Builder brands: Setting up Google My Business
Google My Business is a program that helps small business owners and solopreneurs get found online by Google, directing traffic to websites, directions, calls, appointments, reviews, and social media.
Think of it as Google’s version of Yelp, but it gets mixed into all the search results and ads that Google serves up to people looking for goods and services locally.
This is not meant for large big box stores or retail brands (even though they are all listed).
Basically, you tell Google all this information about your business, and they make sure people find it. To enable and use Google My Business, you will need a few things to get started.
Activate Google My Business from within your account
You will need the following to activate Google My Business from within your account:
- A G Suite Business or Gmail account
- A published website
- A domain connected to their website
- A US or Canadian business address
Setting up your Google business listing
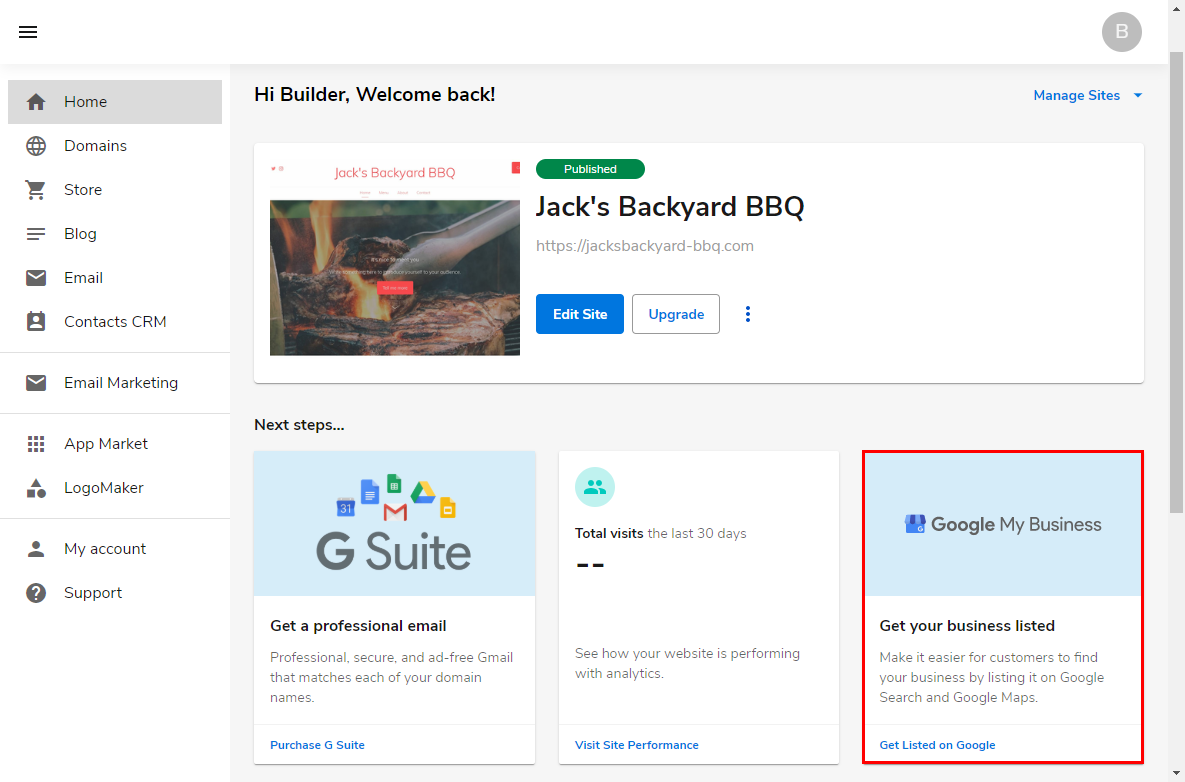
Once you have these requirements, you will be able to begin setting up your Google My Business from your account Home.
- To begin, locate the Google My Business card at the bottom of the screen and click Get your business listed.
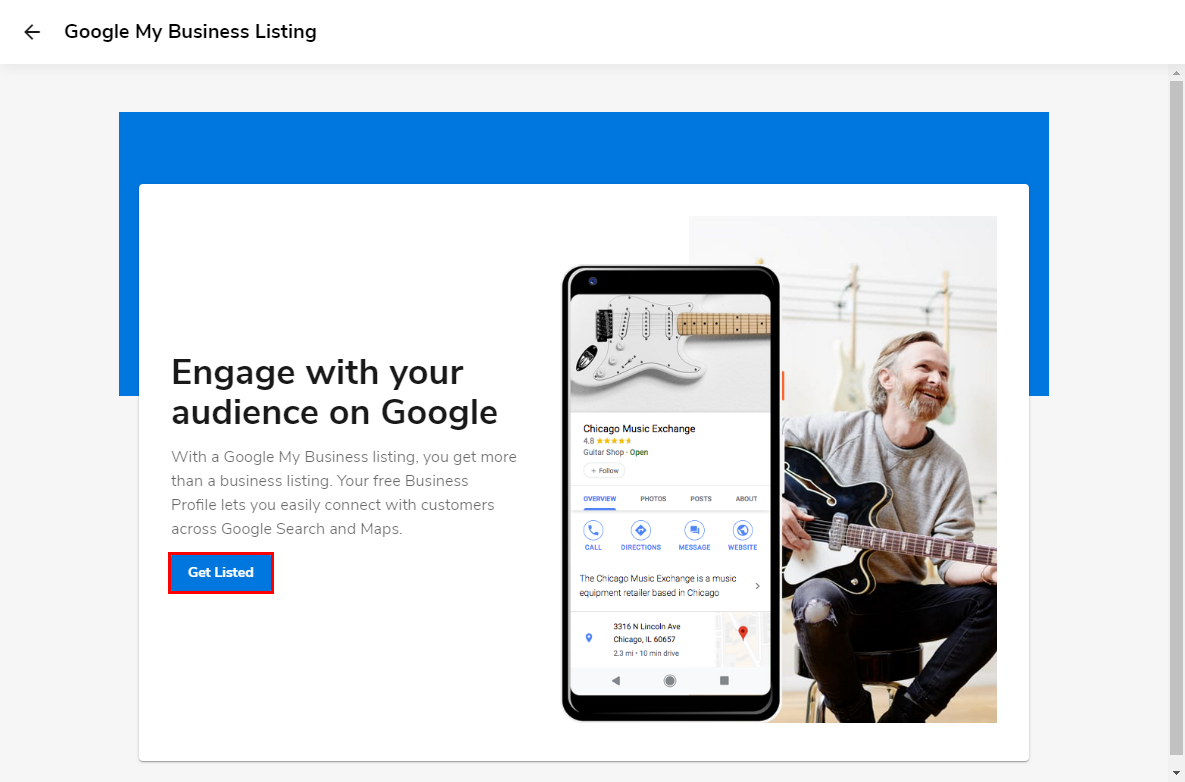
- The next page to load will give you a brief overview of Google My Business, where you will want to click Get Listed to proceed with set up.
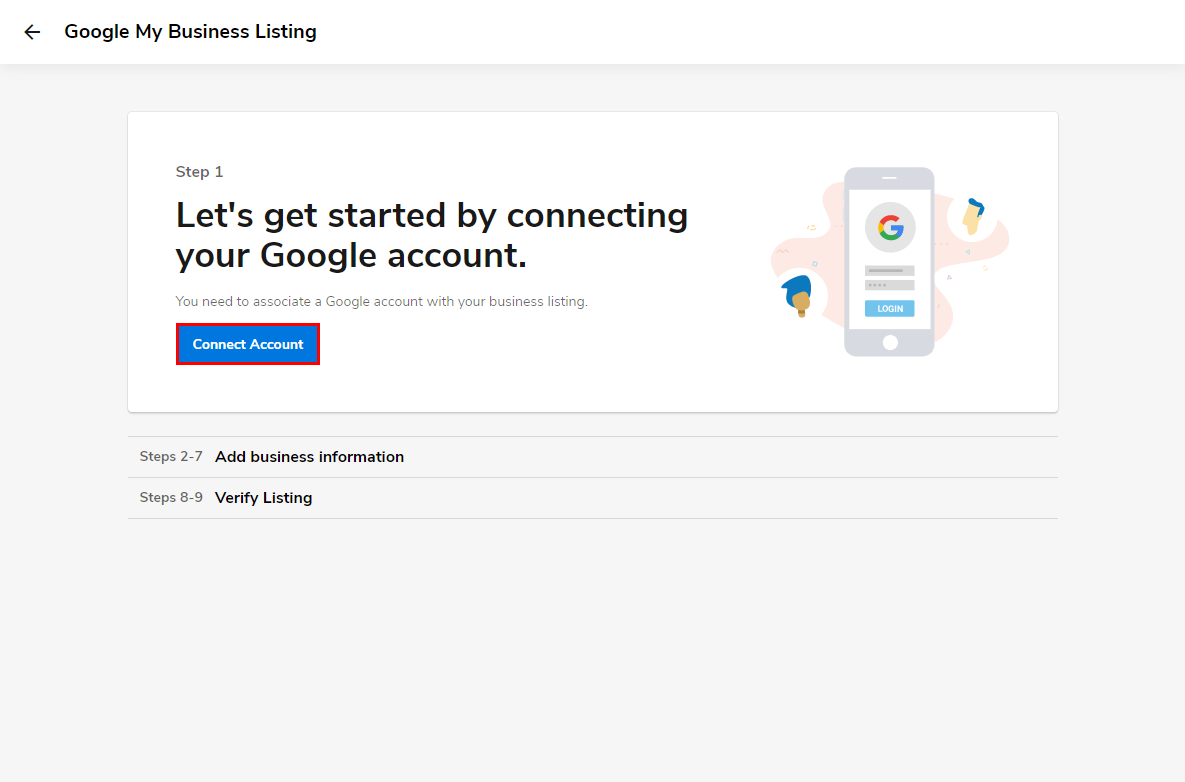
- Next, follow the prompt to connect your G Suite or Gmail email account and choose Connect Account.
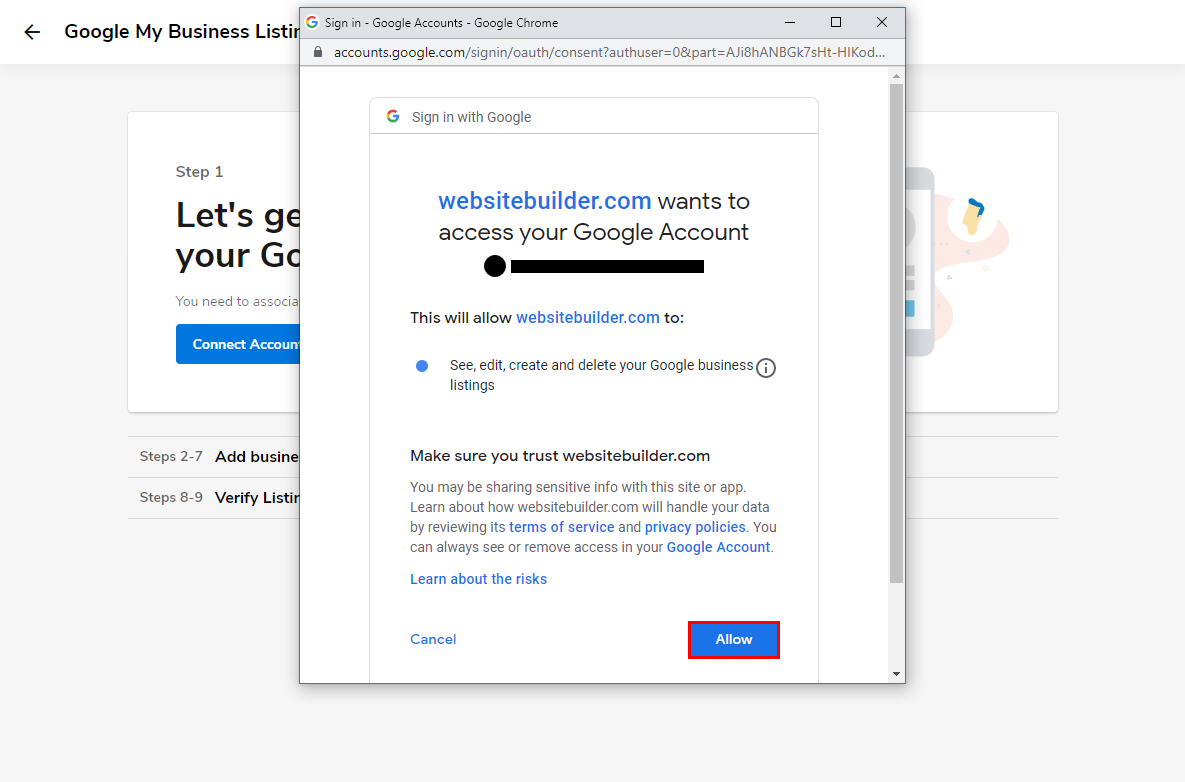
- You will then be prompted to log in or choose which email you would like associated with as the business manager. You will need to Agree and Allow access to link your email to the Google business listing service.
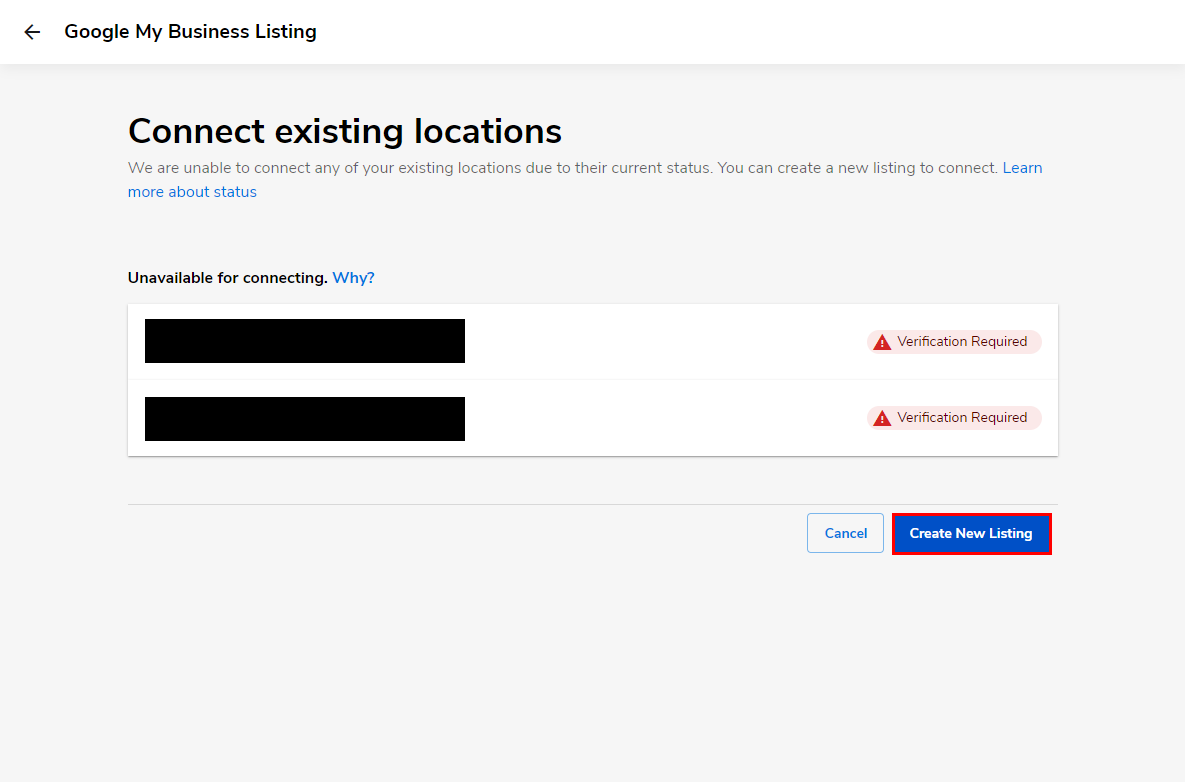
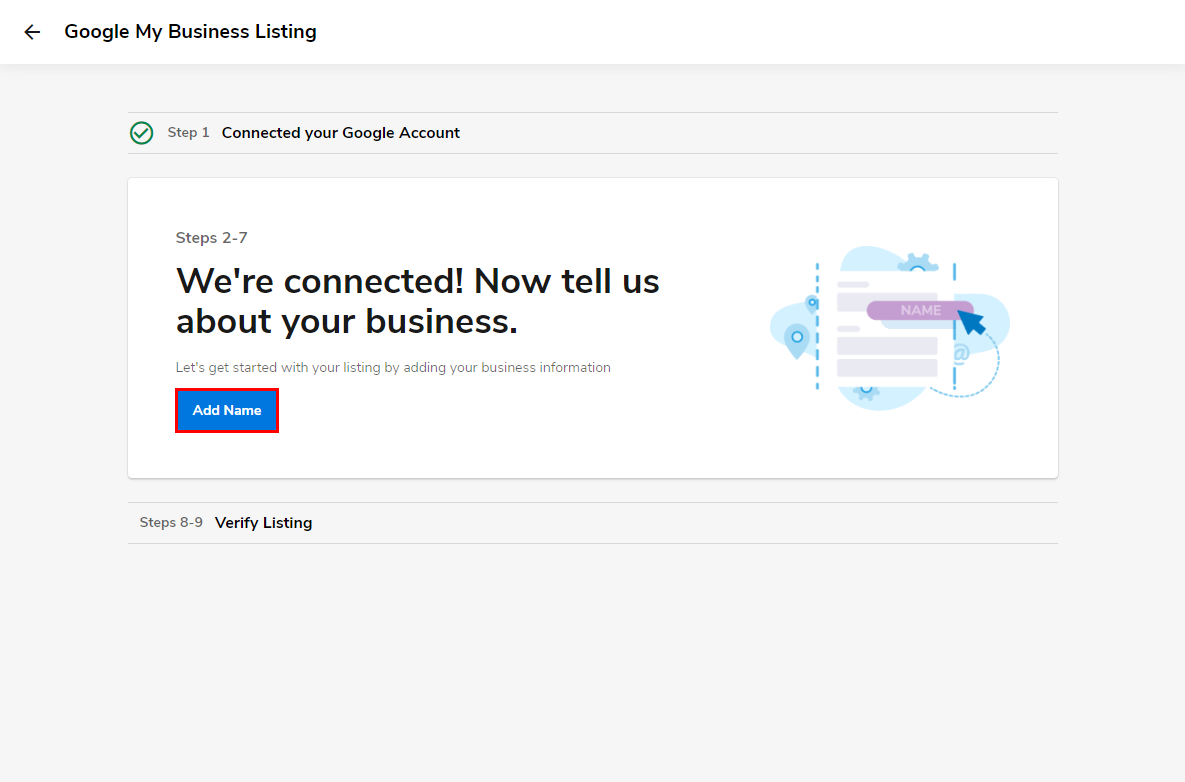
- On the following screen, you will be prompted to connect to an existing location that has been previously created with your email or to Create New Listing.
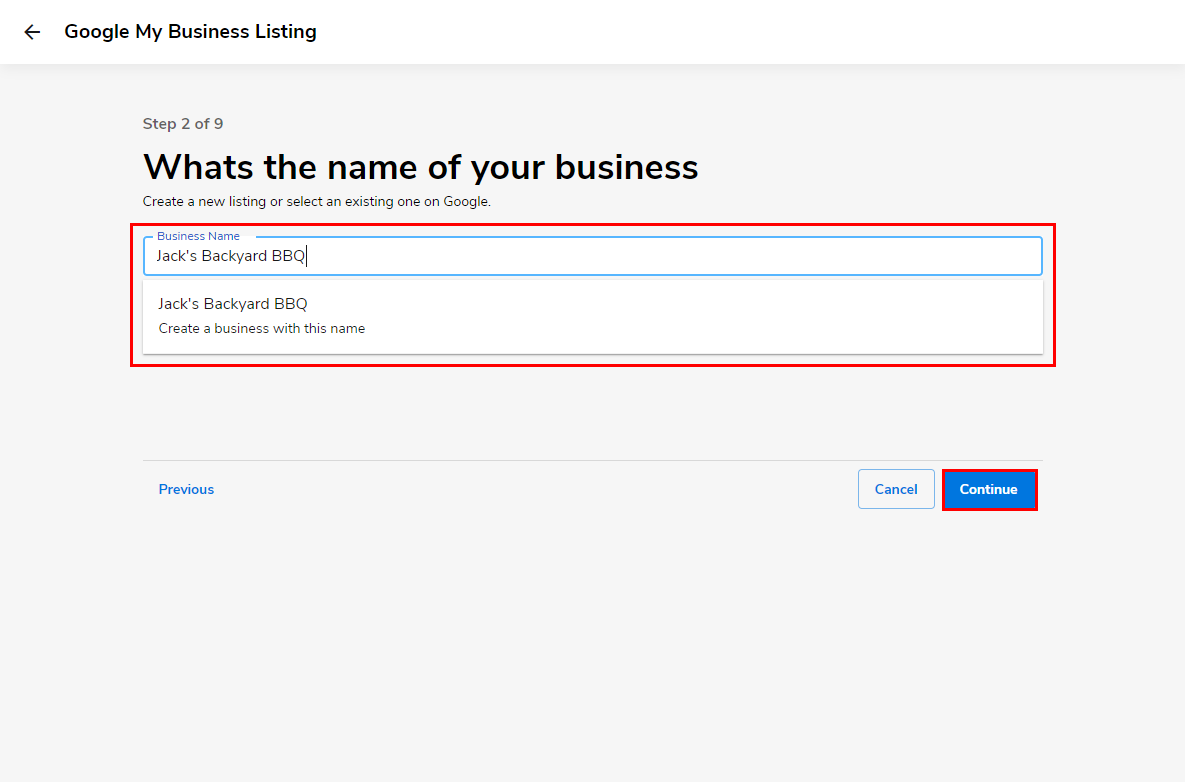
- Once you’ve chosen to create a new listing, you will begin by filling out your business’s name when clicking Add Name.
- Fill out your business name, then choose Continue.
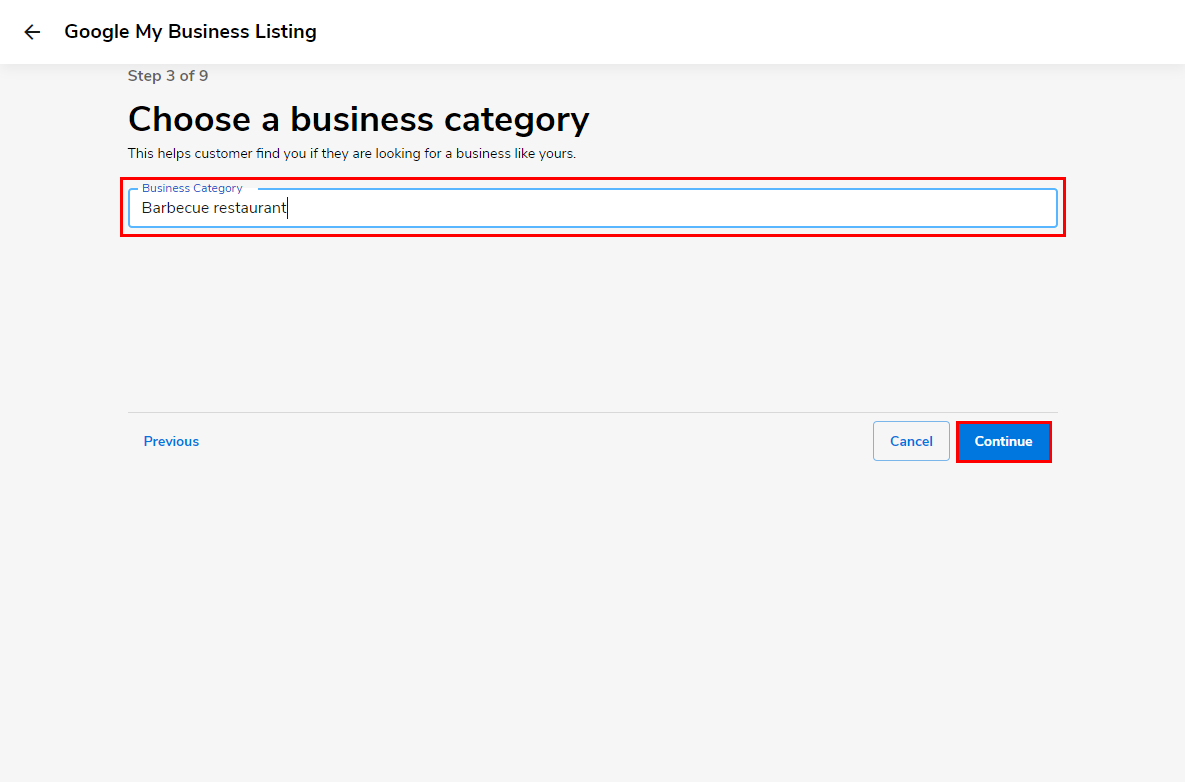
- Next, enter the category your business operates in and click Continue.
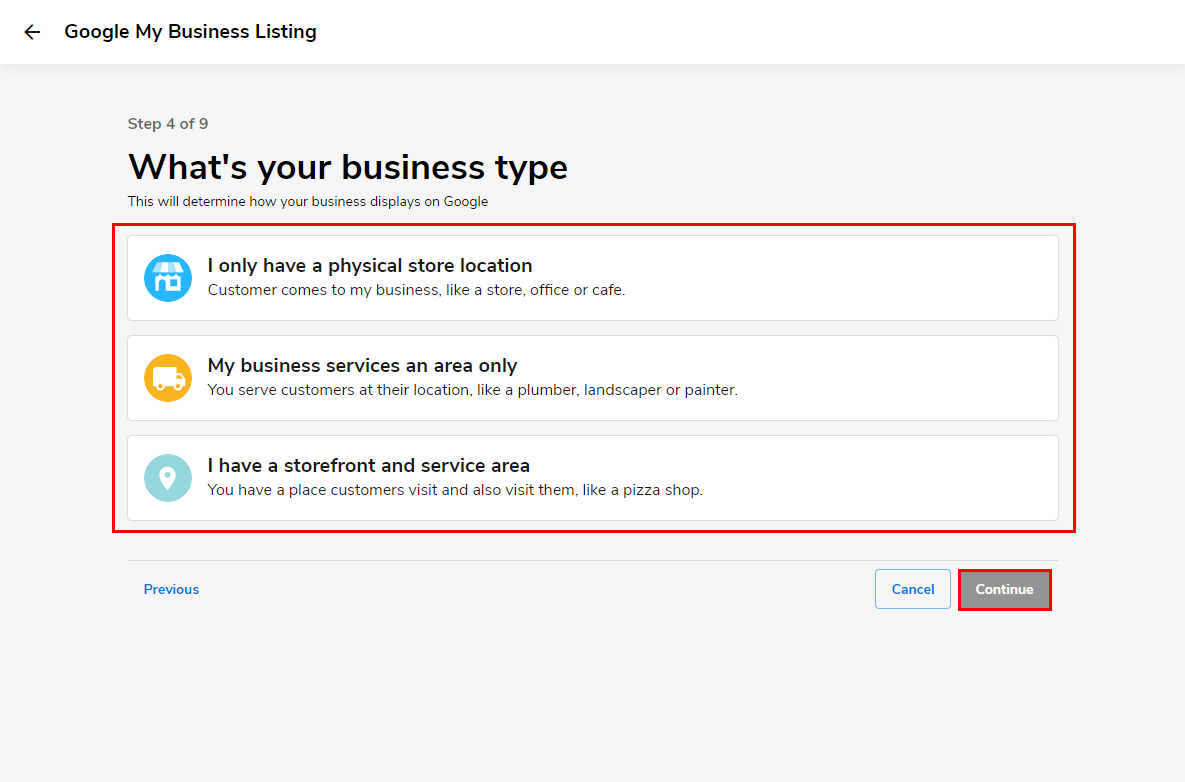
- On the next page, you will want to select the type of business location you operate out of. Do you have a store for people to visit, do you service a specific area, or do you have both? You will want to select the type that best reflects your business.
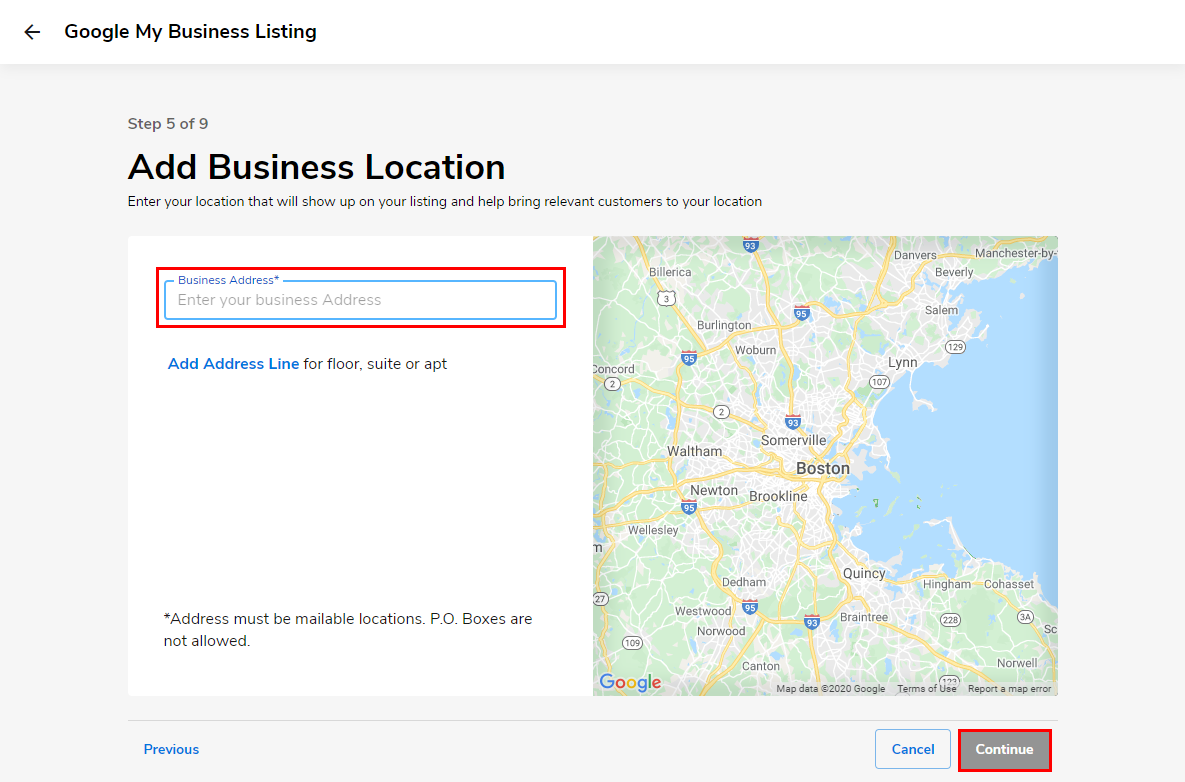
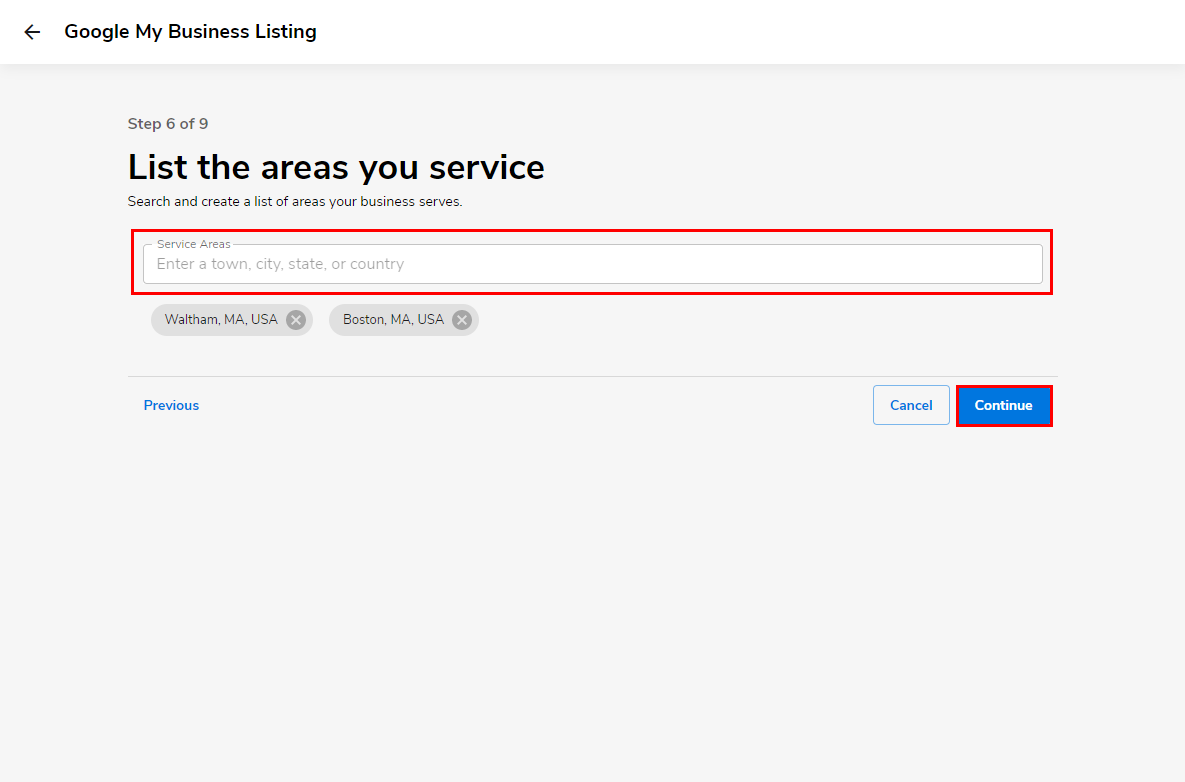
- Next, enter your business’s address and/or the Location(s) of your service.
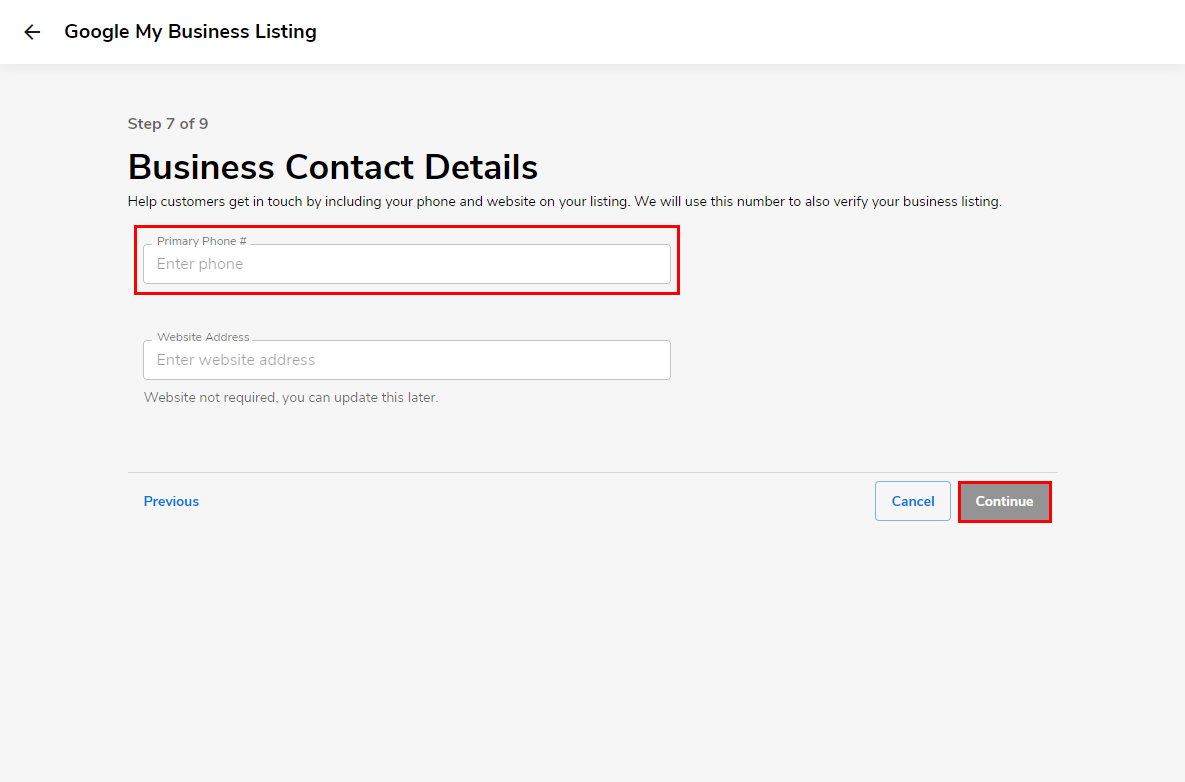
- Finally, enter the business’s Phone Number with no dashes or spaces and the Website (not required).
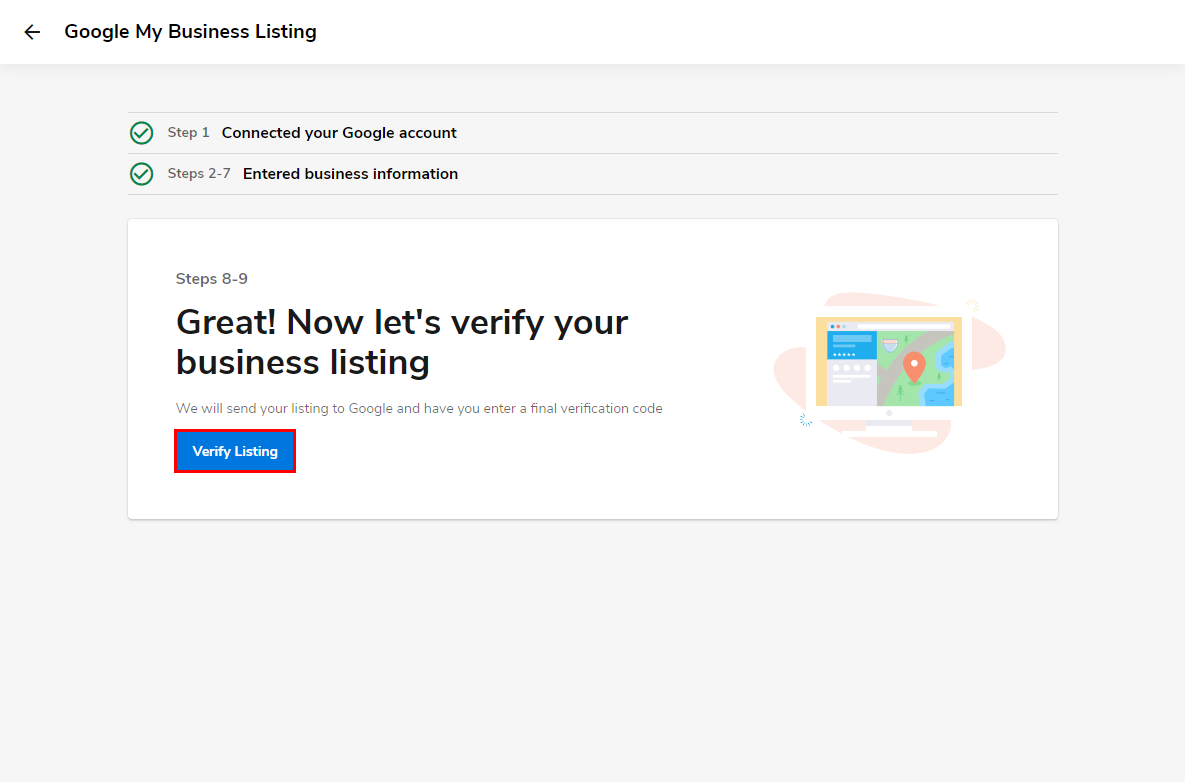
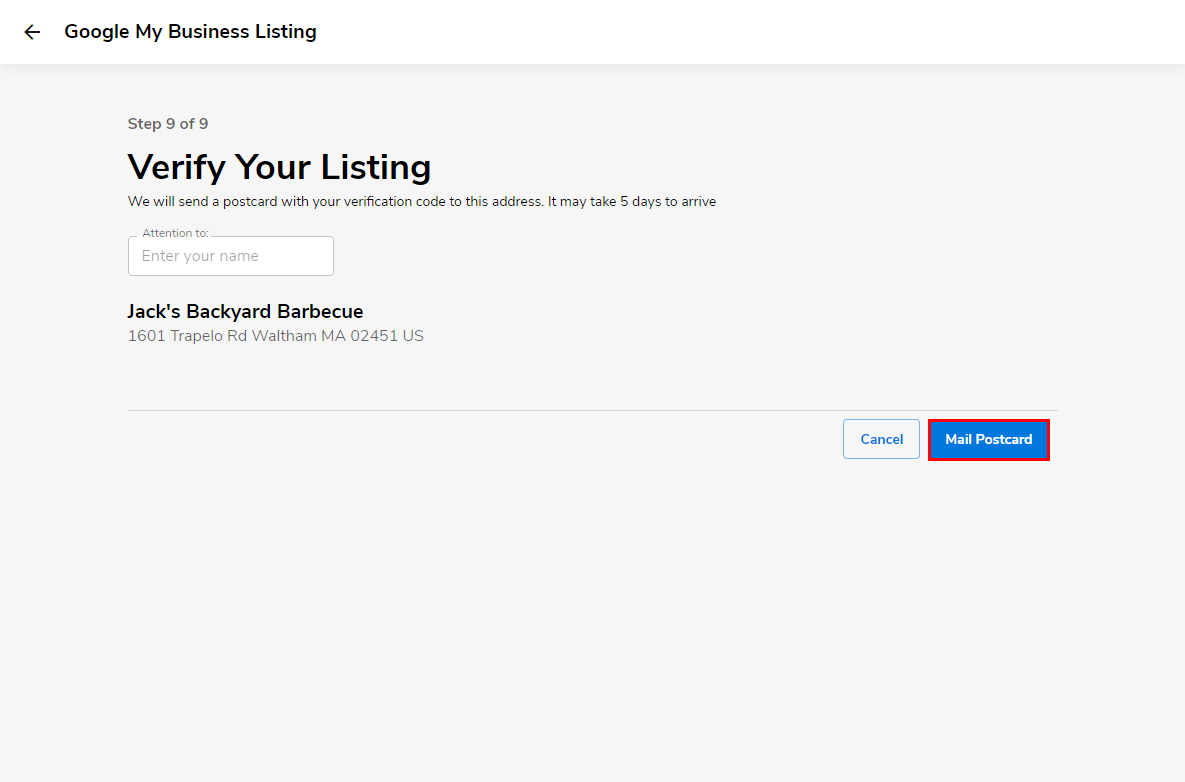
Once your business information is submitted, you will then be taken through Google’s business verification system and process. They will prompt you to verify with a text code, phone call, email, or postcard mail. For more information about verification, you can refer to Google’s help article here.
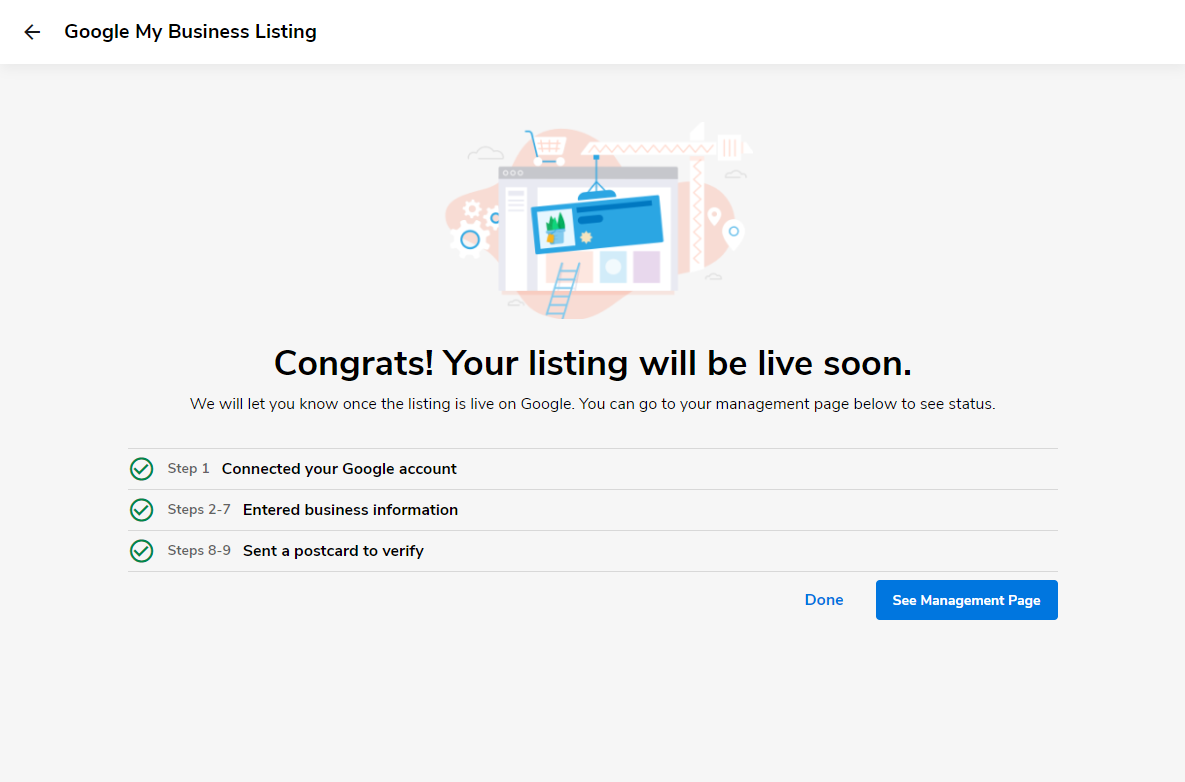
Congrats! You have now completed the setup process, and you will now be able to start managing posts and interacting with your customers!