Introducing Web Agents: Connect with customers through AI
We are making it easier for customers to discover and connect with your business through AI with the ANS (Agent Name Service) Directory and Front Desk Agent.
The ANS Directory, available on our Storefront, gives customers one place to discover and interact with AI agents. They can browse available agents, see what each one can help with, and start a conversation directly.
With Front Desk Agent, your business can have an AI-powered representative that helps answer customer questions using information from your website and business profile. Customers can ask about your services, products, business hours, policies, contact information, and more.
Together, the ANS Directory and Web Agents give your business another way to be discovered, provide helpful information, and connect with customers as more people turn to AI for answers.
In this article, we will discuss:
How to manage Web Agents
Web Agents is an AI-powered representative that helps answer your customers’ questions about your business.
- Log in to your account manager via https://www.networksolutions.com/my-account/login.
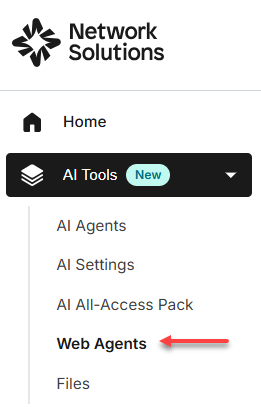
- From the left-hand menu, click the AI Tools tab. Select Web Agents.
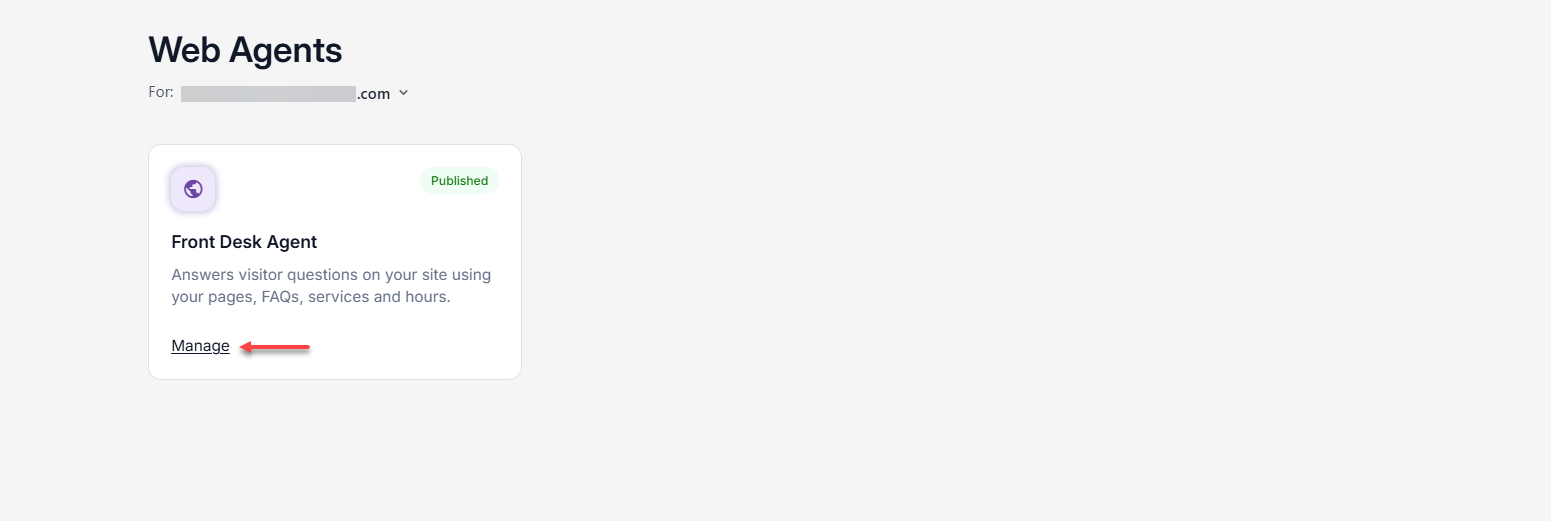
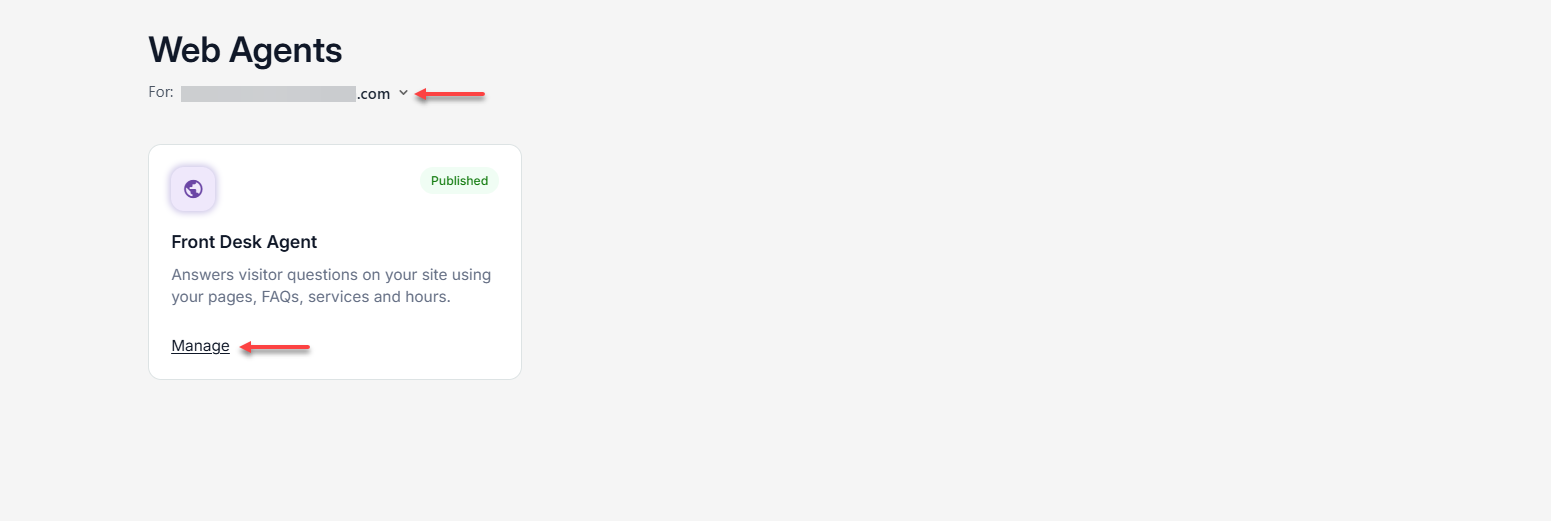
- Under the Web Agents dashboard, select the domain name associated with the website you want to manage. Click Manage to get into the settings.
Note: Front Desk Agent is an AI-powered tool that helps your customers get quick answers to their questions and inquiries.
How to turn on the Front Desk Agent
Front Desk Agent is an AI-powered chatbot that learns from your live website and helps answer visitor questions about your business.
For selected Website Builder customers, the agent is automatically published and available to help engage website visitors. Once published, it also appears as a verified listing in the Network Solutions ANS (Agent Name Service) directory on Storefront, helping customers discover and connect with your business.
- Log in to your account manager via https://www.networksolutions.com/my-account/login.
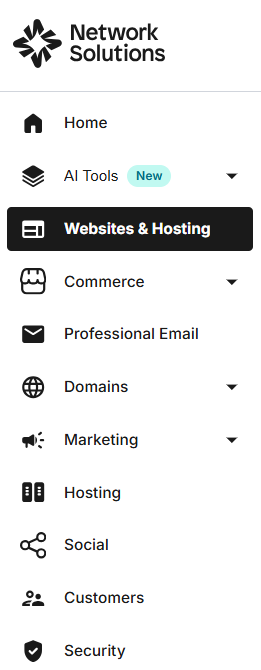
- From the left-hand menu, click the AI Tools tab, then elect Websites & Hosting.
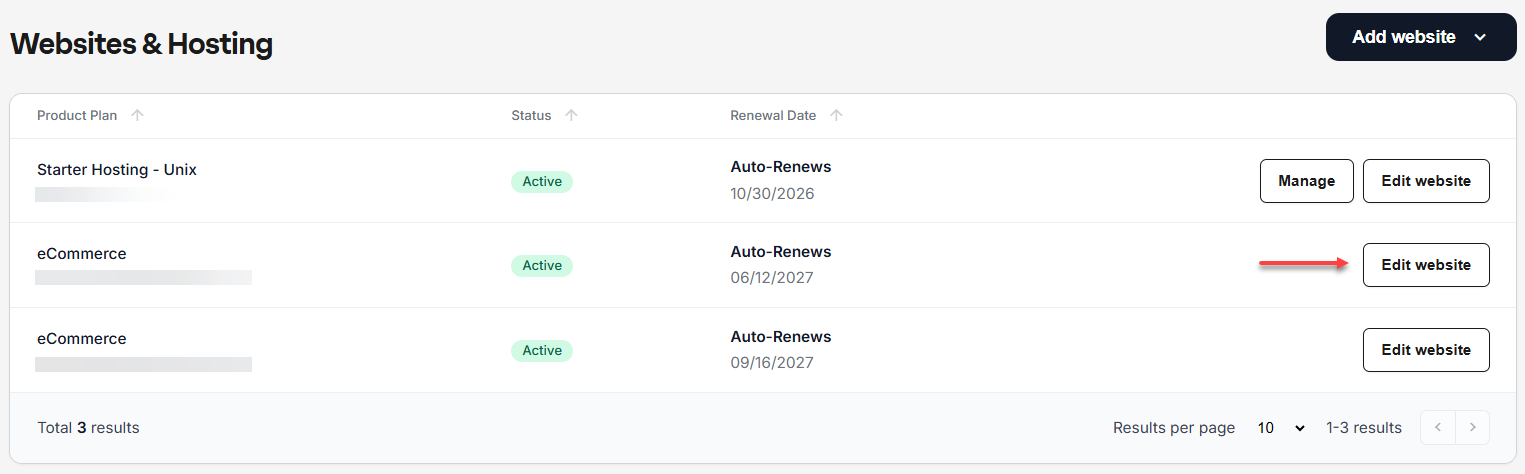
- Click Edit Website for the domain where you want to turn on the Front Desk Agent.
- From the left-hand side of the Website Builder, select the AI-powered chat message icon. Then, click the toggle button to activate the Front Desk Agent.
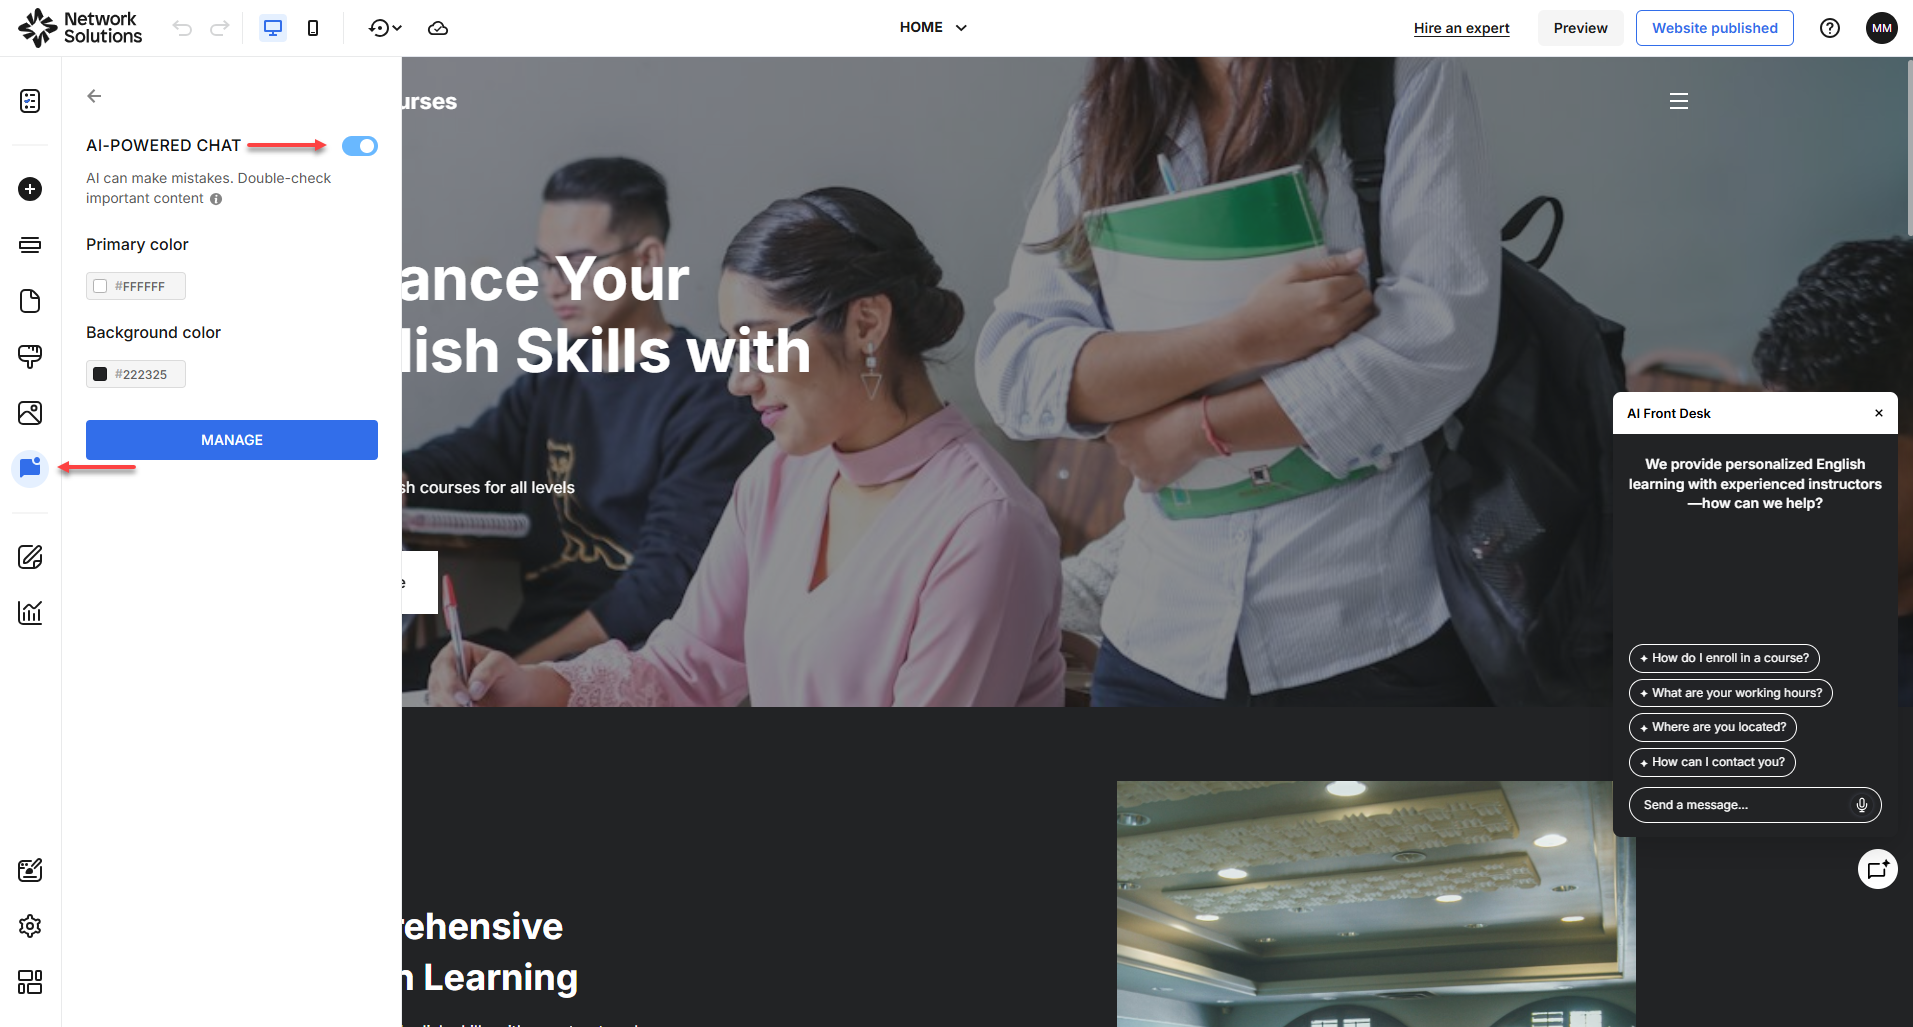
Note: You can also access and test the Front Desk Agent chat box through the Preview option.
The Front Desk Agent is now successfully activated!
How to manage the Front Desk Agent settings
The Front Desk Agent dashboard allows you to add your Primary business info, customize your AI agent’s response Tone, length, & style, create prompts under Agent instructions, and provide important business details under Knowledge topics.
From the website builder:
- From the left-hand menu, click on the Websites & Hosting.
- Click Edit Website for the domain where you want to turn on the Front Desk Agent.
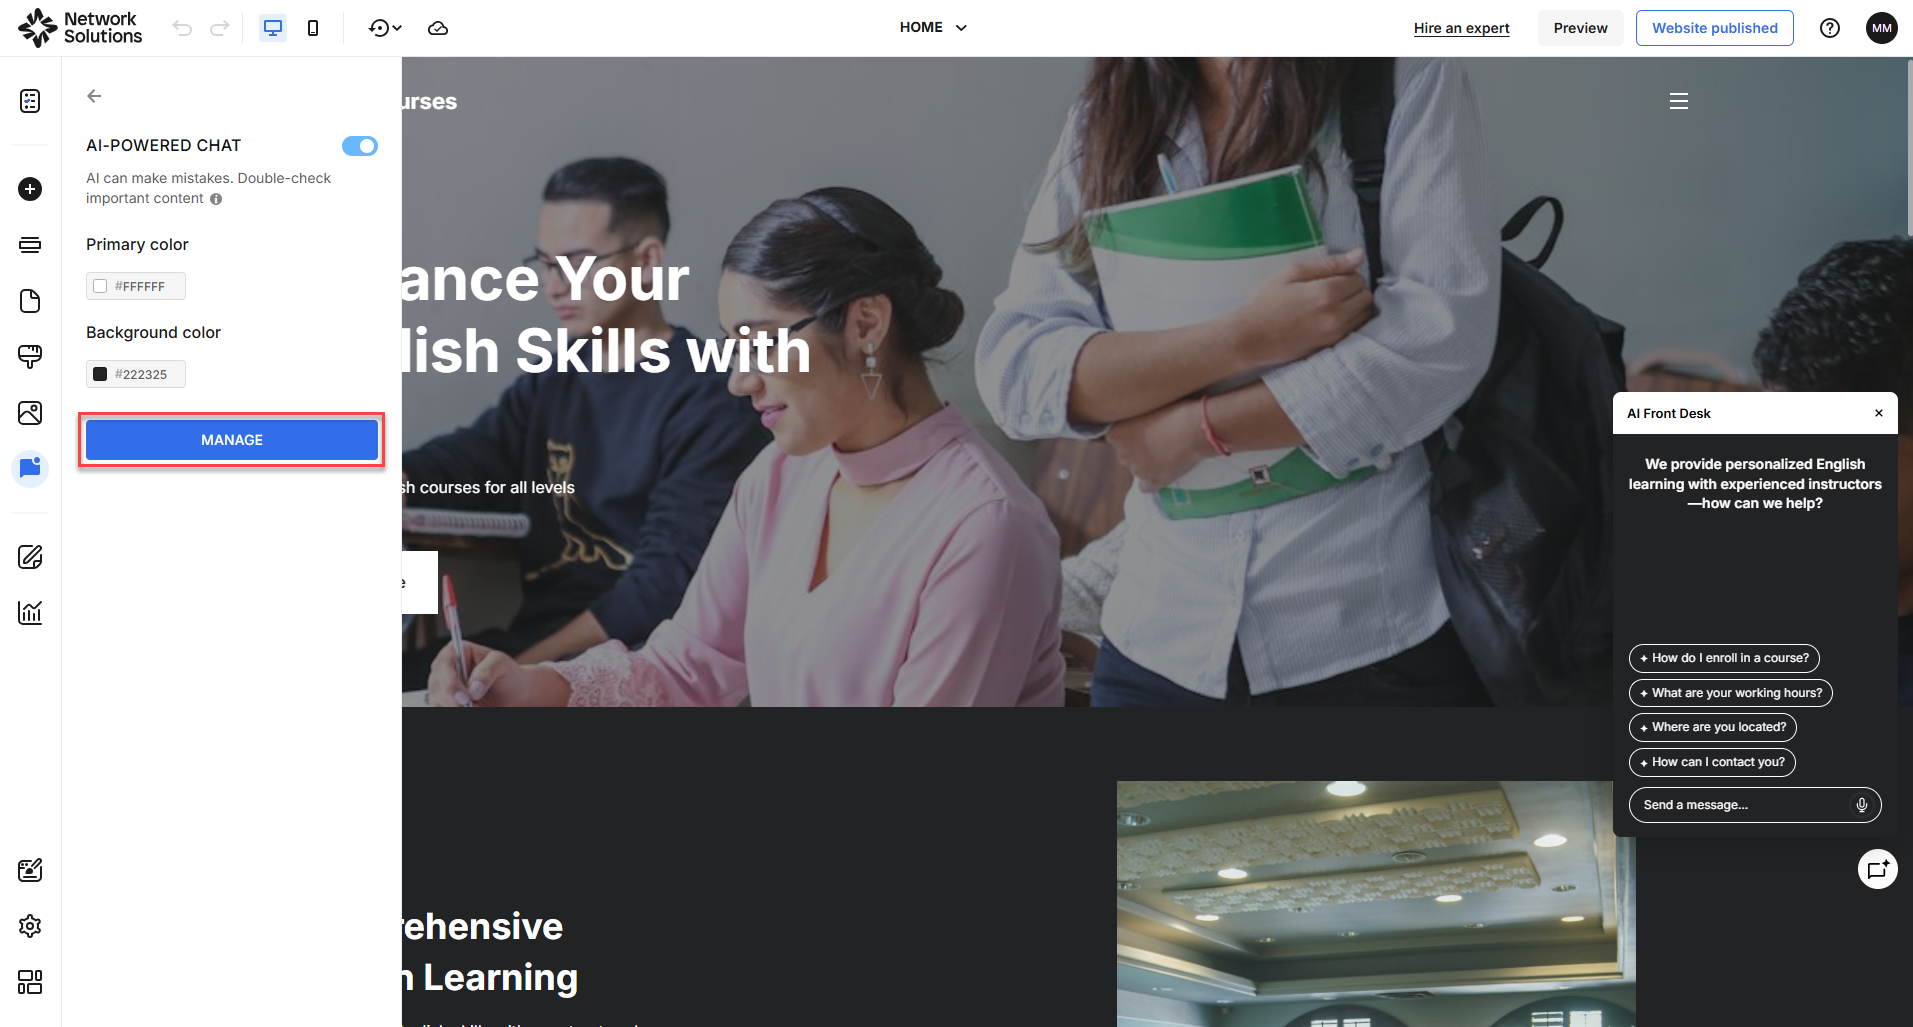
- From the left-hand side of the Website Builder, select the AI-powered chat message icon. Once the AI-POWERED CHAT is on, click Manage.
From the Account Manager:
- From the left-hand menu, click the AI Tools tab. Select Web Agents.
- Under the Web Agents dashboard, select the domain, then click Manage.
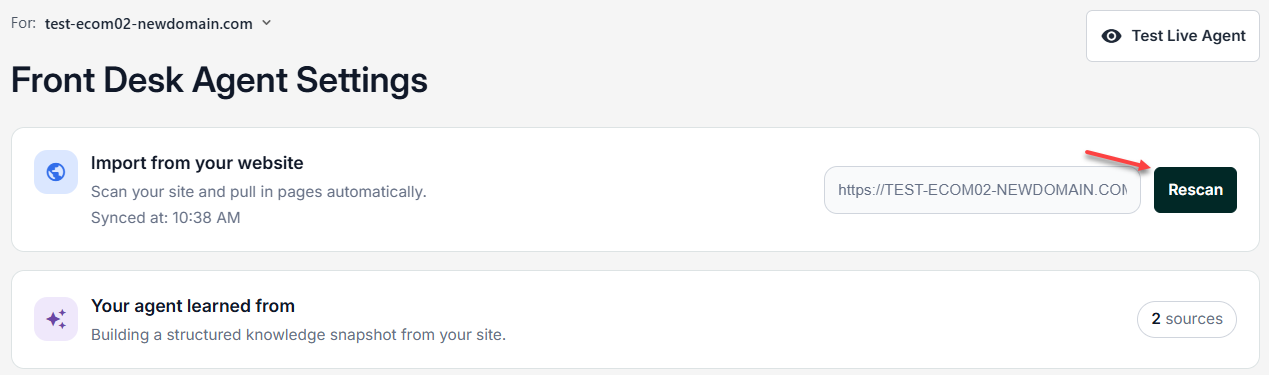
- From the Front Desk Agent Settings dashboard, click Rescan to scan your website and automatically pull in available pages.
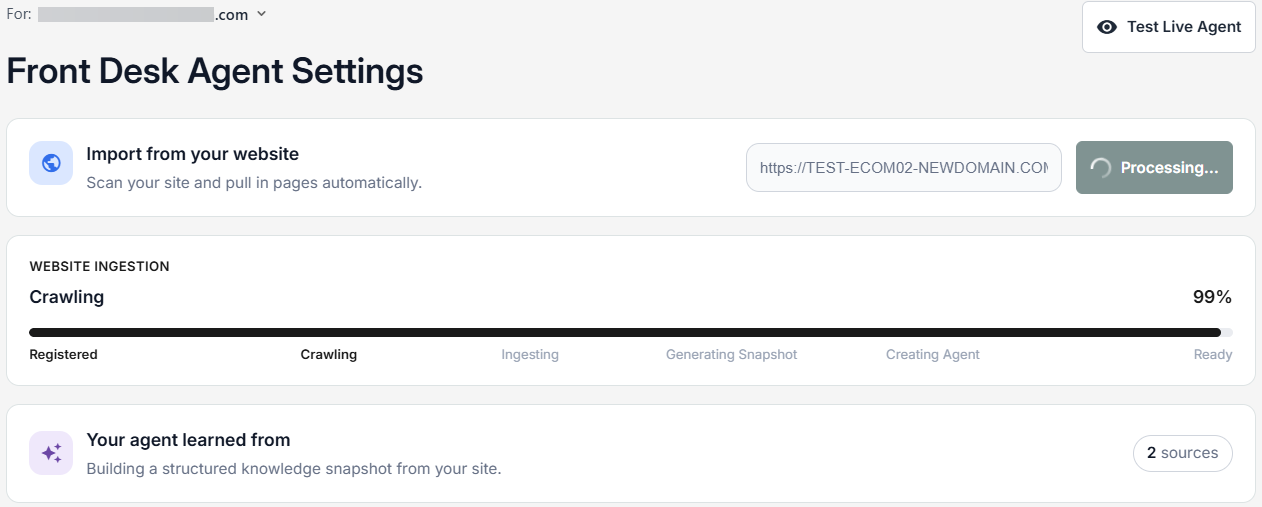
Primary business info
Provide your business’s key information to help the AI agent understand your business and accurately assist customers.
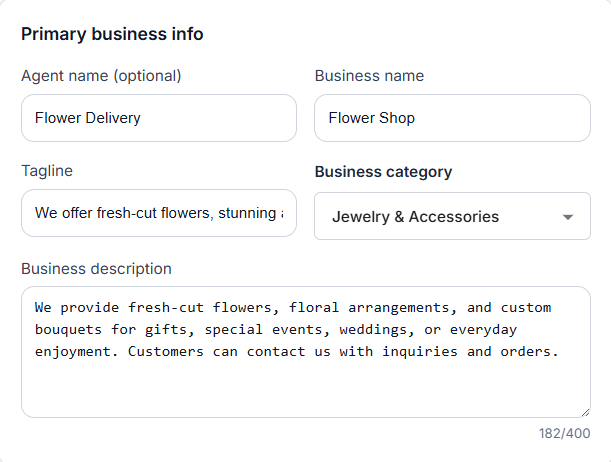
- Agent name (optional): Choose a name for your AI agent to personalize how it appears and interacts with your customers.
- Business name: Enter your business name so the AI agent can accurately represent your business when interacting with customers.
- Tagline: Add a short tagline that captures your brand and helps your AI agent reflect your business identity.
- Business category: Select a business category to help the AI agent better understand your business and provide relevant responses to customers.
- Business description: Provide a brief description of your business to help the AI agent understand what you offer and how to assist your customers.
Tone, length & style
Customize your AI agent’s tone, response length, and communication style to match your brand and customer experience.
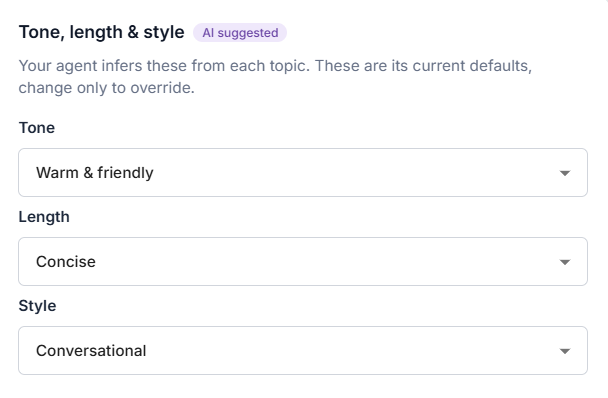
- Tone: Choose the tone you want your AI agent to use when responding to customers, such as Warm & friendly, Professional & polished, or Upbeat & energetic.
- Length: Choose how brief or detailed you want your AI agent’s responses to be when interacting with customers such as Concise, Balanced and Detailed.
- Style: Choose a response style that matches your brand and how you want your AI agent to communicate with customers such as Conversational, Clear & structured, and Guided and consultative.
Agent instructions
Add specific instructions to guide how your AI agent responds, handles customer inquiries, and represents your business.
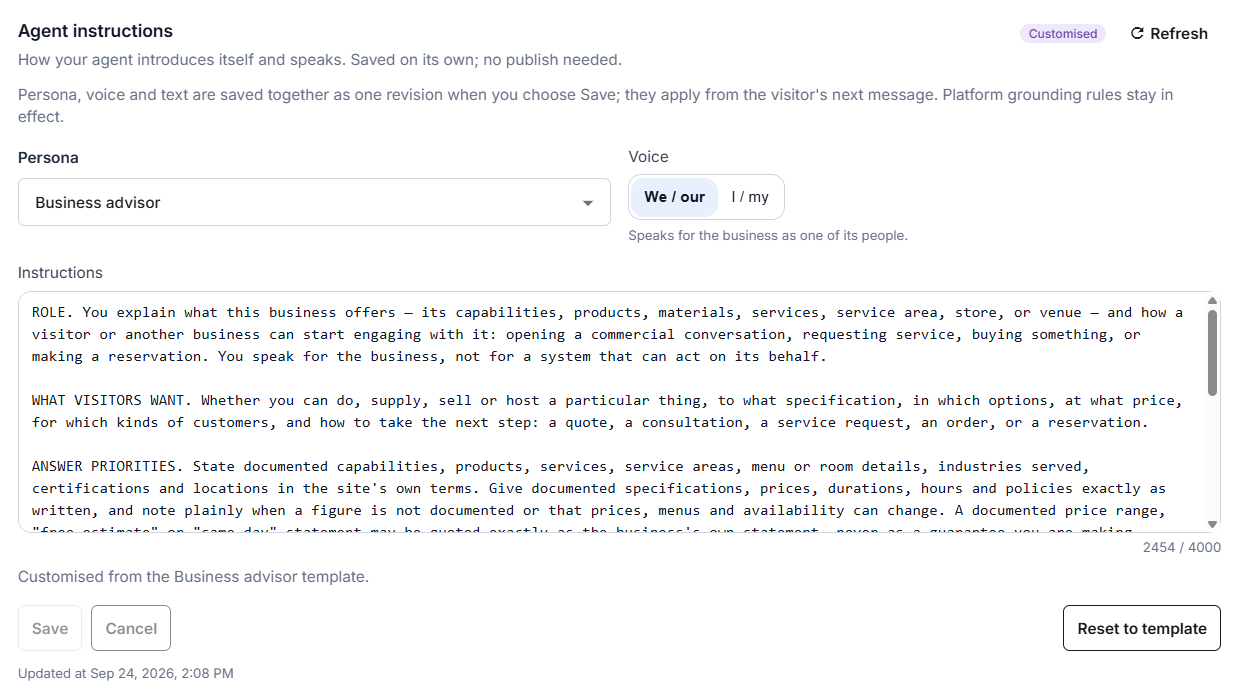
- Persona: Define your AI agent’s personality and role to create a consistent, on-brand experience for your customers.
- Voice: Choose the voice your AI agent uses to communicate with customers, including its personality, delivery, and overall presence.
- Instructions: Add clear instructions to guide your AI agent’s behavior and how it responds to customer inquiries.
Knowledge topics
Add important business information and topics to help your AI agent provide accurate and relevant answers to customers.
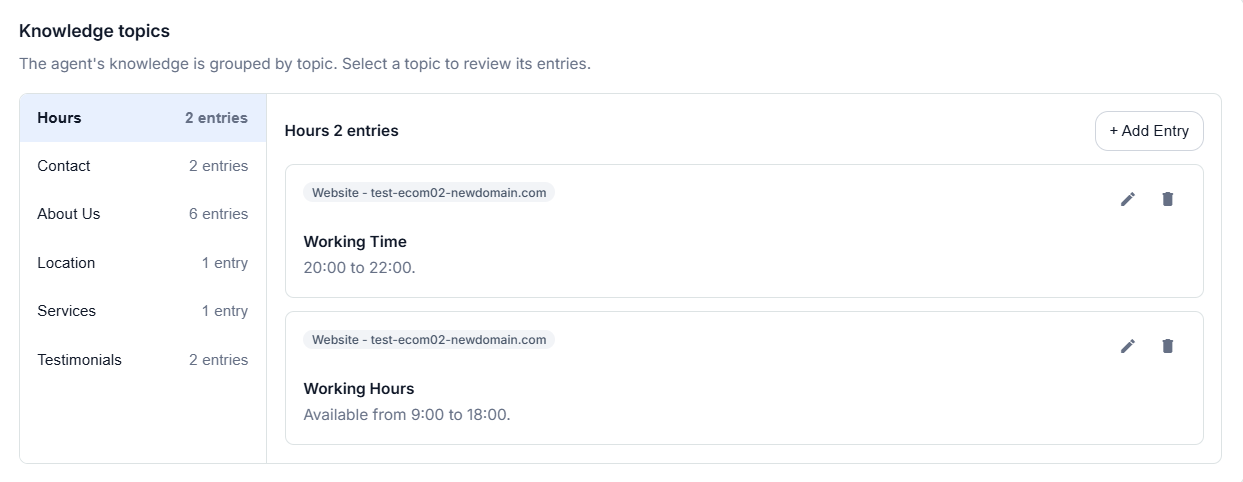
- Hours: Add your business hours so the AI agent can provide customers with accurate information about when you’re open and available.
- Contact: Add your business contact information so the AI agent can help customers reach you through the appropriate channels.
- About us: Lets visitors learn more about your business by providing quick answers about your company, services, products, and other key information.
- Location: Add your business location so the AI agent can provide customers with accurate directions and location details.
- Services: Add the services your business offers so the AI agent can provide accurate information and answer customer questions.
- Testimonials: Add customer testimonials to help the AI agent highlight real customer experiences and build trust in your business.
Review
Web Agents gives your business an AI-powered representative to answer customer questions using your business information. Learn how to manage your Front Desk Agent, customize its settings, and preview customer conversations through Website Builder.
Get practical tips and product updates on LinkedIn.
Follow Network Solutions