Knowledge Base
Categories: iPage Legacy
iPage: How to install Magento
This article explains how you can manually install Magento through the cPanel.
Download the Magento Files
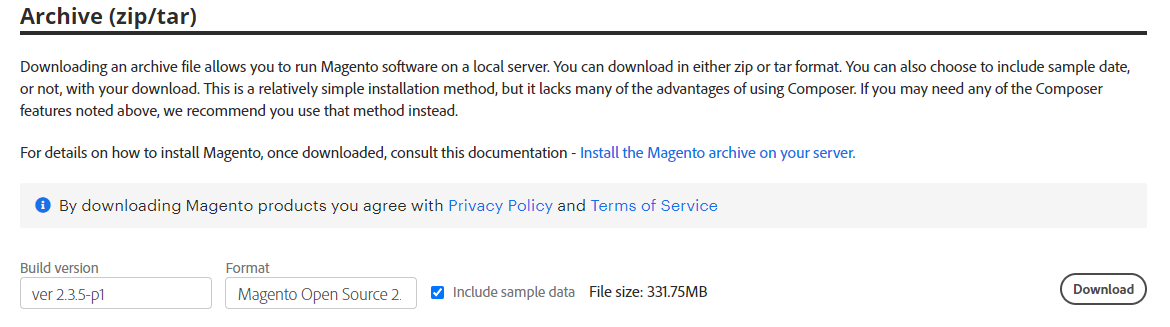
- Download the latest version of the software at the official website of Magento.
Upload the Installation Files
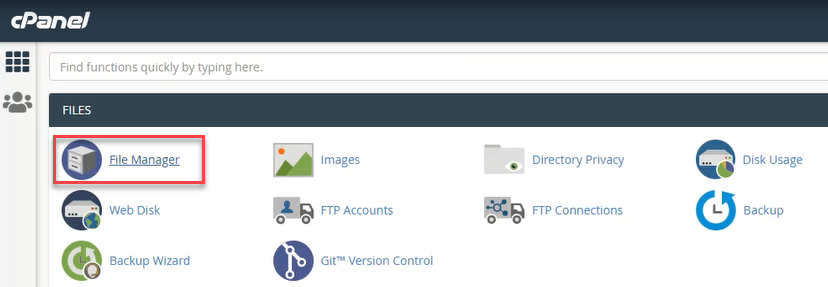
- Inside the cPanel account, go to your File Manager to upload the Magento installation package.
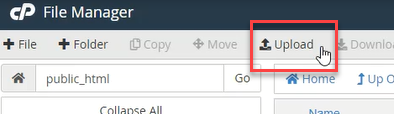
- Choose a folder where you want to upload your files. In this example, files were uploaded in public_html. Once you have decided or created a folder, click Upload.
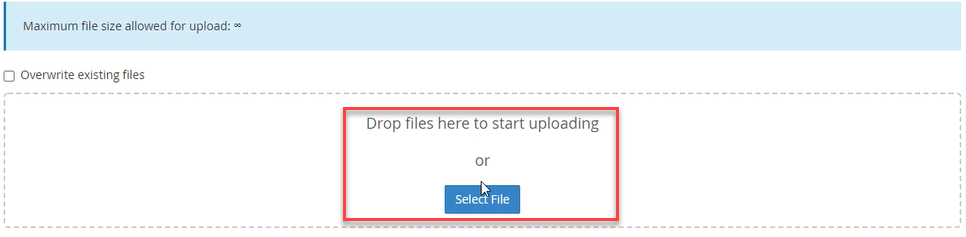
- You can drag and drop the zip file you just downloaded from the Magento official website or click Select File on the upload screen.
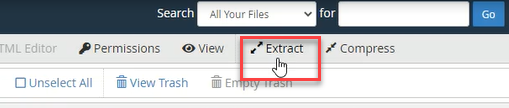
- To extract the uploaded zip files, click the Extract button.
Create a Database
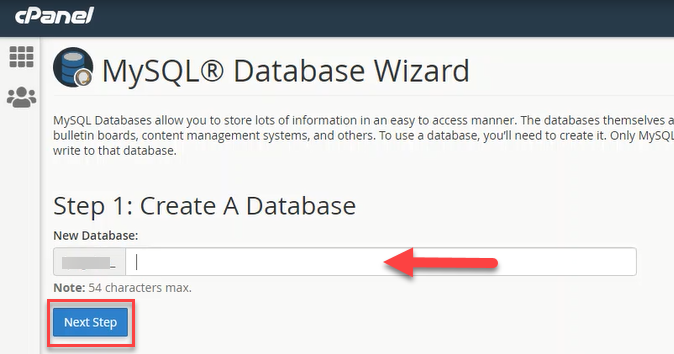
- Create a database and user account for your Magento installation. To do so, click MySQL Database Wizard inside your cPanel.

- Provide a database name, and click Next Step.
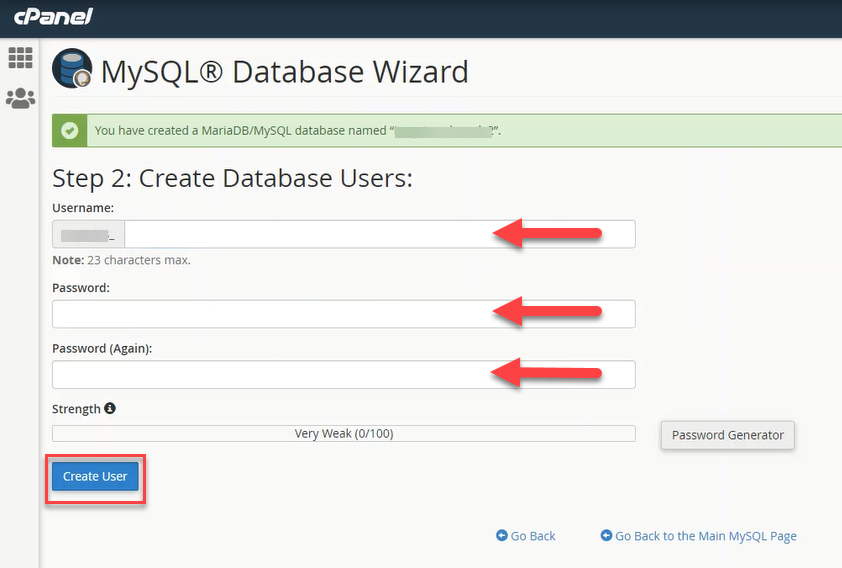
- Create a database username and a password, then click Create User to proceed.
- Ensure that the ALL PRIVILEGES box is checked.
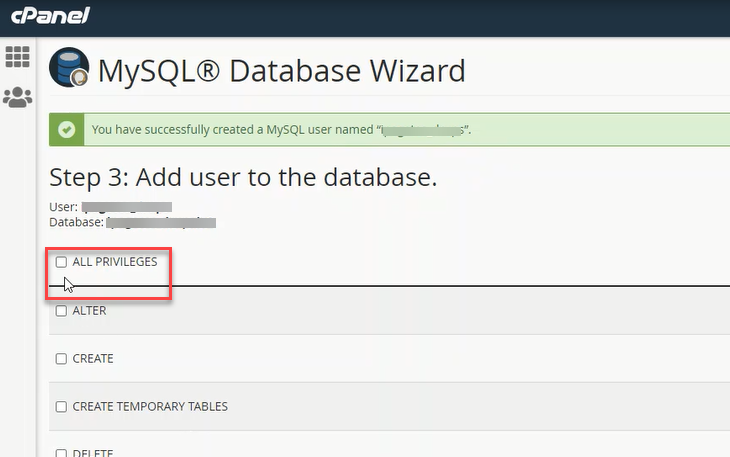
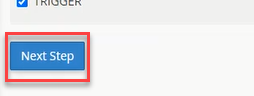
- Click Next Step to finish the task.
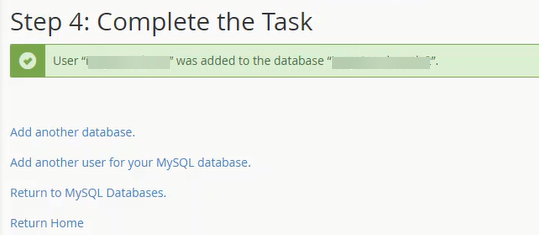
- The new database is now successfully created!
Run the Installation
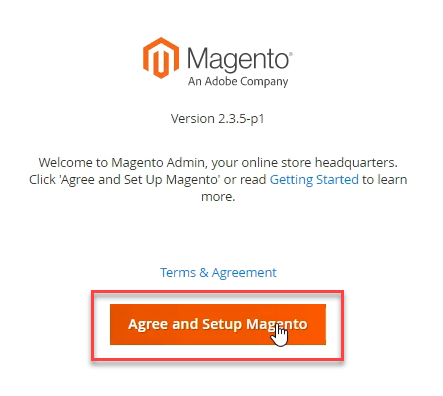
- In your web browser, navigate to the folder where you uploaded the Magento files. In our example, files were uploaded in public_html, so run the installation at https://yourdomainnamehere.com, and you’ll be routed to the first page. Click Agree and Setup Magento button to begin.
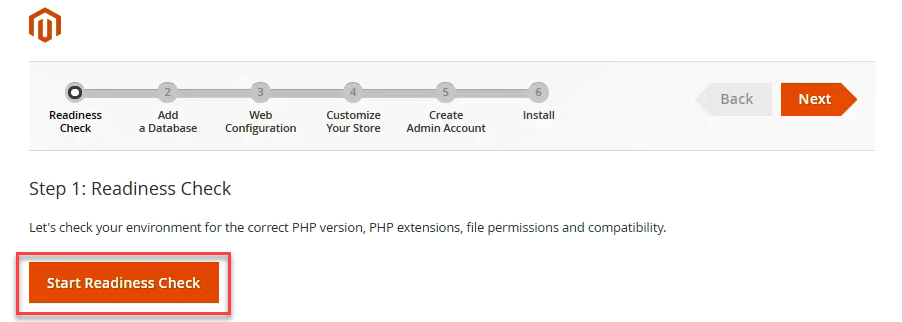
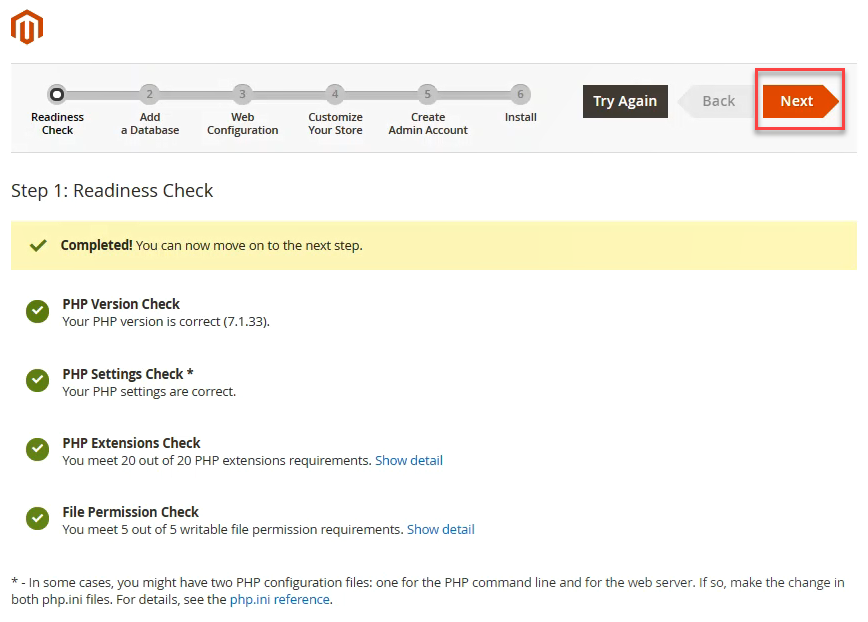
- On the first step, click the Start Readiness Check button to check your hosting settings and see any errors. If all requirements are checked, you may proceed to the next step.
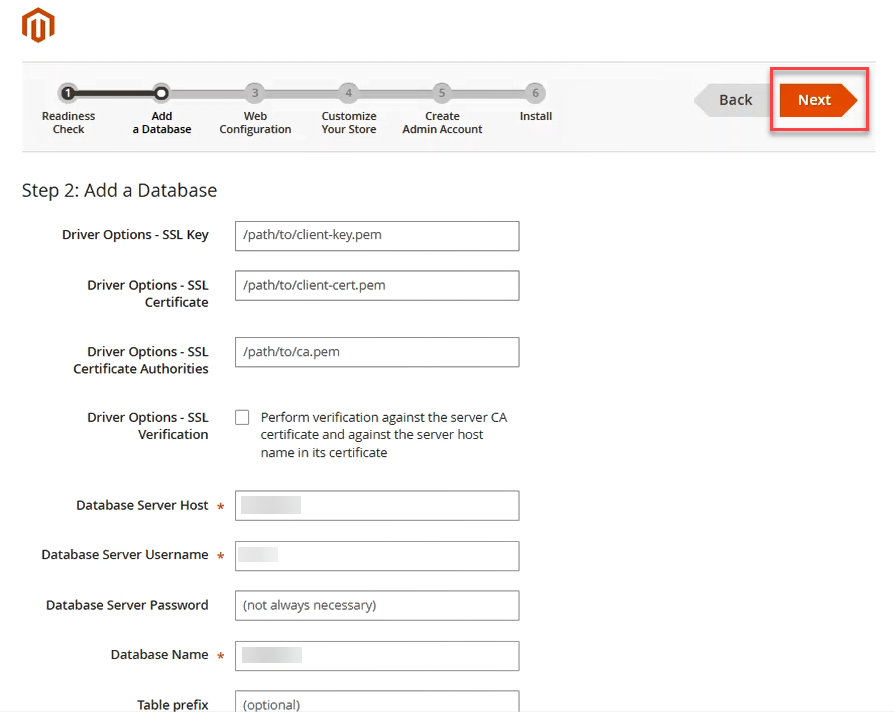
- Under the database configuration, leave the SSL Key, SSL Certificate, SSL Certificate Authorities as default. You may also choose to check or not to check the Driver Options – SSL Verification. Use the MySQL database you have created for Database Name, Username, and Password. Please note that the database server host can be a different value depending on your hosting provider. The table prefix can be left empty since Magento installation will generate a random prefix, then click Next once complete.
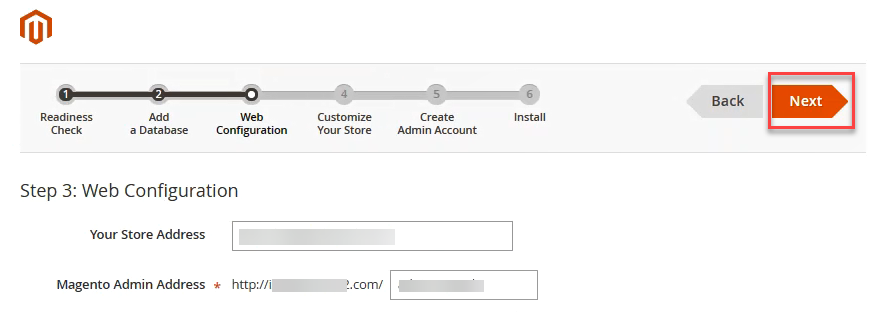
- Enter your store and administrator admin address for the web configuration part, then click Next.
- Customize your store by setting your time zone, currency, and language, then hit Next.

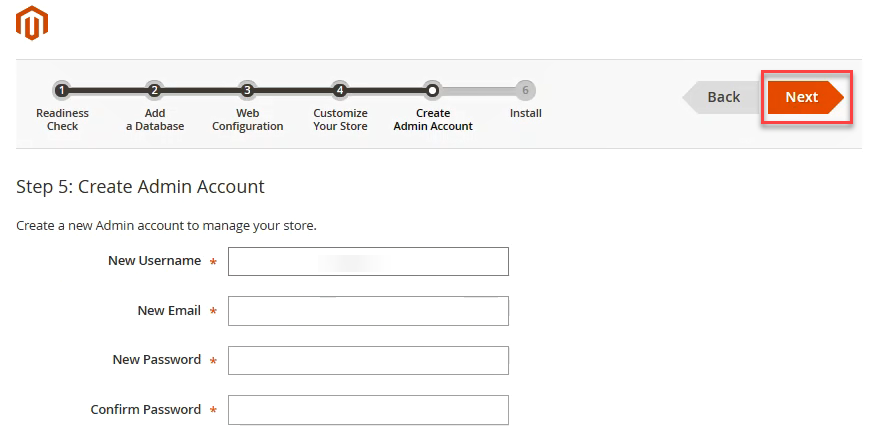
- Here, create your administrator account for your stores, including your username, email address, and password. Make sure that you create a strong password for security reasons, then click Next to proceed to the last step.
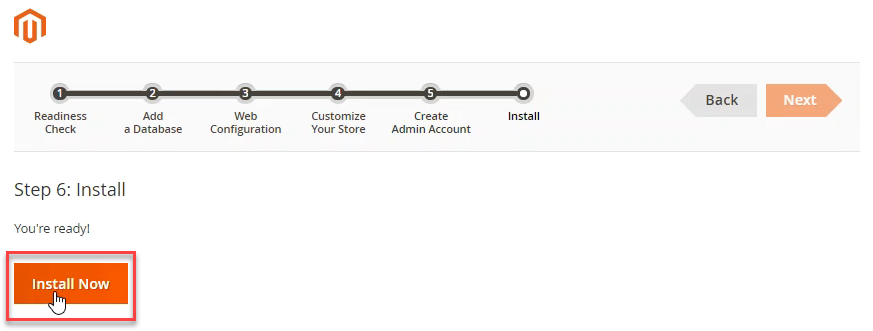
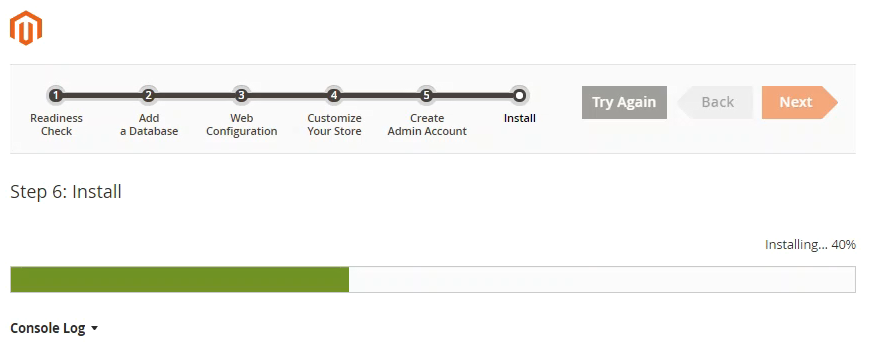
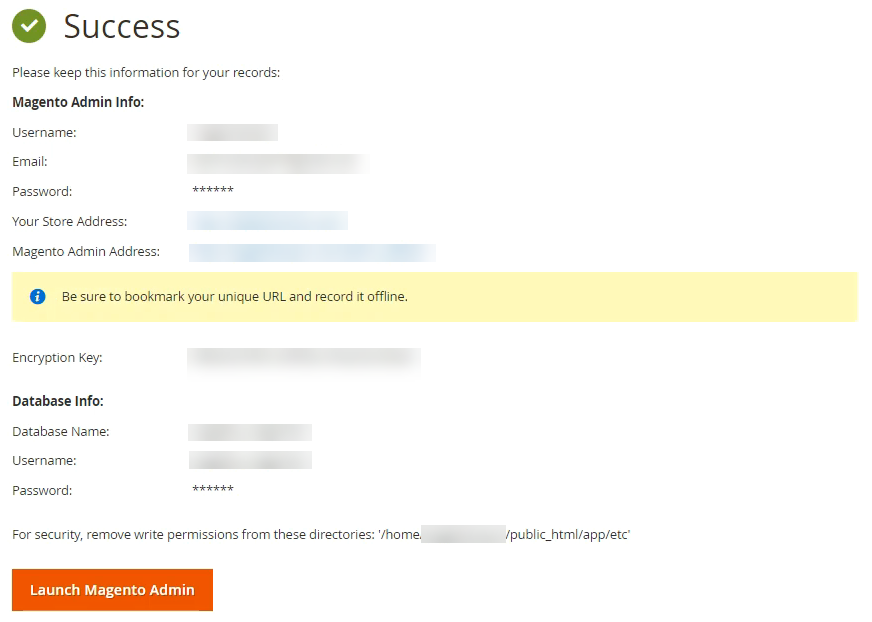
- Lastly, you need to click the Install Now button, to begin with, the installation. Once complete, you will be routed to the next page showing all your installation details!
Get practical tips and product updates on LinkedIn.
Follow Network Solutions
Did you find this article helpful?