iPage: VPS and Dedicated Hosting - How to restore backups
VPS and Dedicated Hosting: How to Restore Backups
This article demonstrates how to restore backups on a VPS or Dedicated server in WHM.
Click on any of the links below to jump to that point in the guide.
Accessing Your WHM
- Log in to your Network Solutions Control Panel.
- Click on the
Server Control Centericon.
- Click on the Regenerate Root Password.
- Navigate to https://
SERVER_IP:2087, whereSERVER_IPis the IP address of your dedicated server. - Log in using 'root' as the userID and the password you received in step 3.
The username for WHM is always "root."

How To Access The Backup Tools
- Once you're logged in to WHM, type "
Backup" into the search box in the top left corner of the control panel. - In the results, click on
Backup Restoration.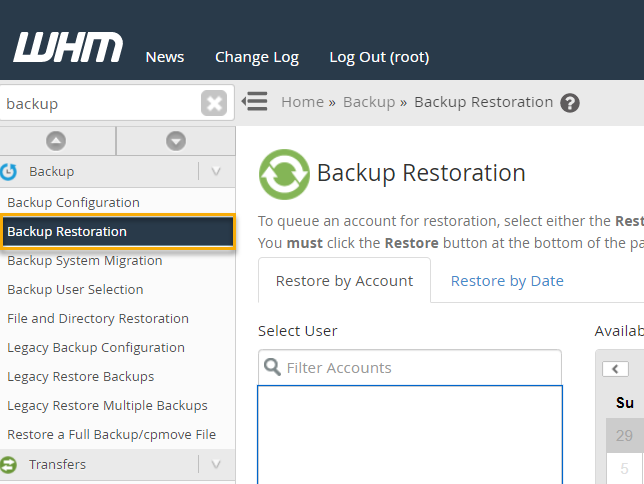
Choose The Backup
- You can either select the
Restore by Accounttab or theRestore by Datetab to queue an account for restoration.- The
Restore by Accounttab allows you to choose an account and see the available backups for it. - The
Restore by Datetab lets you select a date, and you can see which accounts have backups from that point.
- The
- Most of the time,
Restore by Accountwill be the likely choice. When selecting an account, the calendar on the right will display the available backups for it. You can scroll back up for older items. Valid dates will highlight in blue when you hover over them. - In the example below, there is a valid backup for the 'tempeproxy' account from August 30.
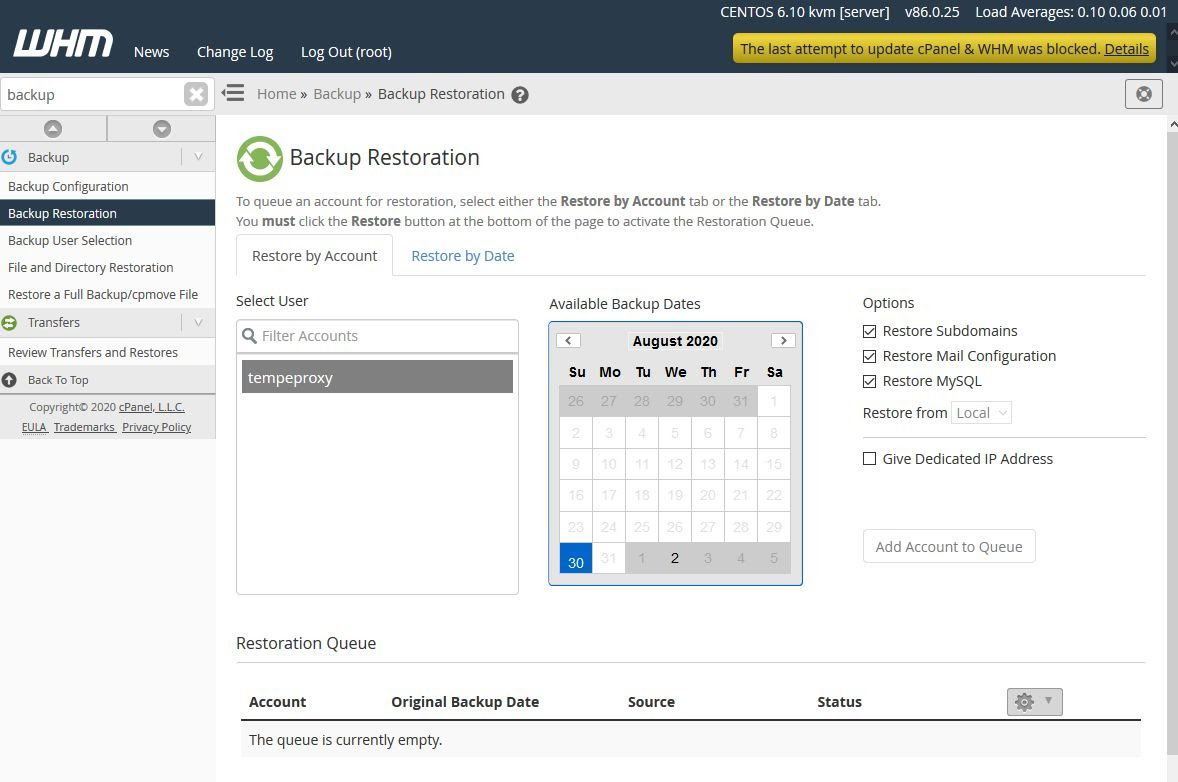
- Once selected, the options on the right will allow you to limit the restore scope if you do not want to restore the entire account (e.g., skip subdomains, mail configuration, and/or MySQL Databases).
- When you choose a backup, the
Add Account to Queuebutton will activate, and you can click it. The selected backup will then appear in theRestoration Queueat the bottom of the screen: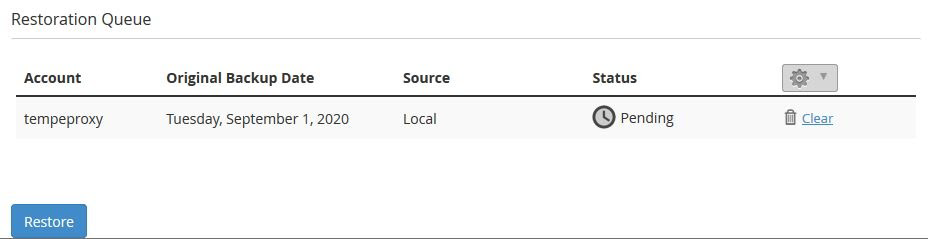
- Repeat the process if you have multiple accounts that you want to restore.
- Once all necessary backups have been added to the queue, click the
Restorebutton.
After you do so, the status will change from Pending to Restoring Account.
Note: This process may take some time, depending on the size of the account. When the backup is finished, the status will update to Completed. You will then have the option to view the restore log or remove the task from the restoration queue.
Lack of Space
The system typically requires about 3x the size of a backup in the available room, for working space, etc. If the backup is 10 GB in size, around 30 GB of room on the drive would be needed for the restore to be completed.
If you donât have enough space, you can either clear other content off the server, make room, or download the backup to your computer. Once there, you can extract the backup and restore the relevant components manually, using FTP, phpMyAdmin, etc.
Get practical tips and product updates on LinkedIn.
Follow Network Solutions