Marketing—Managing a Bing Ad Campaign
As an advertiser and business owner, it is imperative to target a specific audience based on their needs, location, device, and language. Bing Ads provides more granular control to your campaigns and ad groups. It allows business owners to reach the audience and potential customers for their products and services since you can have your campaigns reach internationally.
Bings Ads is your key to a whole new marketing approach!
In this article, we will discuss:
How to Add Bing Ad Campaigns and Ad Groups
Follow the steps below:
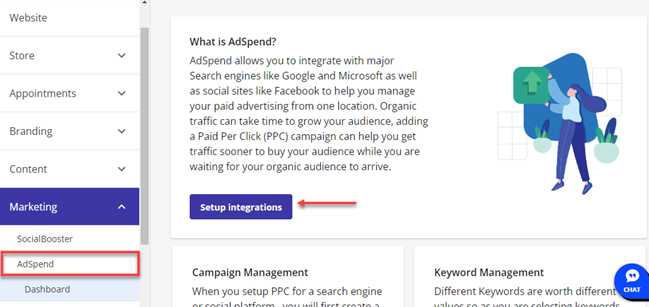
- Once logged in to your eCommerce account, click Marketing on the left menu, then select AdSpend. This will take you automatically to your Dashboard. Click on the Setup integrations button.
- Within the AdSpend dashboard, click the Start with Microsoft Advertising button.

- Enter your Microsoft Ads email address, then hit Next.

- Also, type in your Microsoft Ads account password.

- Ad Spend will need permission for account access. Allow it by clicking Yes.

- Once the account login is successful, you will be routed to the landing page of Microsoft Advertising Campaigns. Select an advertising goal from the following options:
- Visits to my business location
- Visits to my website
- Phone calls to my business

- Enter the following details: Campaign Name, Campaign Budget, Location, and Language. After entering all the required information, hit Save and continue, located at the bottom right corner.

- Set up Ad Groups by providing the necessary information such as Website URL, Ad Group Name, and Keywords. After adding all the information needed, click Continue to Ad Creation.

- Fill in the data for Ad Creation. You will also see an Ad preview in the right column of the screen.

- You’re all set.

You can now view the Campaigns, Ad Groups, Ads, and Keywords just by clicking on the options located on the right navigation menu.
How to Stop Bing Ad Campaigns
Follow the steps below to learn how to stop Bing Ad campaigns.
- Once inside your eCommerce account, select Marketing on the left menu, then click AdSpend. Next, select Settings from the options.

- Click the Edit button below the Integration Settings.

-
To remove the Bing Ad account, click Disconnect from AdSpend.

- Confirm the account access revocation.

The Bing Ad account is now disconnected.
Get practical tips and product updates on LinkedIn.
Follow Network Solutions