Microsoft 365 to Google Workspace migration guide
This guide provides a comprehensive, step-by-step walkthrough for transitioning your email and collaboration services from Microsoft 365 to Google Workspace. The migration process is broken down into three key phases: account provisioning, technical domain configuration, and historical data transfer.
In this article, we will discuss:
- Step 1: Microsoft 365 to Google Workspace setup instructions overview
- Step 2: Admin sign-in and terms acceptance
- Step 3: Domain verification
- Step 4: Add additional users
- Step 5: MX record update
- Step 6: Begin data migration using the import tool
- Step 7: Migration monitoring and completion
- Step 8: Monitor data migration
- Step 9: Confirm migration completion
- Review
Step 1: Microsoft 365 to Google Workspace setup instructions overview
- Sign in to your Network Solutions account manager at https://www.networksolutions.com/my-account/login.
- Click Google Workspace on the left menu to open the details page.
- Click the blue Set up button, then Get started in the pop-up.
- Create the primary email address by entering:
- Desired email
- First and last name
- Organization name (if applicable)
- Click Continue.
- Set a recovery email address and click Set up.
- For domains registered with Network Solutions:
- Prompted to update DNS MX records for Google Workspace email routing.
- Click Update DNS to complete.
- For domains registered elsewhere:
- You must manually verify the domain by adding a TXT record to its DNS settings as instructed.
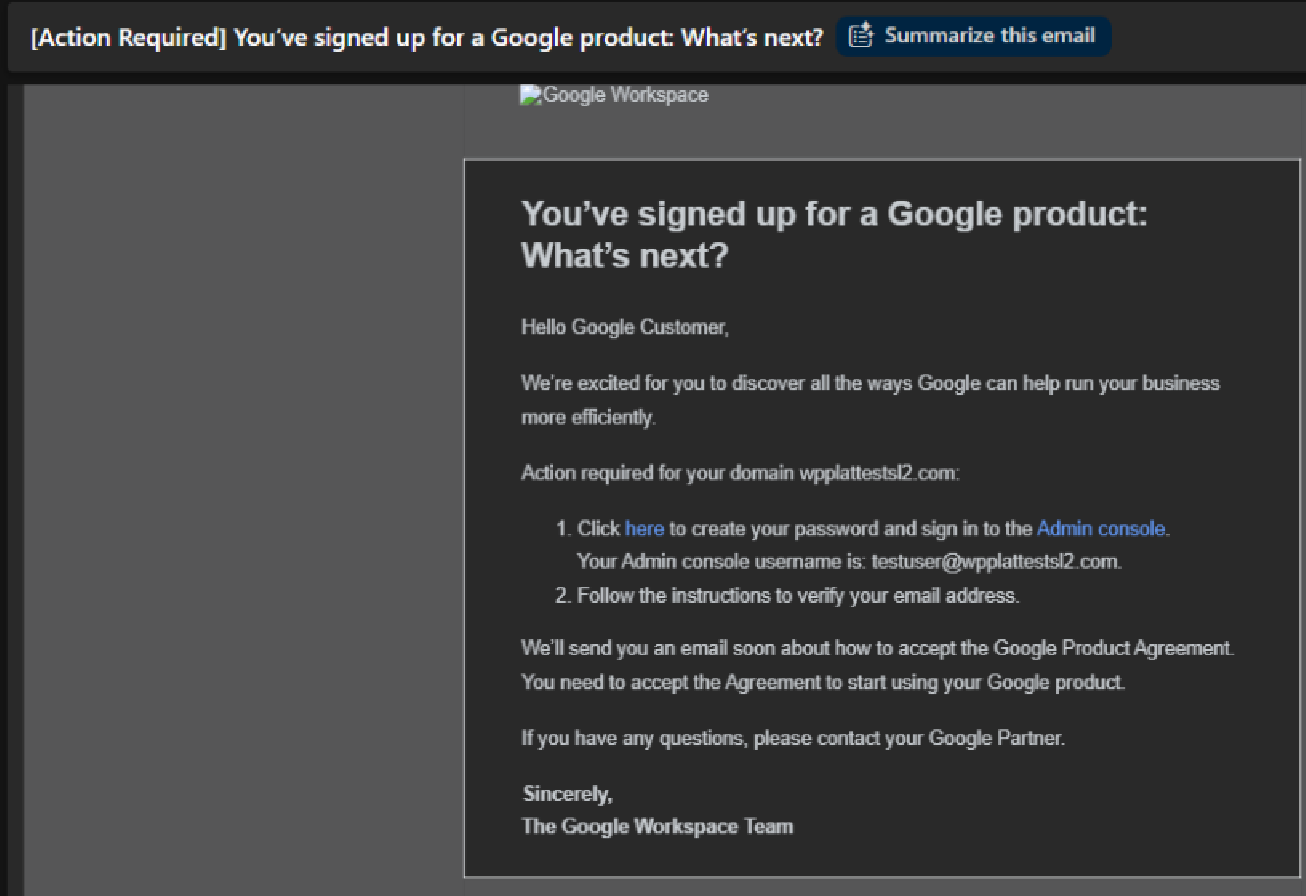
Step 2: Admin sign-in and terms acceptance
- Sign in to admin.google.com using the new super admin credentials created during setup.
- You must accept Google’s terms of service. (Two separate agreements: one for the reseller and one for Google.)
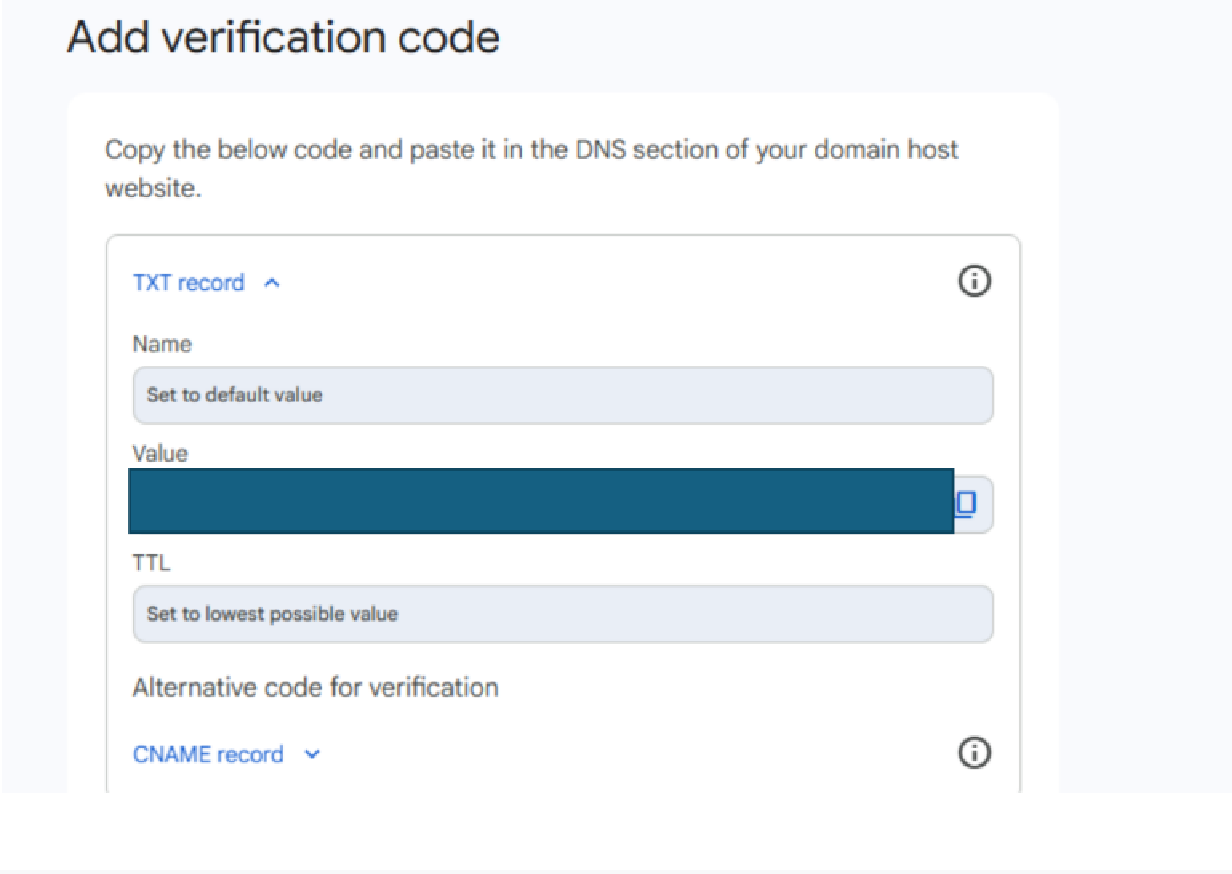
Step 3: Domain verification
- Verify your domain using a TXT record.
- If Network Solutions manages the name servers, the system may automatically enter it.
- Otherwise, you can find the verification record in the Google Admin console.
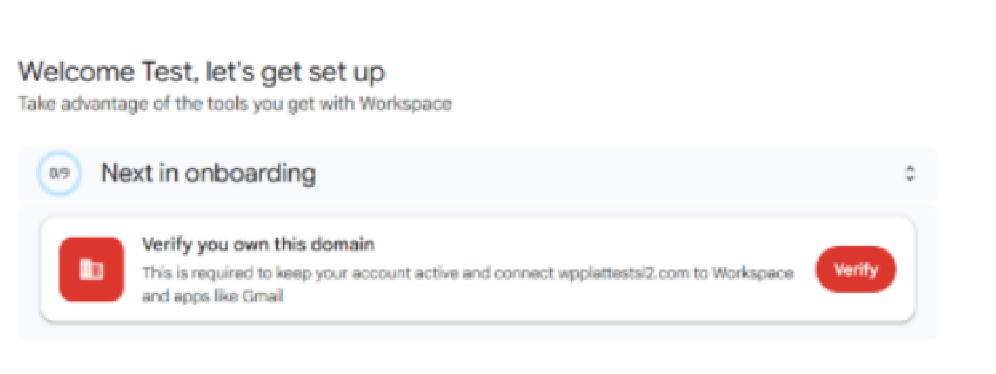
Step 4: Add additional users
On the next page, you can add more users if needed (you can skip this step if you have already set up all your users).
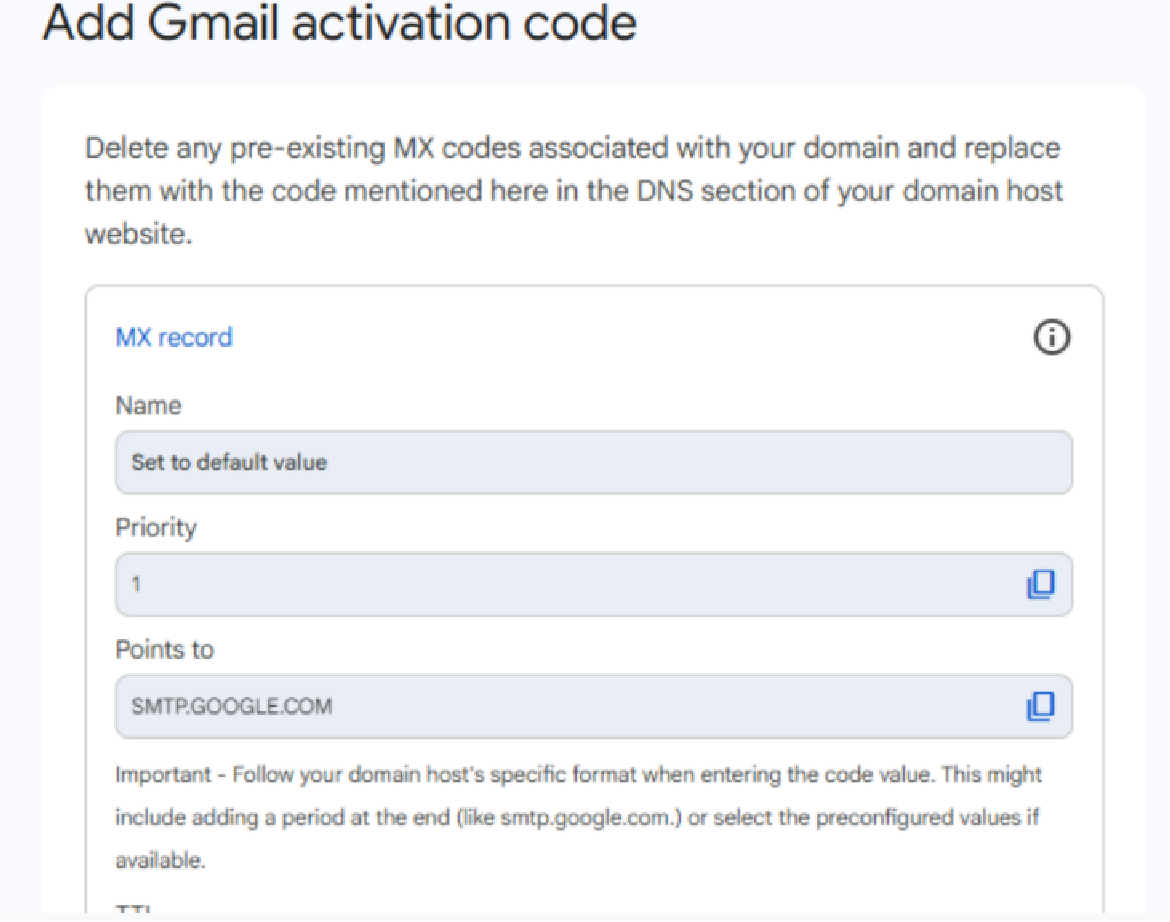
Step 5: MX record update
- Before emails function fully in Google Workspace, the MX records must be updated.
- Remove the Office 365 MX records completely.
- If Office 365 MX records reappear, inform offline support by replying to the ticket email.
Step 6: Begin data migration using the import tool
Use Google Workspace’s import tool to migrate data from Office 365.
- Migration requires the Microsoft tenant admin username/password and access to two-factor authentication.
- Permissions requested must be accepted when prompted.
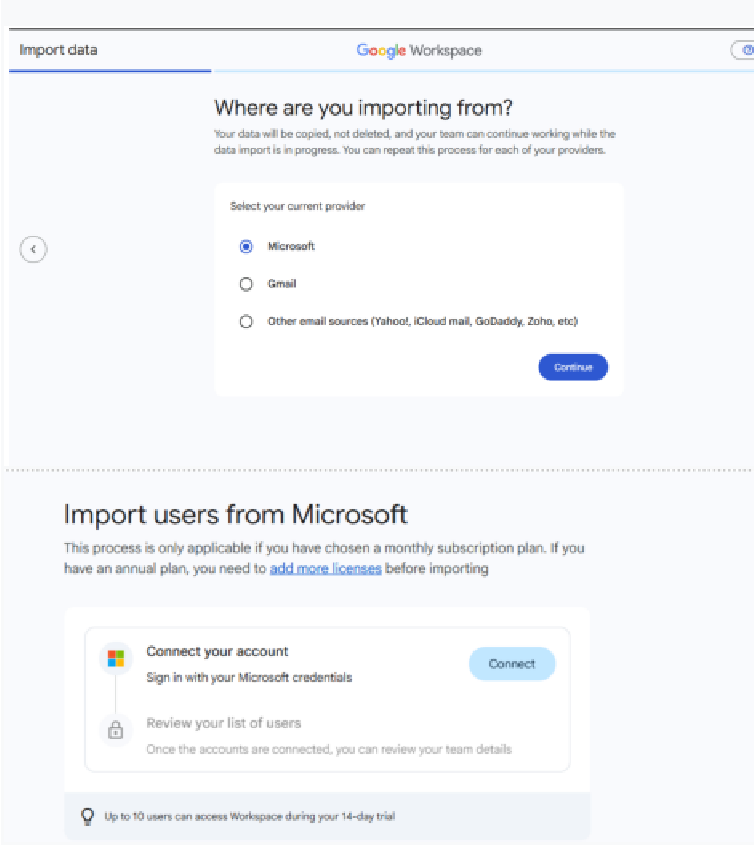
Step 7: Migration monitoring and completion
- Start the import process.
- Once the user import is finished, select Import email data.
- Monitor migration progress on the following page.
- After completion, verify that all emails and content have successfully migrated.
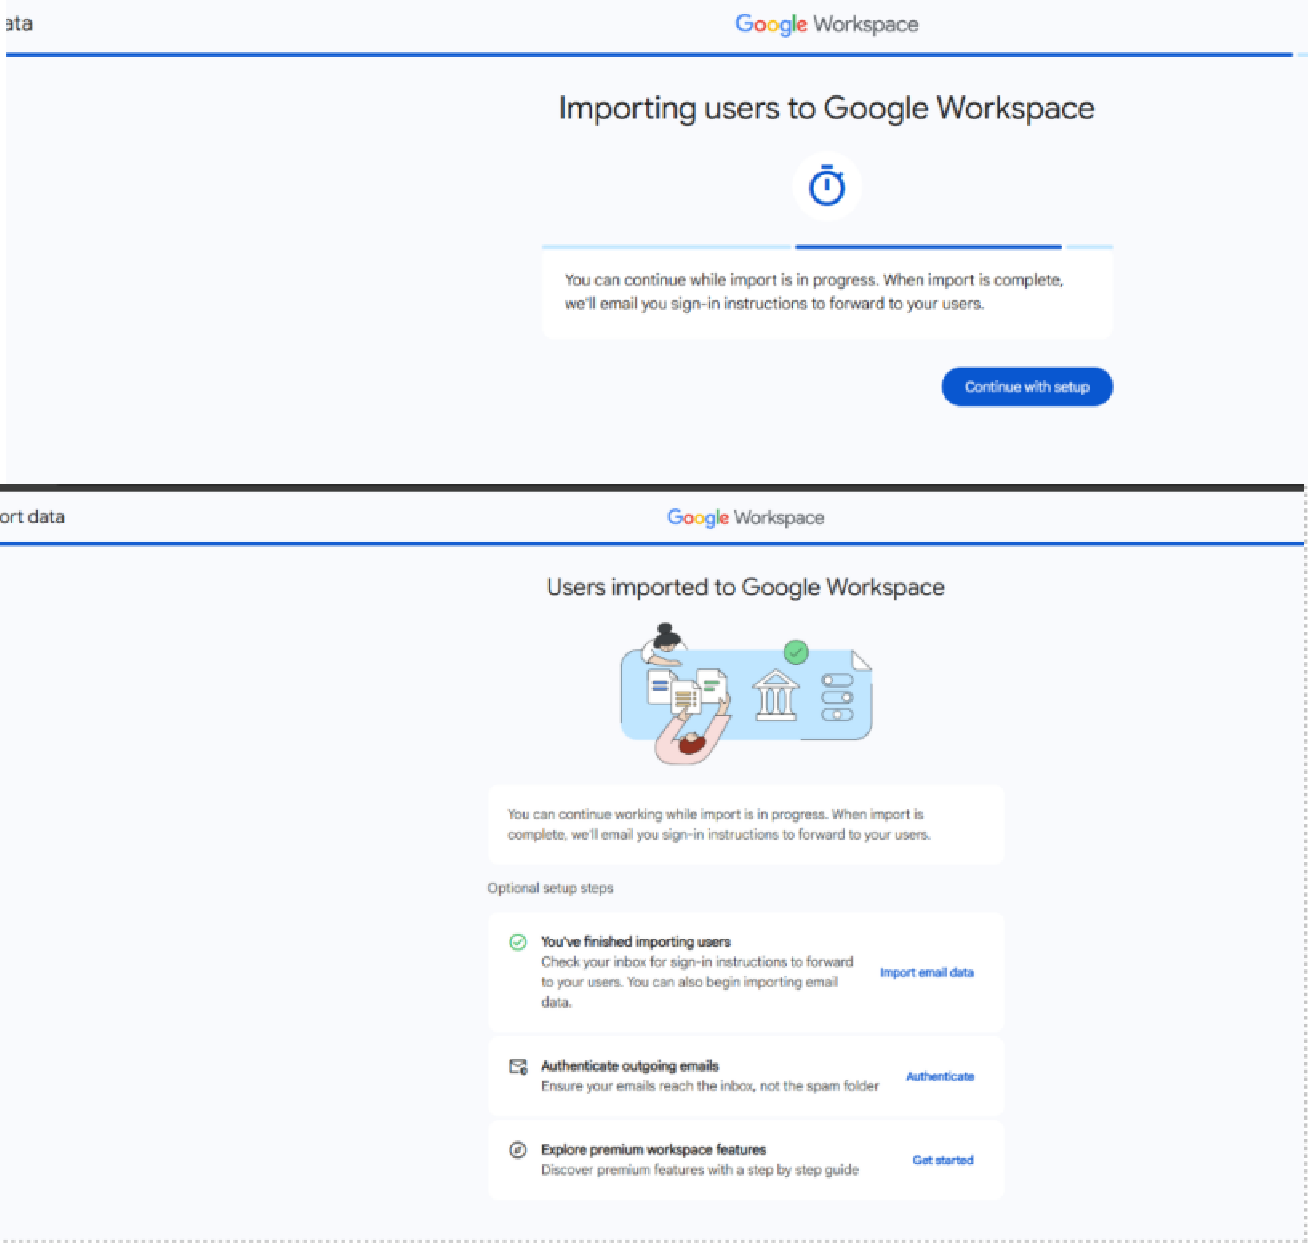
Step 8: Monitor data migration
- Monitor the data migration progress on the next page.
- This may take some time, depending on the volume of data being migrated.
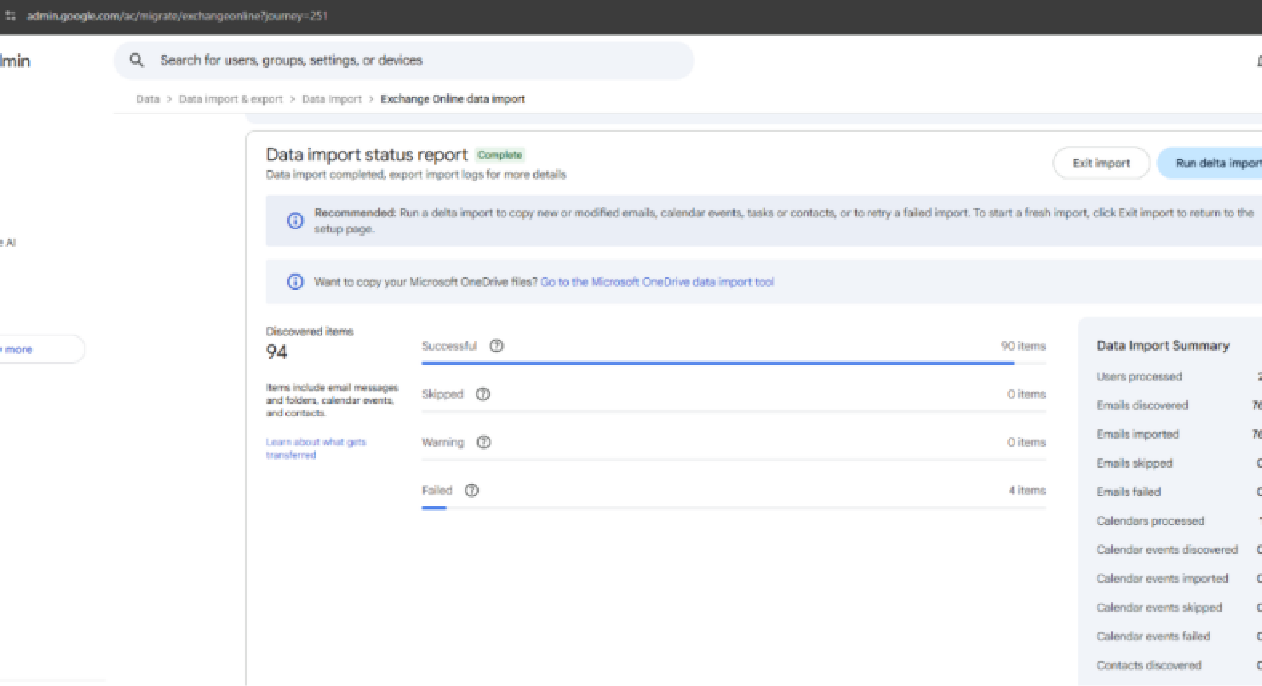
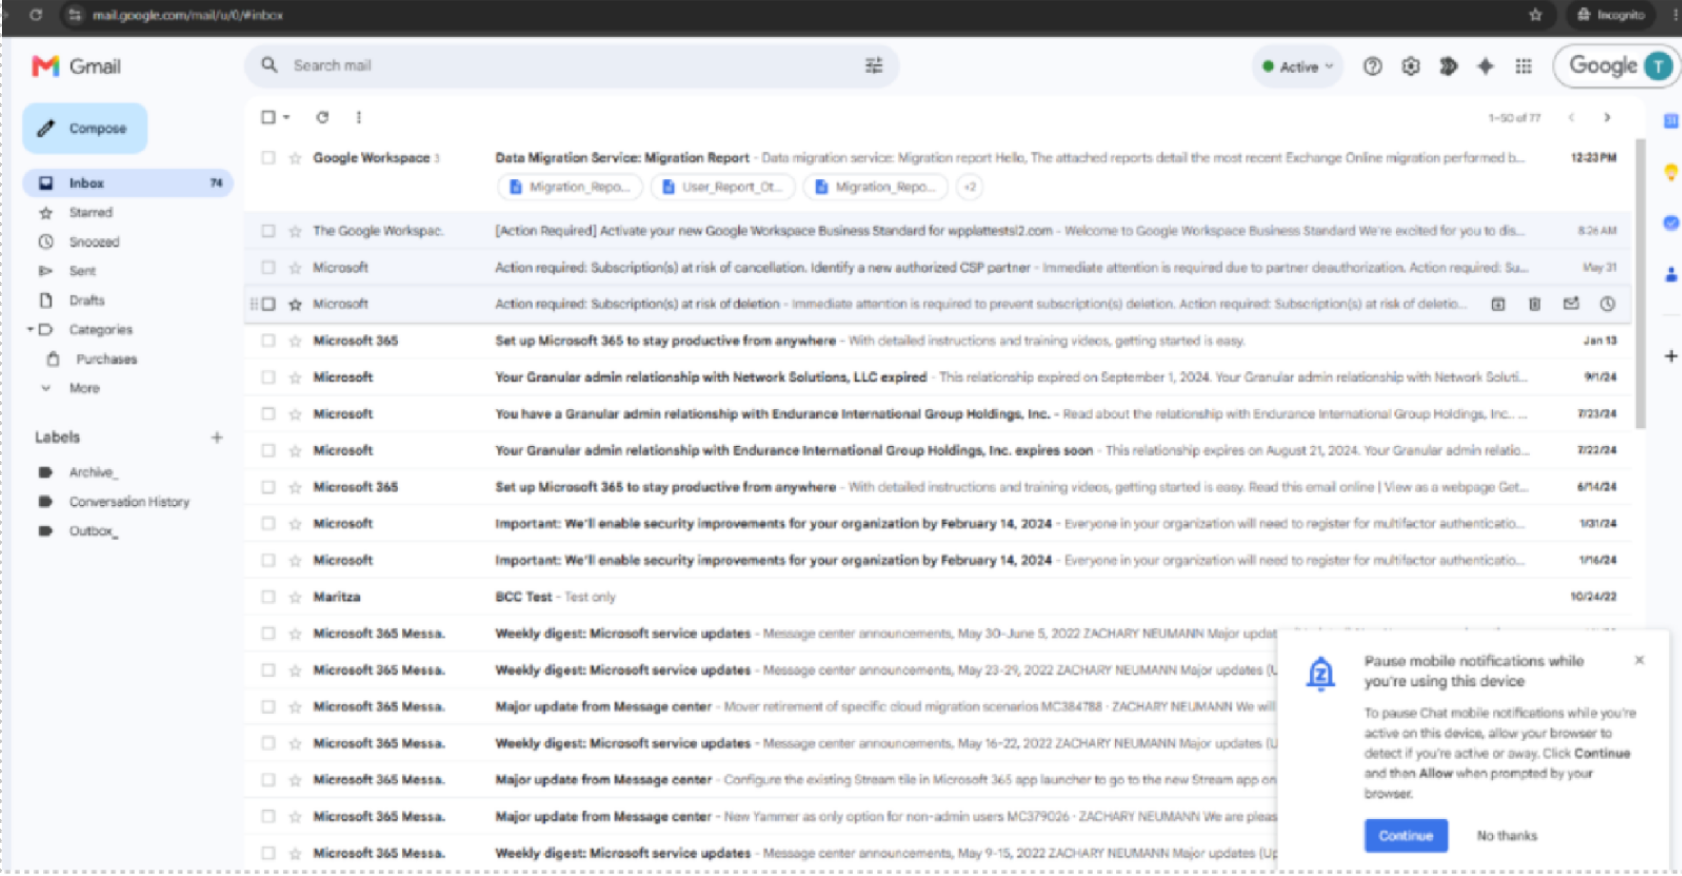
Step 9: Confirm migration completion
- Once the migration completes, verify that all emails and mailbox content have been successfully transferred.
- We encourage you to review your inbox and other relevant folders.
Review
This provides a thorough walkthrough detailing how users can provision accounts, update DNS/MX records, and safely deploy the Google import tool to move corporate mail environments.
Get practical tips and product updates on LinkedIn.
Follow Network Solutions