How to Use My Marketing Calendar
With Marketing Calendar, you can create, schedule, and track all your email campaigns and social posts in one place.
In this article, we will discuss:
Accessing the Marketing Calendar
To access your Marketing Calendar, follow these steps:
- In your Account Manager, click eCommerce on the left side of the page.
- If you have one eCommerce product, you will see the eCommerce Details page.
- If you have more than one eCommerce product, you will see a list of your eCommerce products. Click Manage next to the product you would like to set up to go to the eCommerce Details page.
- From the eCommerce Details page, click Manage Store.
- Once in your eCommerce dashboard, click Content on the left-navigation menu. Then, select Marketing Calendar.

- You have accessed My Marketing Calendar.

Using the Marketing Calendar
In your Marketing Calendar, you can execute the following actions:
- Change the Calendar View
- Create an Email Campaign
- Create a Social Post
- Create a Blog Post
- Track Email Campaigns/Social Posts
Change the Calendar View
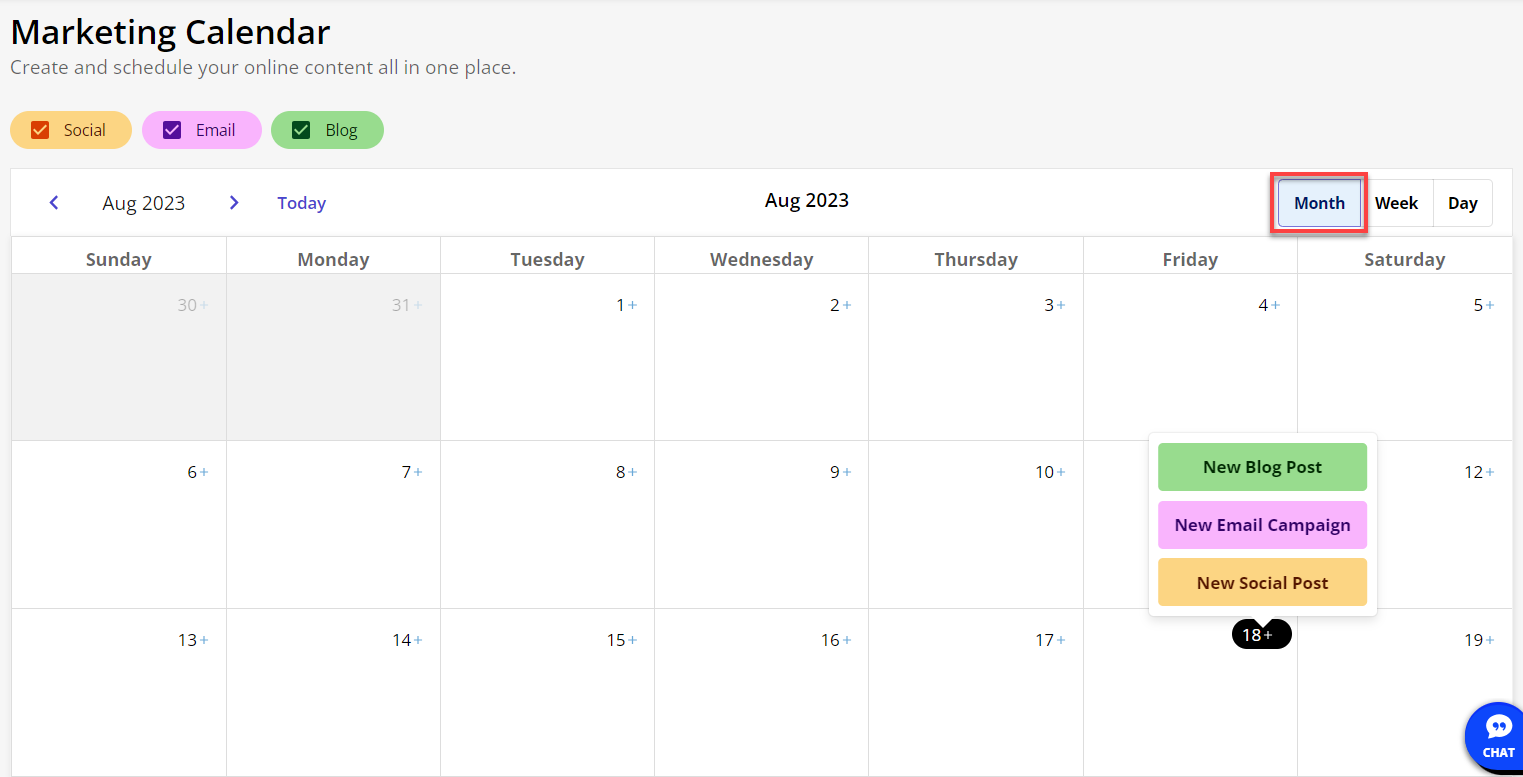
You can change the calendar view by clicking Month, Week, or Day on the top-right corner of the Marketing Calendar.
- Month view
- In this view, the current date will be highlighted in black. To automatically navigate to the current date, click on the Today link on the top-left portion of the calendar.
- You can change the month by clicking on the browse icons < > on the top-left.
- You can only add new blog posts, email campaigns and social posts by clicking on current or future dates. You cannot add any of these on days that have passed already.

- Week view
- To automatically navigate to the current day and time, click on the Today link on the top-left portion of the calendar.
- You can change the week by clicking on the browse icons < > on the top-left.
- You can only add new blog posts, new email campaigns and social posts by clicking on current or future dates. You cannot add any of these on days that have passed already.
- Week view
- In this view, the current day and time will be marked by a red line. To automatically navigate to the current day and time, click on the Today link on the top-left portion of the calendar.
- You can change the week by clicking on the browse icons < > on the top-left.
- You can only add new blog posts, new email campaigns and social posts by clicking on the current time or any time after the current time. You cannot add any of these before the current time.
- You can use the scroll bar on the right side of the calendar to scroll through the time for specific days from Sunday to Saturday.

- Day view
- In this view, the current time of a specific day will be marked by a red line. To automatically navigate to the current day and time, click on the Today link on the top-left portion of the calendar.
- You can change the day by clicking on the browse icons < > on the top-left.
- You can only add new blog posts, new email campaigns and social posts by clicking on the current time or any time after the current time. You cannot add any of these before the current time.
- You can use the scroll bar on the right side of the calendar to scroll through the time of a specific day.

Create an Email Campaign
You can create an email campaign in your Marketing Calendar by clicking on a current or future date/time, then clicking on New Email Campaign. Doing so will take you to a page where you can create different types of email campaigns.
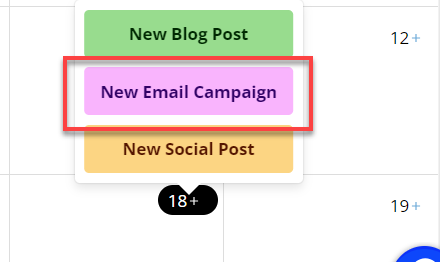
To view instructions on how to create an email campaign, please see Creating an Email Campaign in Marketing.
Create a Social Post
You can create a social post in your Marketing Calendar by clicking on a current or future date/time, then clicking on New Social Post. Doing so will take you to a page where you can use SocialBooster to connect to different platforms (Google, Facebook, Twitter, Instagram, and LinkedIn) and create and track social posts/campaigns.
Option to add a new social post:

For instructions on how to connect to social platforms and create new social posts, select from the options below:
Create a Blog Post
You can create a blog post in your Marketing Calendar by clicking on a curret or future date/time, then clicking on New Blog Post. You will then be routed to a different page where you can write your own blog post. You may also utilize the AI Writer feature to assist you in writing a blog post. 
To view instructions on how to create a blog post, please see Writing a Blog Post.
Track Email Campaigns/Social Posts
You can track scheduled email campaigns and social posts in your Marketing Calendar. By clicking on a scheduled email campaign or social post, you will see the scheduled date and time when it will be sent/posted or the scheduled date and time it has been sent or posted.
Note: The pencil icon indicates that an email campaign has only been drafted and is not yet scheduled to be sent, while the check mark indicates an email campaign has been successfully sent. To track social posts, click on a social platform icon (e.g., Facebook) to see the details.
Get practical tips and product updates on LinkedIn.
Follow Network Solutions