Knowledge Base
Categories: Legacy Domain
Powered by Network Solutions: How to Backup and Restore a MySQL Database
In this article, we will discuss:
- Creating a Backup of a MySQL Database via the phpMyAdmin Export Method
- Restoring a MySQL Database via the phpMyAdmin Import Method
- Review
Creating a Backup of a MySQL Database via the phpMyAdmin Export Method
You can download a backup of your MySQL database by exporting its .sql file via the phpMyAdmin.
Here are the steps to export your MySQL database.
- Log in to your account via https://www.networksolutions.com/my-account/login.
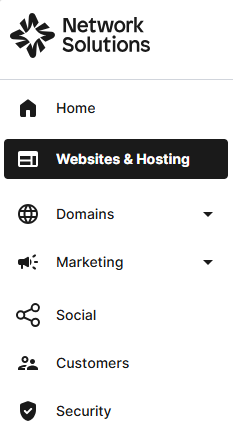
- Click Websites & Hosting from the left navigation menu.
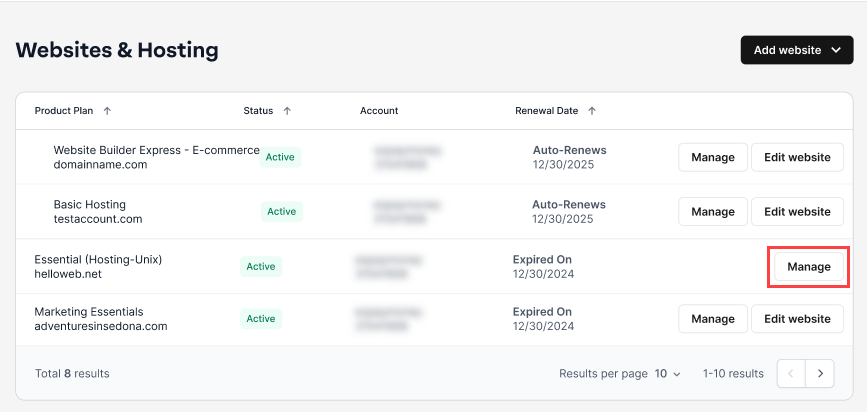
- Navigate to the hosting package that you want to access the database for, then click Manage to continue.
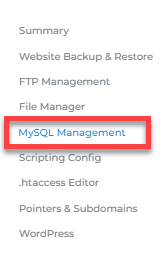
- In the left pane, click on MySQL Management.
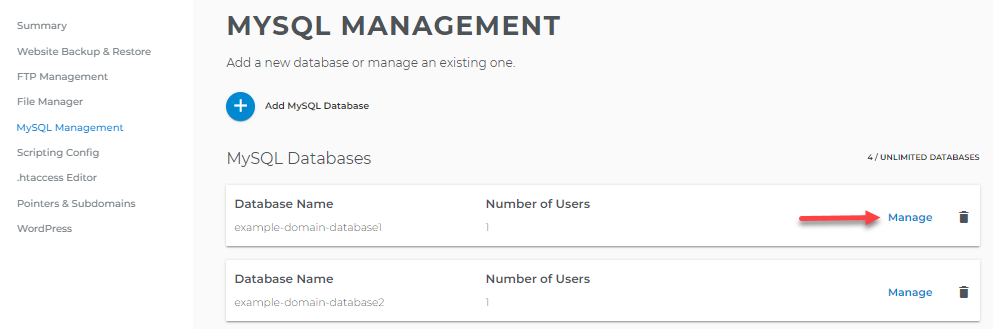
- Look for the database you want to export to and click its Manage button.
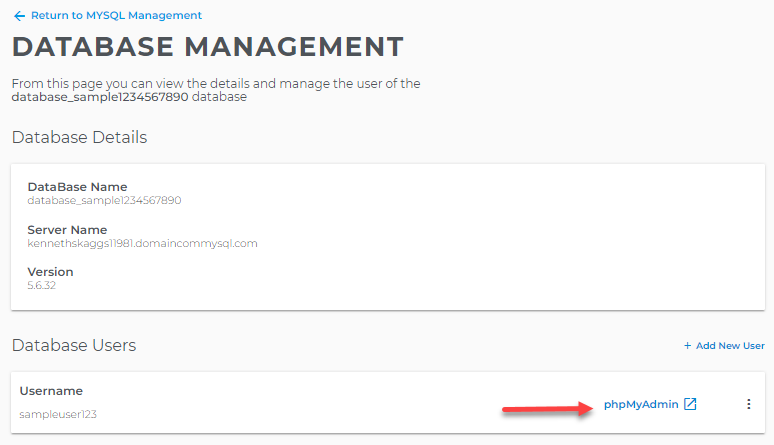
- On the Database Management page, click the phpMyAdmin link.
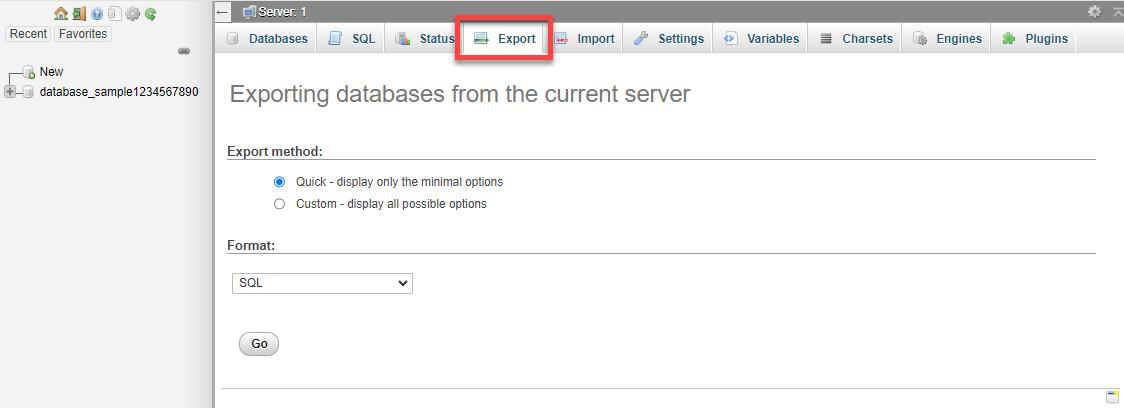
- With the database selected in the left pane, click the Export tab in the top menu.
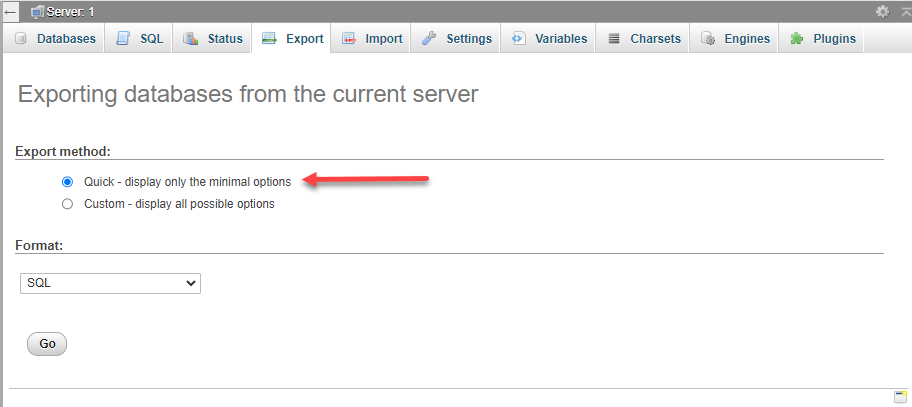
- Select Quick as the Export method.
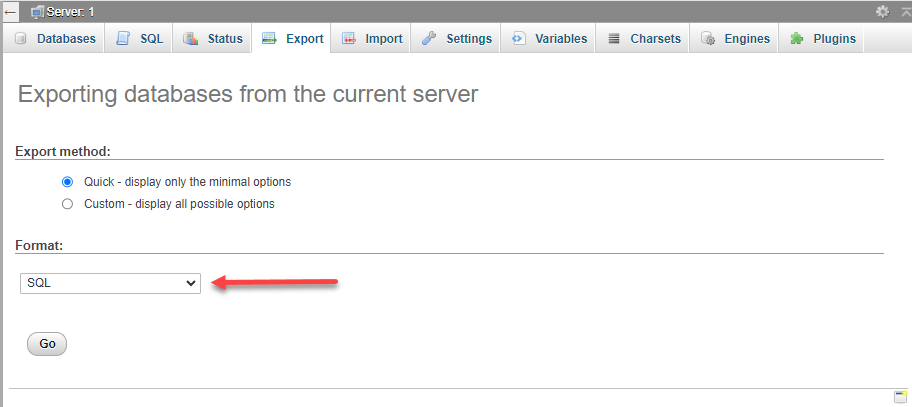
- Select SQL from the Format drop-down menu.
- Click the Go button to initiate the download/export process.
Your database will be downloaded into your computer as a .sql file.
Restoring a MySQL Database via the phpMyAdmin Import Method
To export your MySQL database.
- In the left pane, click on MySQL Management.
- On the MySQL Management page, click + Add MySQL Database.
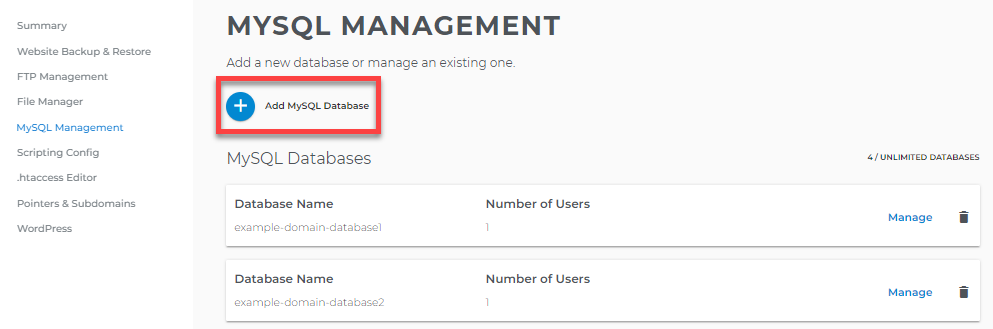
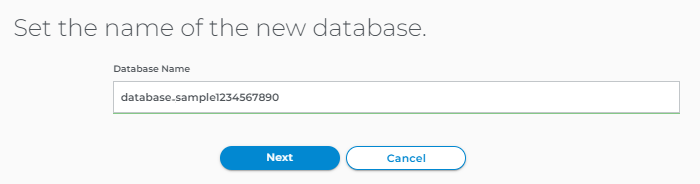
- Enter a name for your database, then click Next.
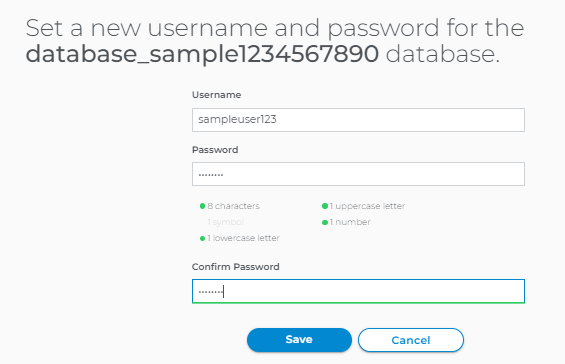
- Type your database username and password, then click on Save.
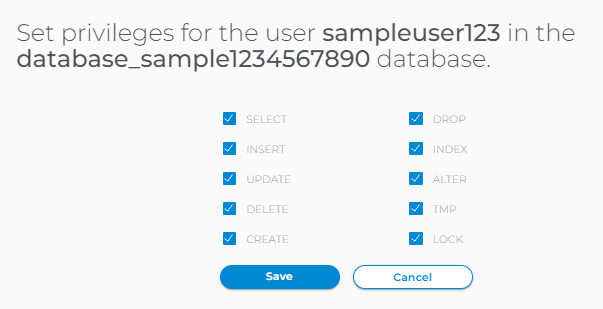
- In the next pop-up, set the database privileges.
- On the Database Management page, click the phpMyAdmin link.
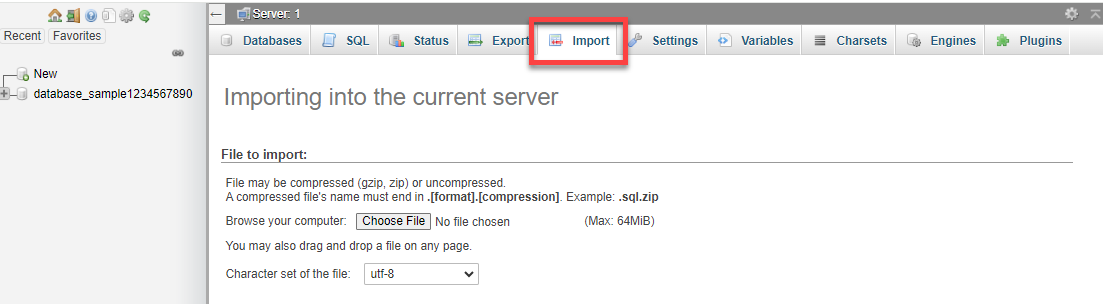
- With the database selected in the left pane, click the Import tab in the top menu.
- Click the Choose File button and select the database file you want to import.
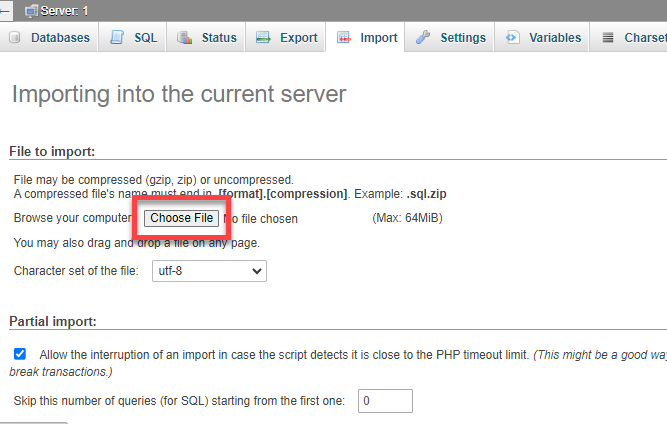
- Scroll down and click the Go button.
- Once your database is finished importing, you will see that your new database is now populated with your imported database information.
Review
The article provides the information in a straightforward format, making it easier to follow the process from start to finish. The content is organized in a logical order, allowing users to locate the details they need without unnecessary effort. Overall, it supports a smoother self-service experience by helping users complete the task with fewer questions.
Get practical tips and product updates on LinkedIn.
Follow Network Solutions
Did you find this article helpful?