Manage auto-renew with Network Solutions
Learn to manage auto-renew for your Network Solutions' products and services. Automatic renewal, also known as auto-renew, is a feature designed to ensure your products renew on time, avoiding any accidental service interruptions. While we recommend keeping auto-renewal enabled for uninterrupted service, you can easily change these settings at any time through your account manager. Following these steps will help you take full control of your product renewal preferences.
How to access the Renewal Center
Follow the steps below to access your account manager's Renewal Center.
- Log in to your account manager via https://www.networksolutions.com/my-account/login.
- From the left-hand menu, click the Renewal Center tab.

In your Renewal Center, you can now:- Easily search your products using the search bar at the top of the list of services.
- See the renewal date of your products, which is usually different from their expiration date.
- No renewal date will show if the auto-renewal of the product is off.
- Monitor each of your products' auto-renewal status at a glance.
You will then be rerouted to the Renewal Center page of your account.
How to enable/disable auto-renewal
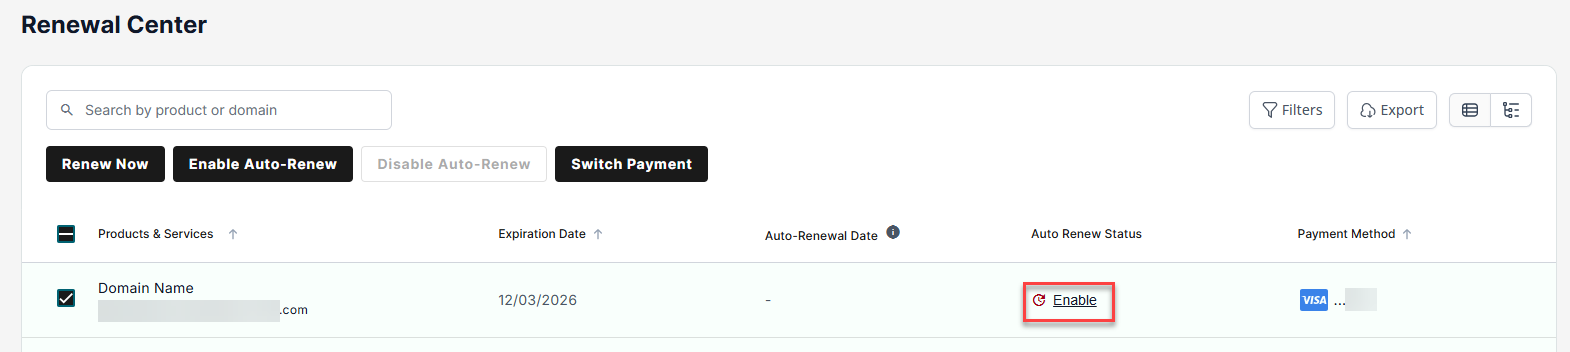
- Locate the services you want to enable or disable auto-renewal.
- Under the Auto Renew Status tab, you can check the status of each product:

To enable auto-renewal:
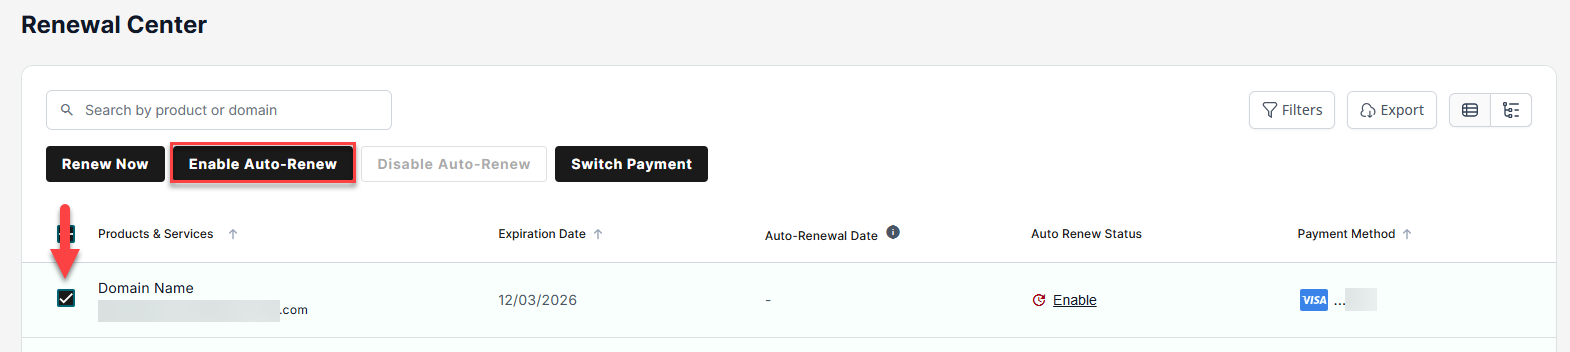
- You can click on the Enable link under the Auto Renew Status tab.
or
You can click on the box before your product's name then click the Enable Auto-Renew button at the top of the page under the search box.
- A pop-up will show. To confirm your action, click Enable.
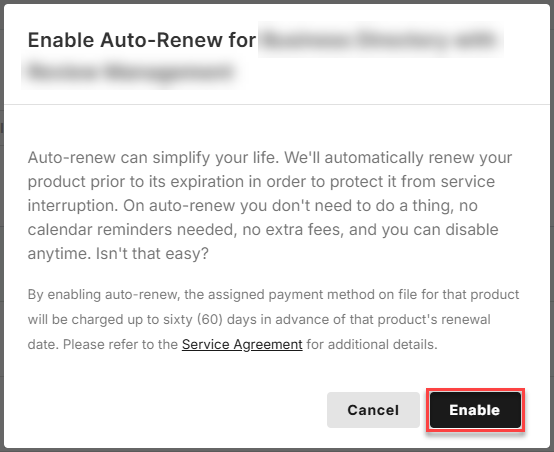
Important: A product can only be set to auto-renew for a maximum of five years. For example, if you purchase a domain for nine years, it will automatically renew for five years.Note: You can also enable auto-renewal by clicking on Domain Names instead of Renewal Center. Check the box next to the product you want to renew. Then, click Renew and select Turn on Auto-Renew.
You have successfully enabled auto-renew!
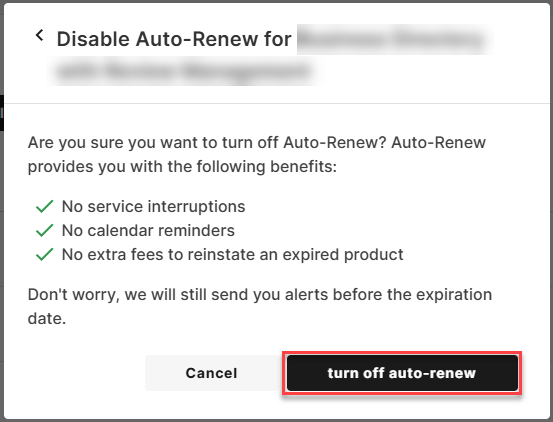
To disable auto-renewal:
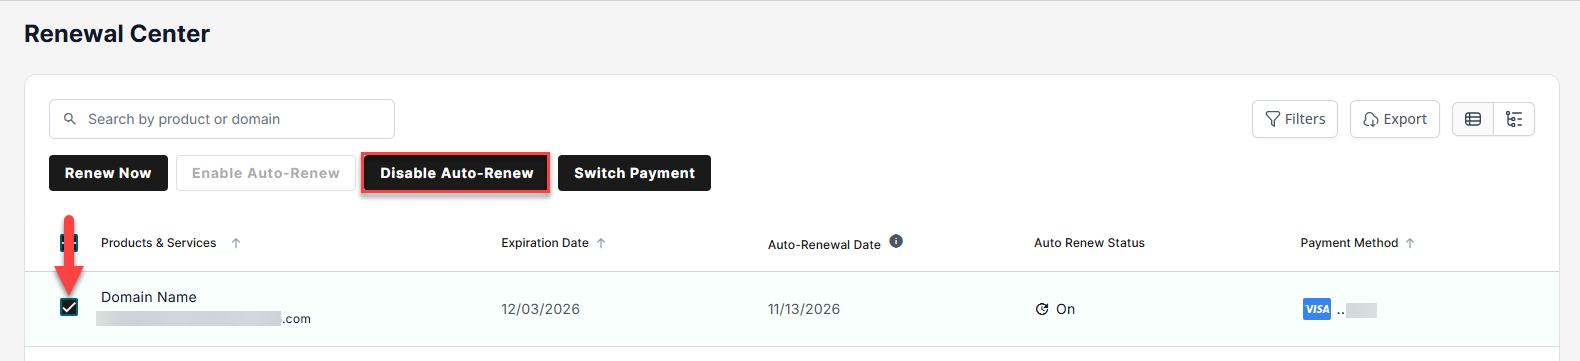
- You can click on the box before your product's name then click the Disable Auto-Renew button at the top of the page under the search box.
- To proceed, click:

- Continue if you wish to turn off auto-renewal.
- Chat with an expert for further assistance with your product before making a decision.
- Then, click the turn off auto-renew button.
Important:- Starting 5/22, you will now have the option to turn off auto-renew for monthly products from the Renewal Center in Account Manager.
- With this update, you can now manage auto-renew for both annual and monthly products, and you will no longer need to contact Support. Simply follow the steps below since the “Disable Auto-Renew” button is no longer grayed out and can now be selected.
Note: If you disable auto-renew, you will be responsible for manually renewing your product before it expires.
You have successfully disabled auto-renew!
Renewal notices and alerts
The automatic renewal system alerts you to any problems, such as outdated billing information, on the following dates:
Before your product expires, you will receive the following:
- An automatic renewal reminder email is sent when the system checks the payment, and the payment is valid.
- A bad payment email is sent when the system checks the payment, and the payment is invalid.
When automatic renewal processes, you will receive the following:
- An order payment failure email is sent when automatic renewal fails.
- An order confirmation email is sent when the automatic renewal is successful.
Find out what happens to a domain that is not renewed.
Review
Make sure your website, domains, email, security, and other products renew smoothly without interruption by managing their auto-renewal settings effectively. Whether you prefer automatic renewal or want to take charge of the process, mastering these settings is a requirement for a digital product owner to keep services running and be smart about online operations with the support of auto-renewal management practices, which puts the right in front of customer expectations.
Get practical tips and product updates on LinkedIn.
Follow Network Solutions