Powered by Network Solutions: File Management - How to Backup and Restore Files
How to Backup and Restore Files using FTP
Why should I back up and restore files?
Backing up your website on a regularly ensures that if the unexpected happens, you are prepared. A backup of your files and data makes, it so you don’t have to recreate your site from scratch. You save both time and money.
Saving a backup to your personal computer:
- (Optional) Create a zip archive of the files you want to download (see how).
- Connect to your account using FTP (see tutorials).
- Download your file(s).
Restoring a backup from your personal computer:
- Connect to your account using FTP (see tutorials).
- Upload your file(s).
- (Optional) If you uploaded a zip archive, unzip it using Archive Gateway (see how).
How to Backup Files Using Website Backup and Restore
Website Backup and Restore gives you access to our automatic backups of your website files. Because you cannot store an infinite number of backups of your website files, older backups are regularly replaced with newer backups. If you are interested in keeping older backups, you can download a zip archive onto your personal computer by following these steps:
- Log in to your Account Manager via https://www.networksolutions.com/my-account/login.
- Click Hosting in the left-hand menu.

- Go to Website Backup & Restore.

Backups tile. Here, you will see all your existing backups.
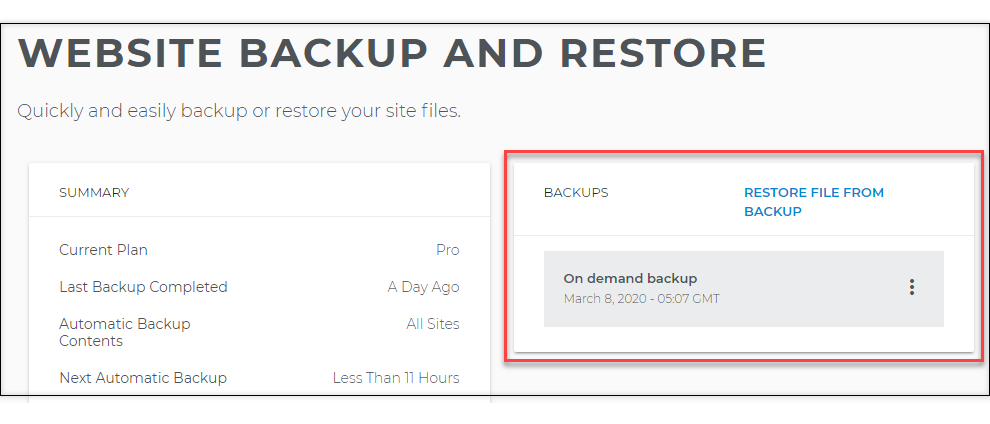
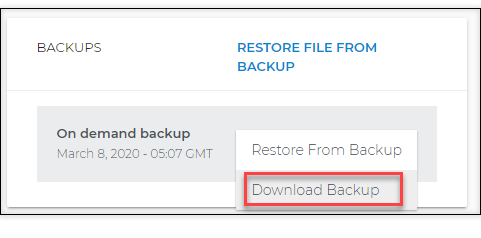
- Click the three-dot menu on the backup file that you want to run.

- Click Download Backup.
- Once on the Download Backup page, select a backup type. Then, mark the files/database/sites that you want to archive.
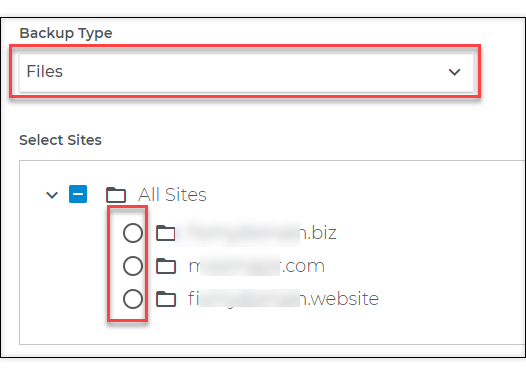
Important: Selecting a directory does not automatically select all of its contents.You will need to click on the directory first to show its contents, then click on the contents individually.
- Click the Download button.

This may take some time to initiate the download after clicking this button.
How to Restore Files Using Website Backup and Restore
You can use the Website Backup and Restore tool to restore automatic backups only. Manual backups can only be restored by using FTP (to upload the files) and Archive Gateway (to unzip the files, if necessary). Use the following steps to restore an automatic backup:
- Log in to your Account Manager via https://www.networksolutions.com/my-account/login.
- Click Hosting in the left-hand menu.
- Go to Website Backups & Restore.
- On the right side of the page, look for the Backups tile. Here, you will see all your existing backups.
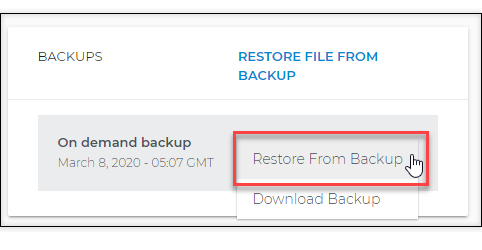
- Click the three-dot menu on the backup file that you want to restore.
- Click Restore From Backup.
- Once in the Restore Backup page, select a restoration type. Then, select your desired action.
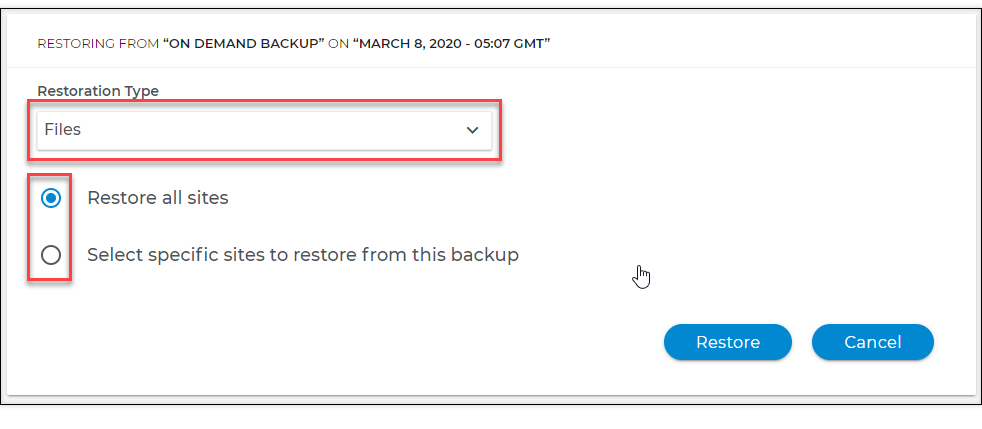
Important: Selecting a directory does not automatically select all of its contents.You will need to click on the directory first to show its contents, then click on the contents individually.
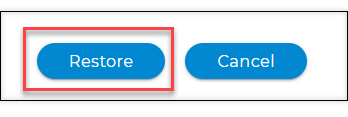
- Click the Restore button.
Important: Any files and directories you restore will save over existing files and directories of the same name.