Knowledge Base
Categories: Powered by Network Solutions
Powered By Network Solutions: WebsiteBuilder - How to Move Your Page Menus
- Log in to your account via https://www.networksolutions.com/my-account/login.
- Click Hosting on the left menu, then click the MANAGE button next to the WebsiteBuilder plan you would like to update.

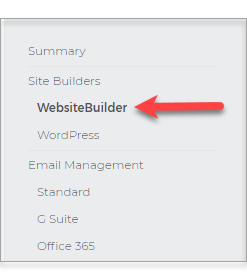
- On the left pane, click on WebsiteBuilder.
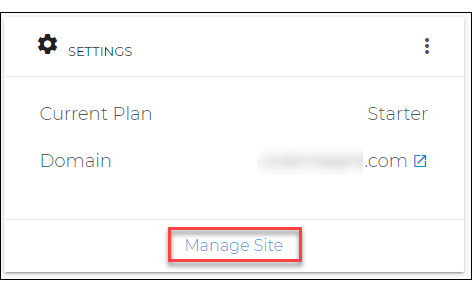
- To open your WebsiteBuilder Editor, click on Manage Site.
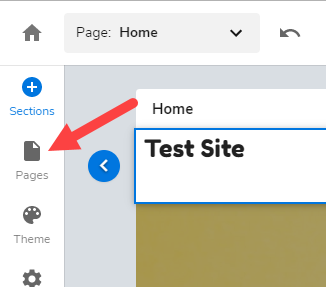
- Once inside your WebsiteBuilder Editor, locate Pages on the left pane options.
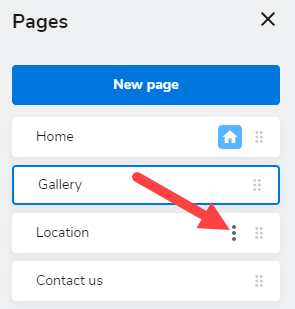
- Inside the Pages menu, you can have multiple options depending on your goal.
- Add a New Page - This gives you an additional page for your website. Note that if your WebsiteBuilder plan is Starter, you can only have 6 pages. For the Business and Ecommerce Website Builder plan, you can have unlimited pages.
- Click on the New page button.

- Update the page name and select from the Page templates.
- Once set, click Add Page at the bottom-right corner.
- Click on the New page button.
- Set as Homepage - This gives you the option to select any page on your site to be the Homepage. This is also the same as the landing page for the site.
- Click on the three-dotted icon.
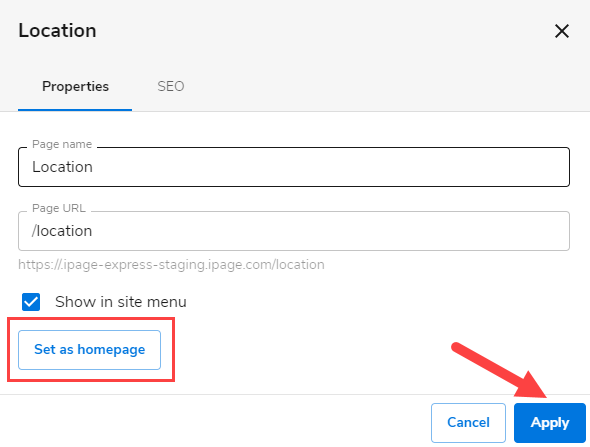
- Hit Settings.
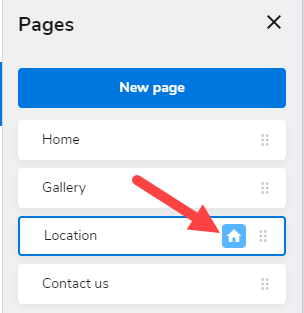
- Select the button that says Set as homepage, and click Apply.
- The Homepage icon will show up right next to the page name.
- Click on the three-dotted icon.
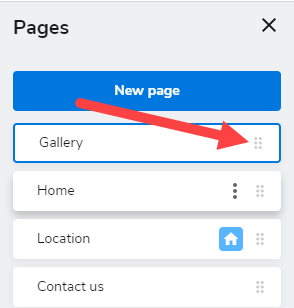
- Rearrange the pages - This option allows you to change the order of the pages as to how they appear on your website.
- Hold the six-dotted icon and move the pages depending on the order of their appearance to the site.
- Hold the six-dotted icon and move the pages depending on the order of their appearance to the site.
- Add a New Page - This gives you an additional page for your website. Note that if your WebsiteBuilder plan is Starter, you can only have 6 pages. For the Business and Ecommerce Website Builder plan, you can have unlimited pages.
Get practical tips and product updates on LinkedIn.
Follow Network Solutions
Did you find this article helpful?