Knowledge Base
Powered by Network Solutions: How to zip and unzip files using Archive Gateway
- Log in to your account manager via https://www.networksolutions.com/my-account/login.
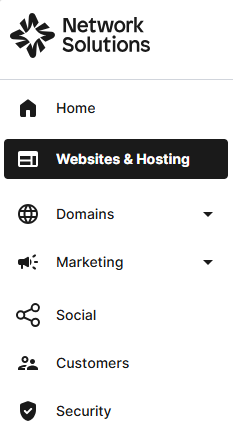
- From the left-hand menu, click the Websites & Hosting tab.
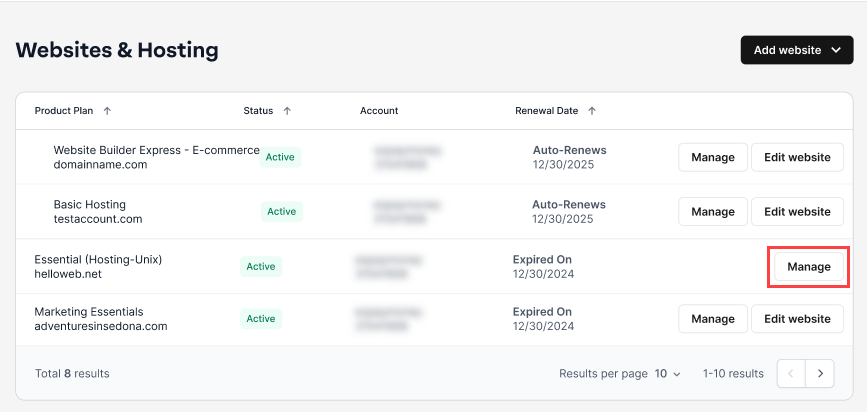
- If you have a single hosting package in the account, you will be redirected to the control panel. If you have multiple hosting packages in your account, click the Manage button on the respective hosting package that you need to access.
- Click the HOSTING tab from the top menu, go to the HOSTING TOOLS section, then select Launch next to Archive Gateway.

- Select the directory or file you want to uncompress (only one item can be selected and file names must end in .zip, .gz, or .tar).

- Type in an Output Directory (this determines where the uncompressed file will be placed).
- Click the Extract/Uncompress button.

How to compress files using Archive Gateway
- Log in to your account manager via https://www.networksolutions.com/my-account/login.
- From the left-hand menu, click the Websites & Hosting tab.
- If you have a single hosting package in the account, you will be redirected to the control panel. If you have multiple hosting packages in your account, click the Manage button on the respective hosting package that you need to access.
- Click the HOSTING tab from the top menu, go to the HOSTING TOOLS section, then select Launch next to Archive Gateway.
- Select the directory or file you want to compress (only one item can be selected, though selecting a directory will compress all of its contents as well).

- Type in an Output Directory (this determines where the compressed file will be placed).
- Select your Compression Type.
- Select what you want to do with the original directory or file:
- Keep the original file (keeps the original copy)
- Replace with the compressed file (deletes the original copy)

Get practical tips and product updates on LinkedIn.
Follow Network Solutions
Did you find this article helpful?