Knowledge Base
Categories: Powered by Network Solutions
Powered by Network Solutions: WebsiteBuilder - Adding and deleting pages
The number of web pages a website has depends on its nature and its content. You can add as many web pages as you like. You can also remove unnecessary pages if needed. If you need assistance with these processes, read through the steps below:
Note: We offer two different versions of WebsiteBuilder. Our original implementation of the builder is the Legacy WebsiteBuilder editor, while WebsiteBuilder Express editor is the newest interface commonly found in the Foundation dashboard. It is not possible to upgrade a Legacy WebsiteBuilder site to the Express editor. The site will need to be recreated with the Express editor. All new WebsiteBuilder installations will be the Express editor.
In this article, we have provided two sets of instructions for each editor. Follow the instruction set that matches your WebsiteBuilder version.
How to check if I have Legacy WebsiteBuilder editor or Express editor?
| Legacy WebsiteBuilder | WebsiteBuilder Express editor |
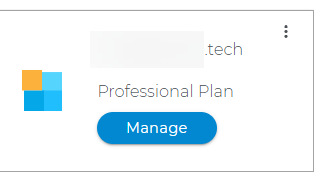 |
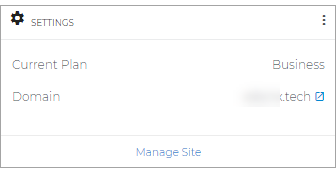 |
How to's:
How to launch WebsiteBuilder?
- Log in to your account manager via https://www.networksolutions.com/my-account/login.
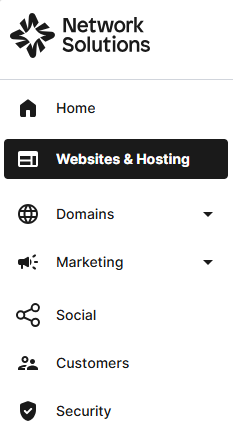
- From the left-hand menu, click the Websites & Hosting tab.
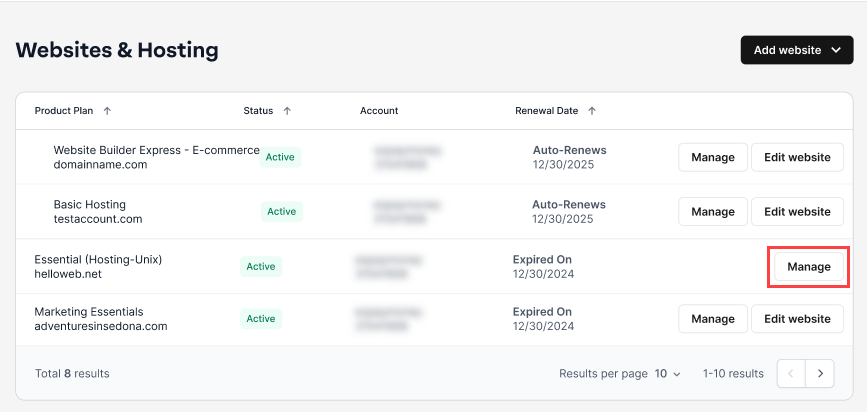
- If you have a single hosting package in the account, you will be redirected to the control panel. If you have multiple hosting packages in your account, click the Manage button on the respective hosting package that you need to access.
- Click the WEBSITES & POINTERS tab from the top menu, then select WebsiteBuilder from the left pane.
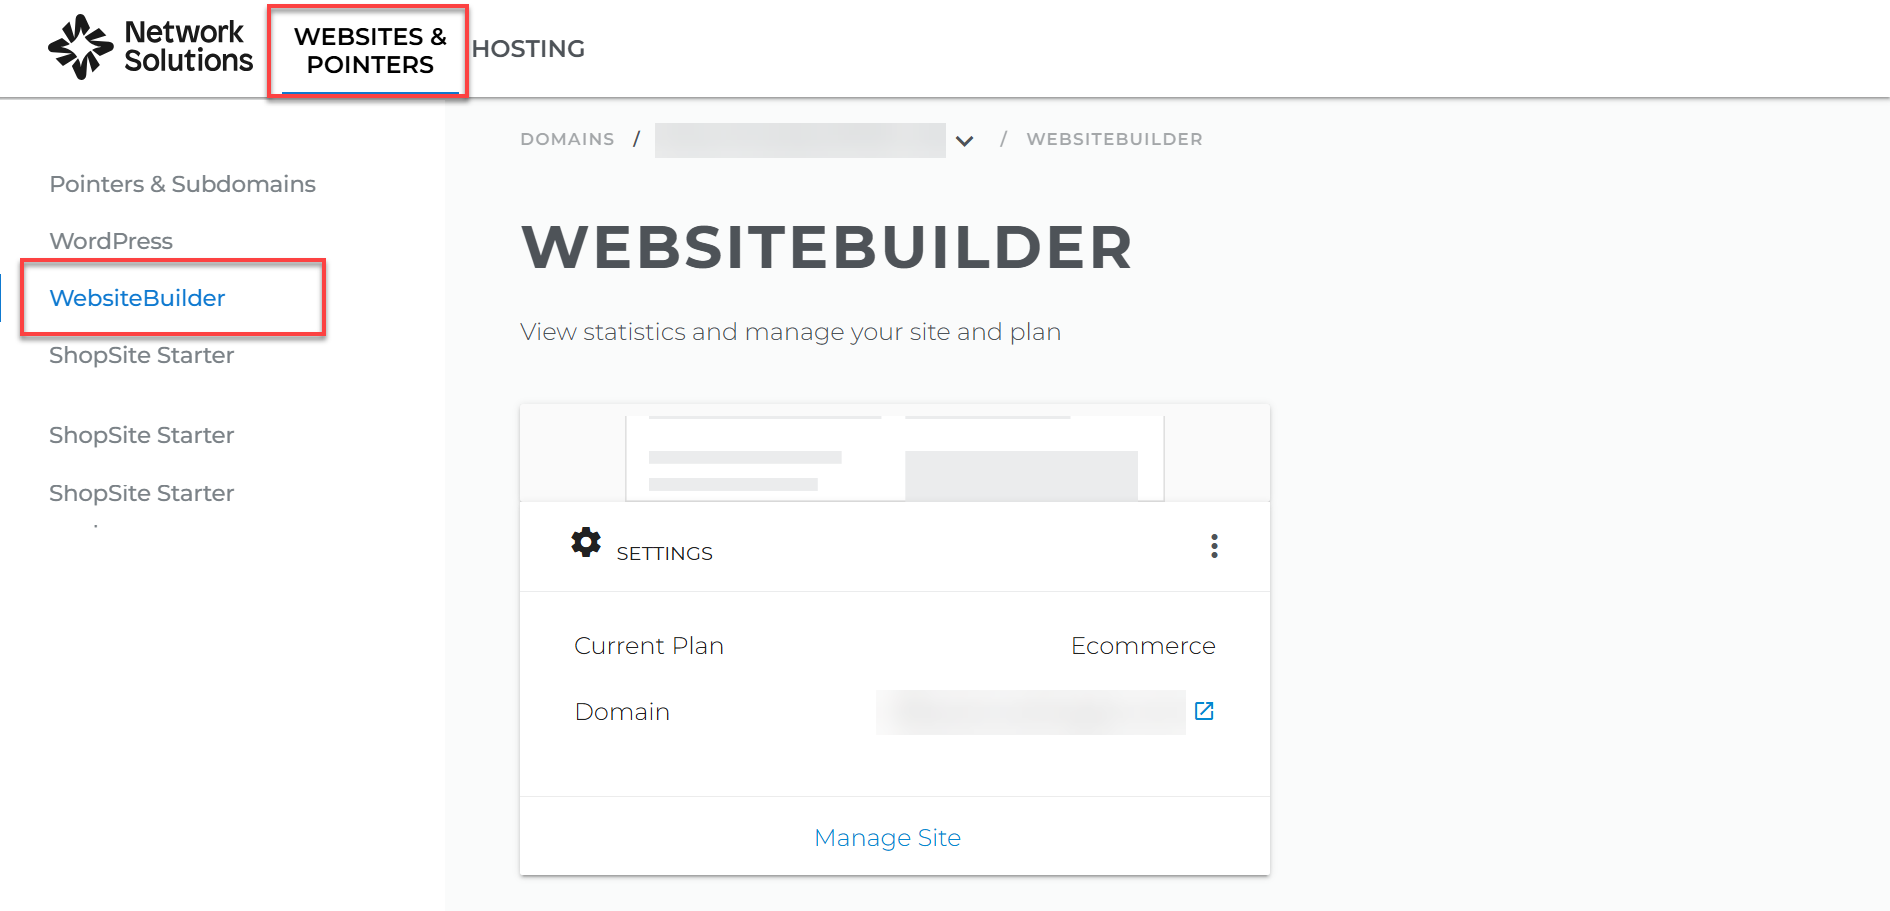
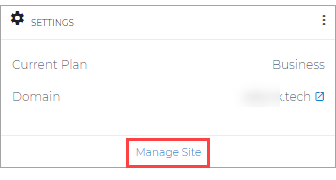
- Click Manage / Manage Site. This action will open your WebsiteBuilder screen in a new tab.
Legacy WebsiteBuilder WebsiteBuilder Express editor 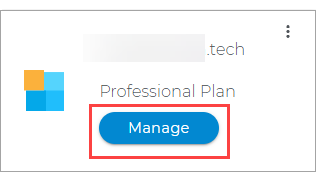
Legacy WebsiteBuilder editor:
Adding a new page to your site
- Click Pages, then click Add New Page.
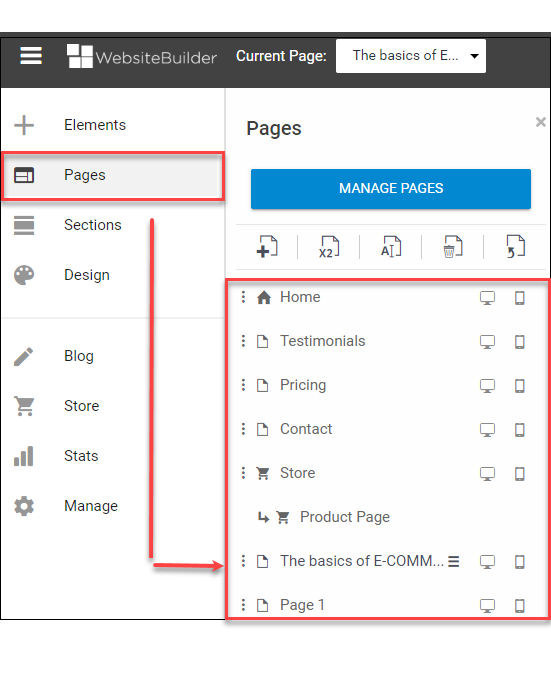
- Choose your desired page type.
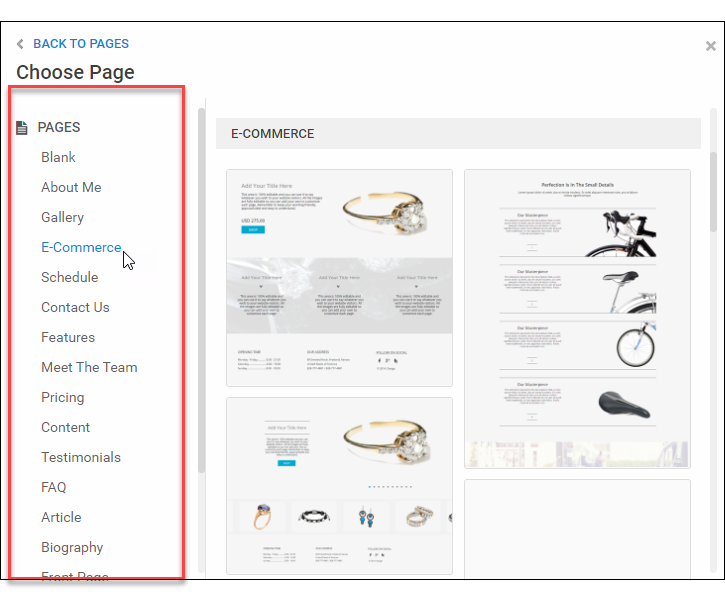
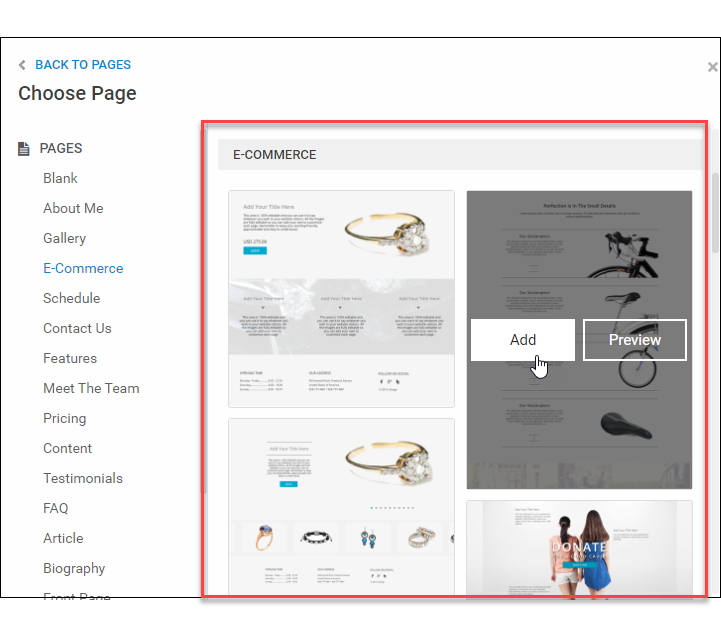
- Choose your desired layout, then click the Add button.
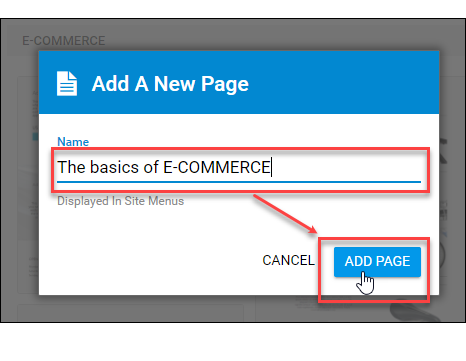
- Type an appropriate name for your page, then click the ADD PAGE button.
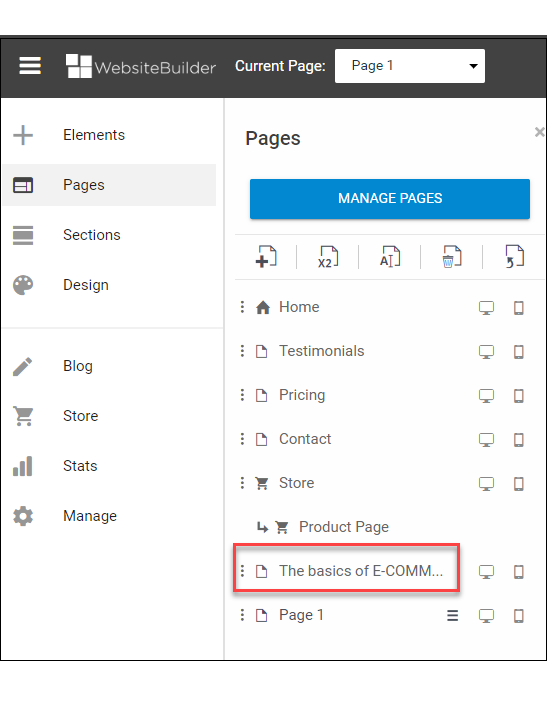
- Click on Pages again to verify if the new page has been added.
- Once done, click Save. If you want to make all changes available on your live website, click Publish. Both options are placed at the top of your editor. Note: if you only save changes, they will not appear on the website unless you click Publish.

Deleting a page from your site
- Click Pages, then the page to be deleted.
- Click Delete Current Page.
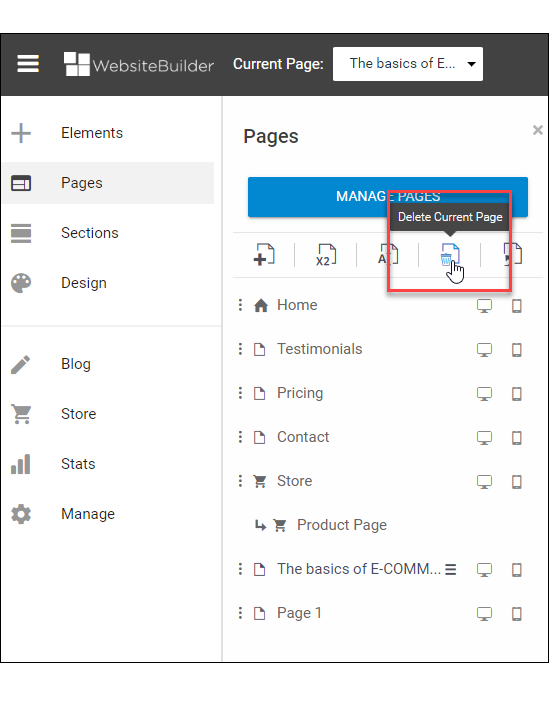
- When prompted, click the DELETE button to proceed. Otherwise, click CANCEL.
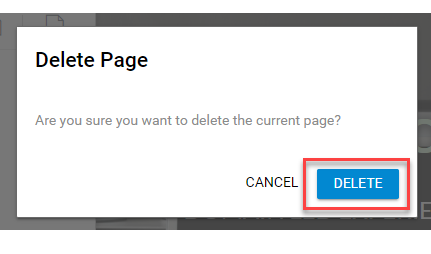
- Click on Pages again to verify if the page has been deleted.
- Remember to save your work by clicking the Save icon. After saving, click the Publish button on the upper part of your editor screen. Remember that changes are only visible after you have saved and published your work.
WebsiteBuilder Express editor:
Adding a new page to your site
- Click the Home drop-down menu on the upper left, then click the Navigation management link to open the Manage Navigation screen.
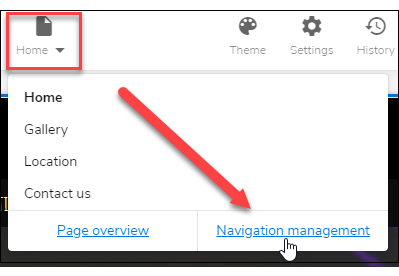
- From the Manage Navigation screen, click the Add item button in the lower-left corner.
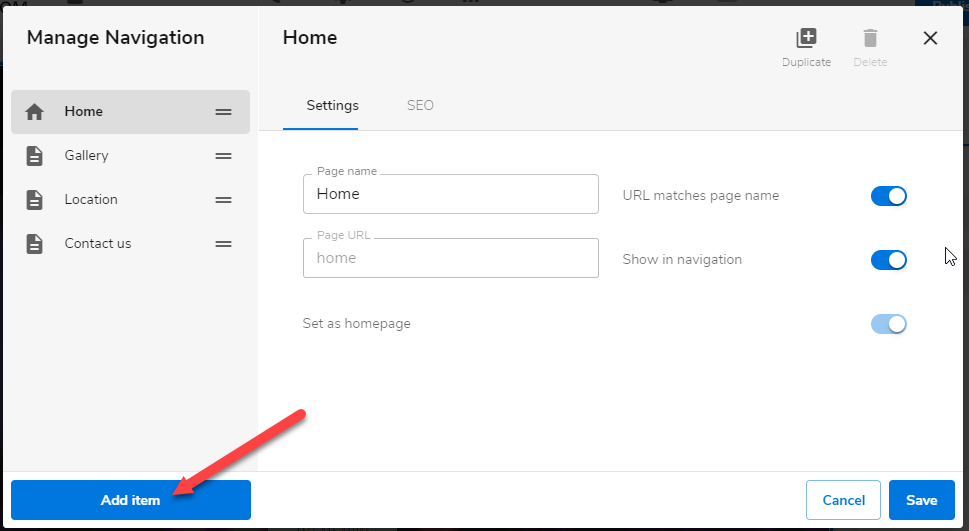
- Select Internal page.
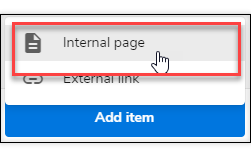
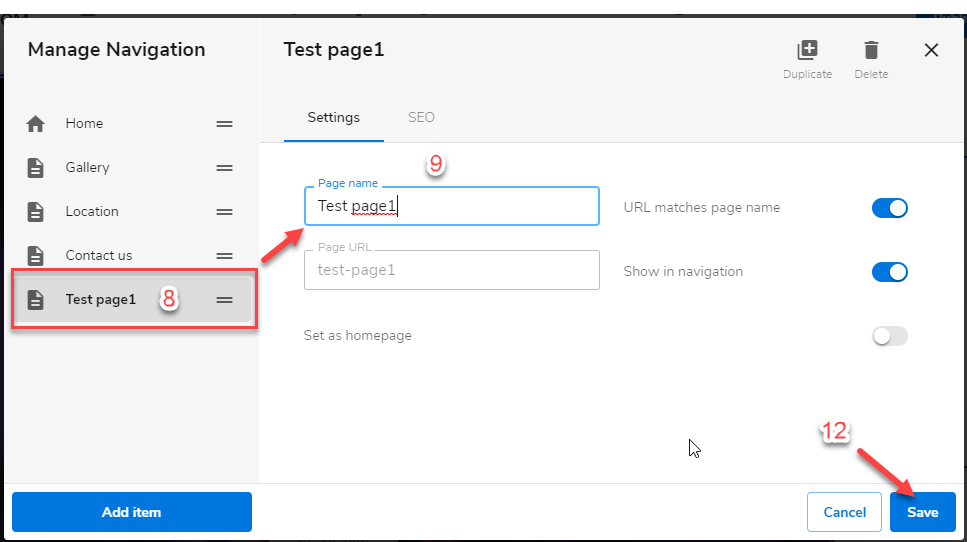
- Notice that a new page has been added to your Manage Navigation list.
- Type an appropriate name for this newly added page in the Page name field. Make sure to click Save.
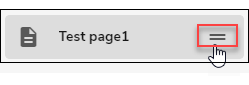
- Optional: To arrange the list to your desired order, click and hold the drag bars of the page that you want to move. Drag it up or down to the desired position.
- Optional: If you wish to specify this newly added page as your homepage, toggle the "Set as homepage" switch to the on position.

- When editing is complete, click Save. If you want to make all changes available on your live website, click Publish. Both options are placed at the top of your editor.
Note: if you only save changes, they will not appear on the website unless you click Publish.

Deleting a page from your site
Warning: If you delete a page, all of its contents will be lost and unrecoverable.
- Open the Manage Navigation screen.
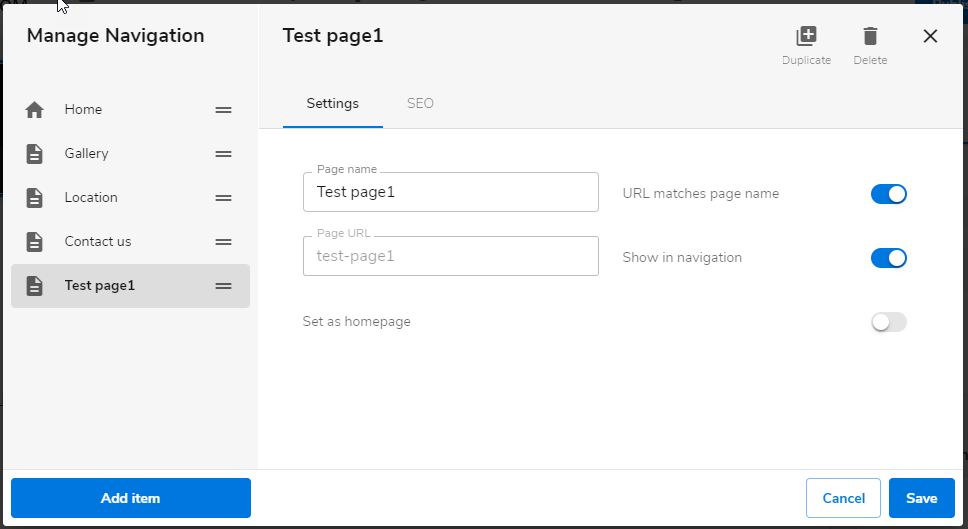
- Select the page that you want to delete from the Manage Navigation list.
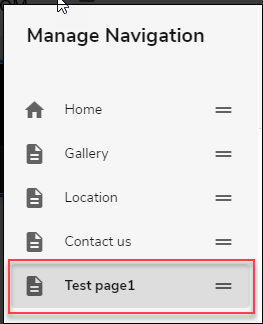
- Make sure that the page you are deleting is currently not selected as your homepage. To deselect this page, click a different page from the Manage Navigation list and toggle its Set as homepage switch to on. When you are finished, go back to the page that you want to delete.

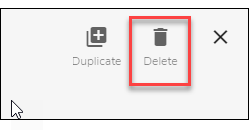
- Click the Delete icon on the upper right.
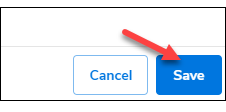
- To keep the changes, click the Save button on the bottom right.
- Remember to save your work by clicking the Save icon. After saving, click the Publish button on the upper part of your editor screen. Remember that changes are only visible after you have saved and published your work.
Get practical tips and product updates on LinkedIn.
Follow Network Solutions
Did you find this article helpful?