Knowledge Base
Categories: Powered by Network Solutions
Powered By Network Solutions: WebsiteBuilder - How to Create a Shipping Label
Note: Make sure that you have already added and set up a Store section to your website before proceeding with the steps below.
- Log in to your Account Manager via https://www.networksolutions.com/my-account/login.
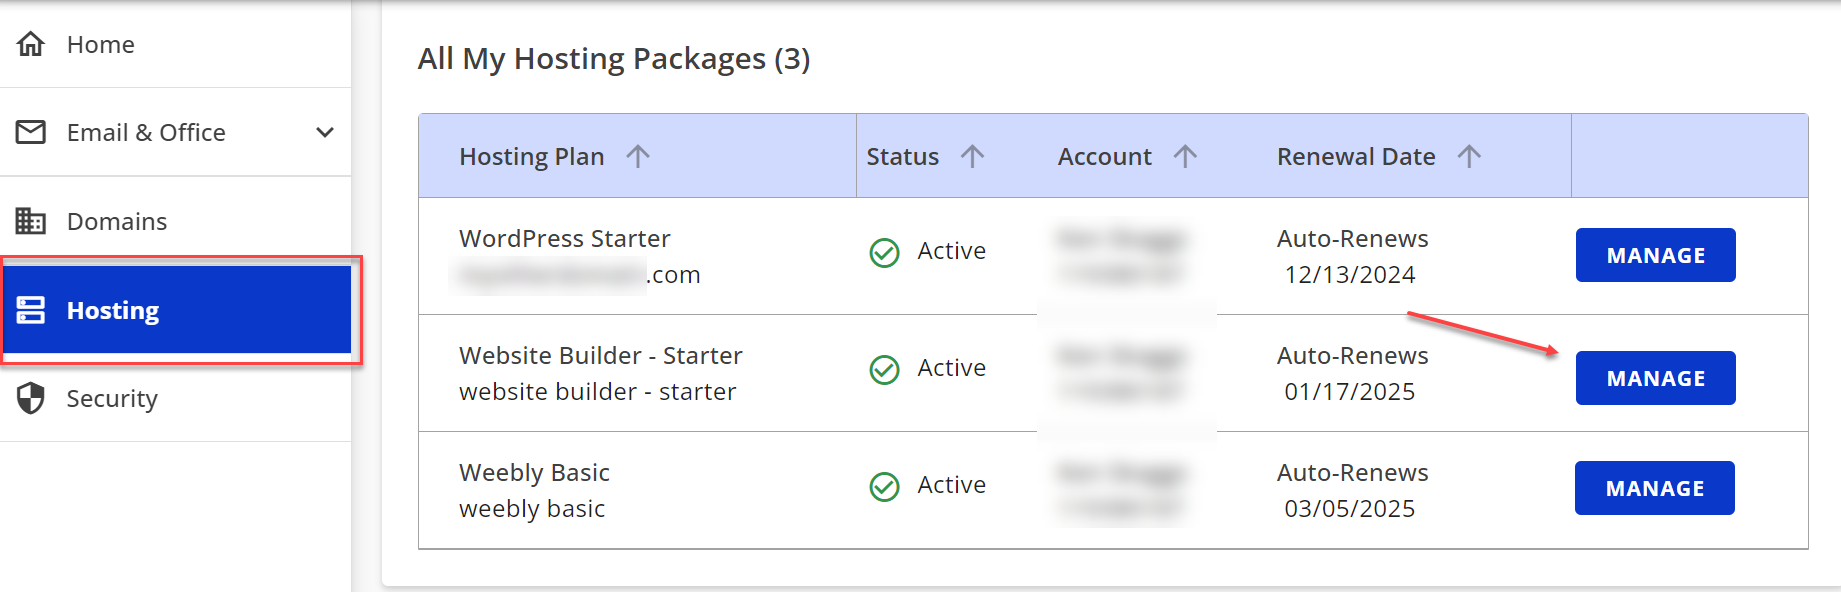
- Click Hosting on the left menu, then click the MANAGE button next to the WebsiteBuilder plan you would like to update.
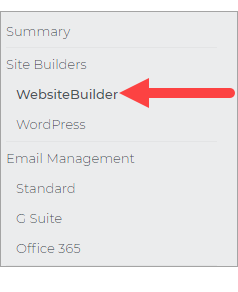
- On the left pane, click on WebsiteBuilder, under Site Builders.
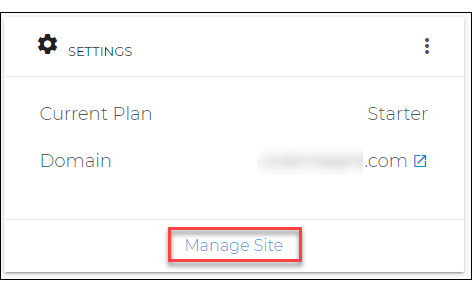
- Under Settings, click Manage Site. This action will open your WebsiteBuilder screen on a new tab.
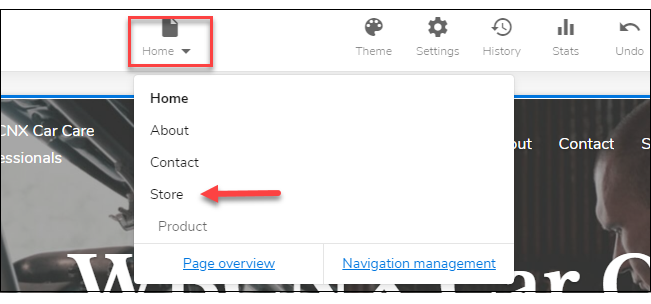
- Click the page navigation drop-down menu on the upper left and select Store.
- From your Store page, click on your Store section.
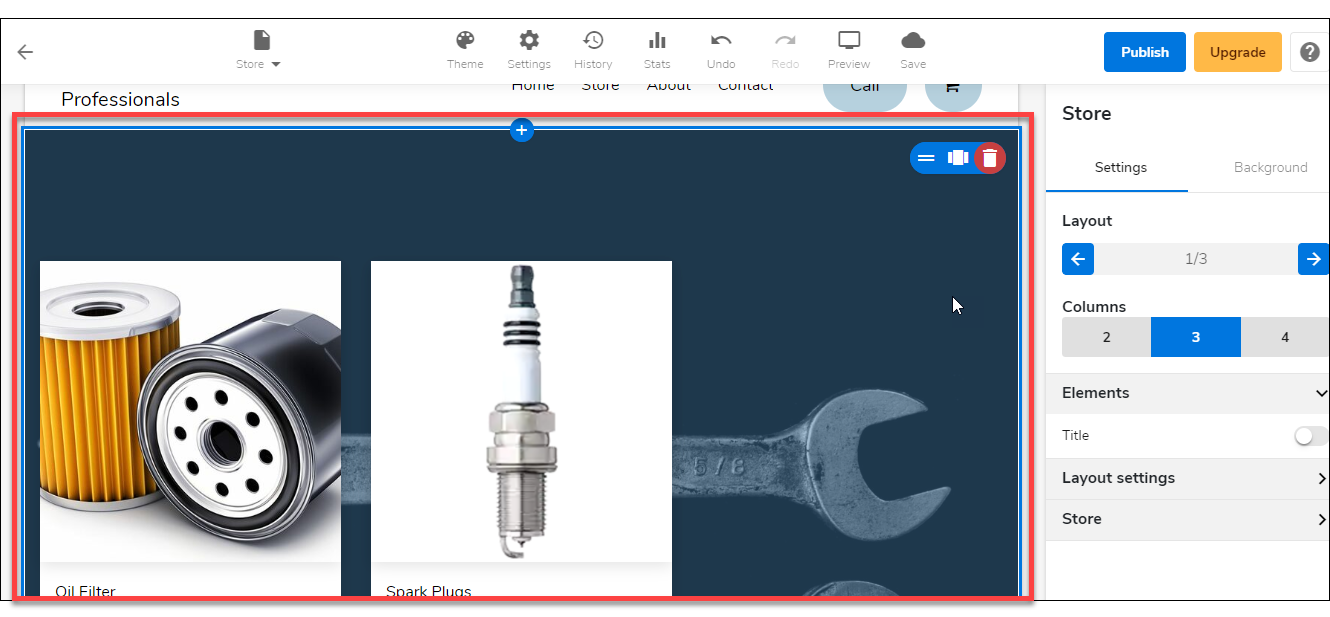
- On the right pane, click on the Settings tab. Then expand the Store settings menu on the bottom.
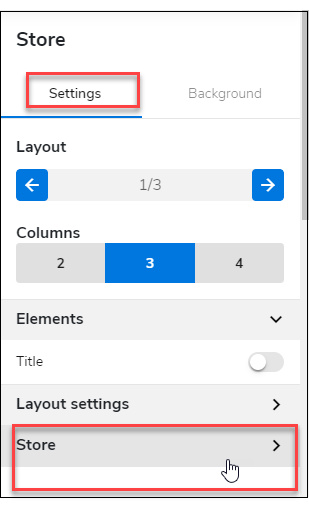
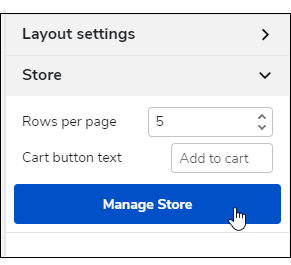
- Under Store settings, click the Manage Store button.
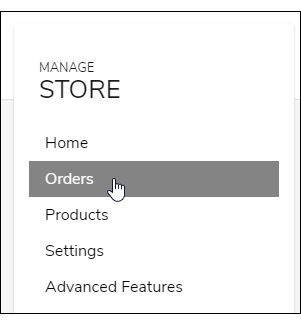
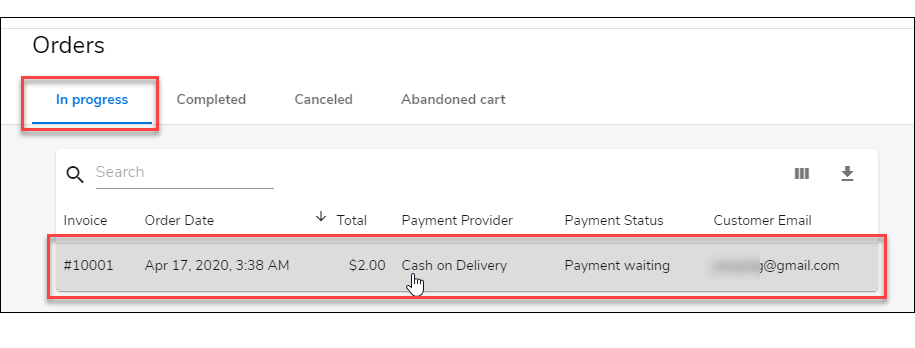
- Once the Manage Store screen is up, click on Orders from the left pane.
- On the Orders screen, click the In progress tab. Then, select the order that you want to print.
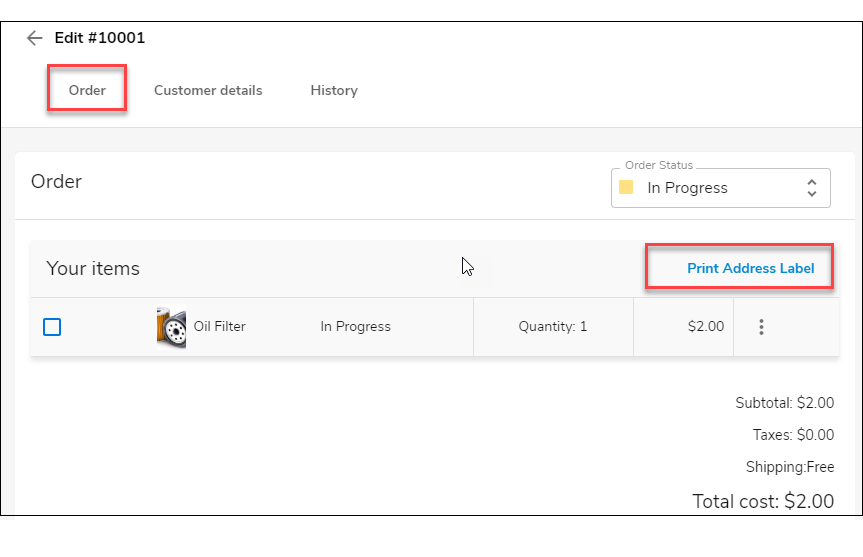
- On the Order Details screen, click the Order tab. Then click on the Print Address Label link.
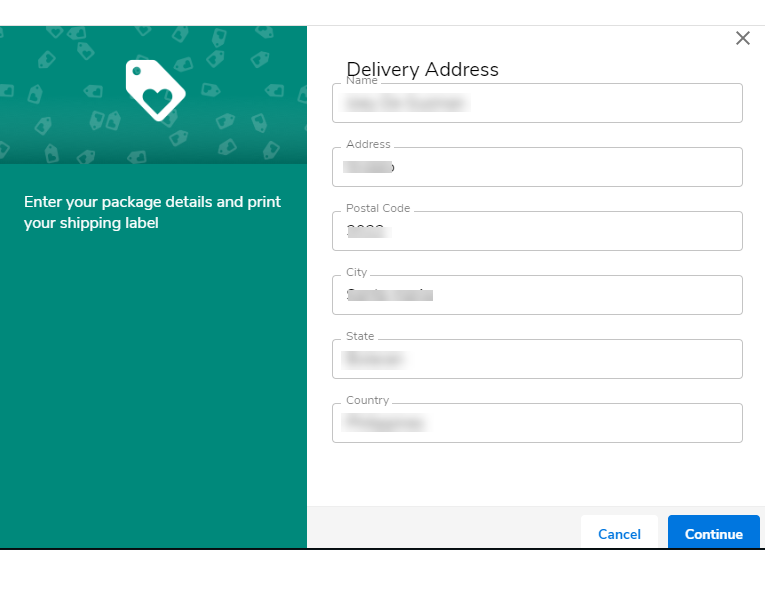
- On the next screen, please enter the delivery address. Then click Continue.
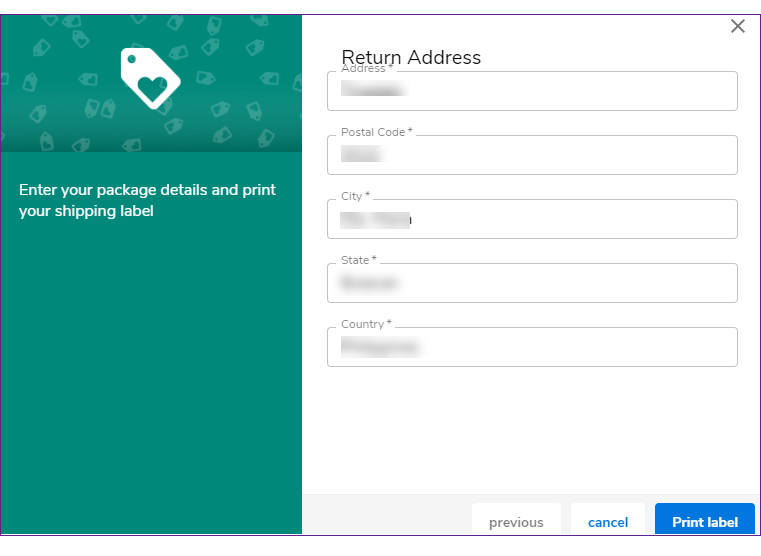
- Lastly. On the next page, please enter the return address. Then click Print Label.
Get practical tips and product updates on LinkedIn.
Follow Network Solutions
Did you find this article helpful?