Knowledge Base
Categories: Powered by Network Solutions
Powered by Network Solutions: WebsiteBuilder - Integrated Shipping
Important: We offer two different versions of WebsiteBuilder. Our original implementation is the Legacy WebsiteBuilder editor, while WebsiteBuilder Express editor is the newest interface commonly found in the Foundation dashboard. It is not possible to upgrade a Legacy WebsiteBuilder site to the Express editor. The site will need to be recreated with the Express editor. All new WebsiteBuilder installations will be the Express editor.
Note: Follow the instructions that match your WebsiteBuilder version.
How to check if I have Legacy WebsiteBuilder editor or Express editor?
| Legacy WebsiteBuilder | WebsiteBuilder Express editor |
|---|---|
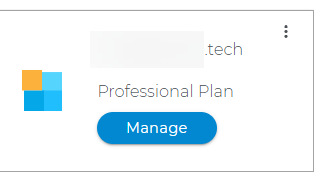 |
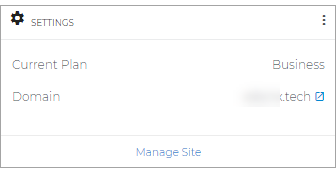 |
How to launch WebsiteBuilder?
- Log in to your account manager via https://www.networksolutions.com/my-account/login.
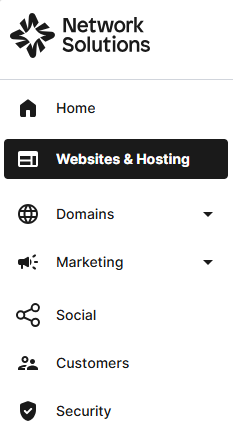
- Click Websites & Hosting from the left navigation menu.
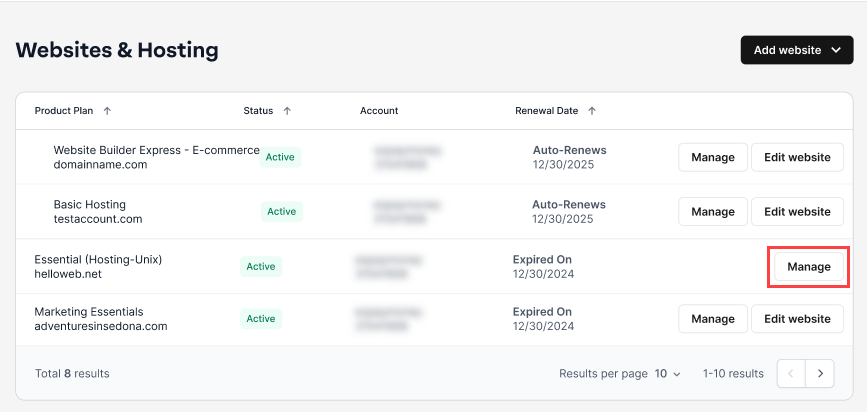
- Navigate to the hosting package that you want to update, then click Manage to continue.
- Click WEBSITES & POINTERS. In the left pane, click WebsiteBuilder.
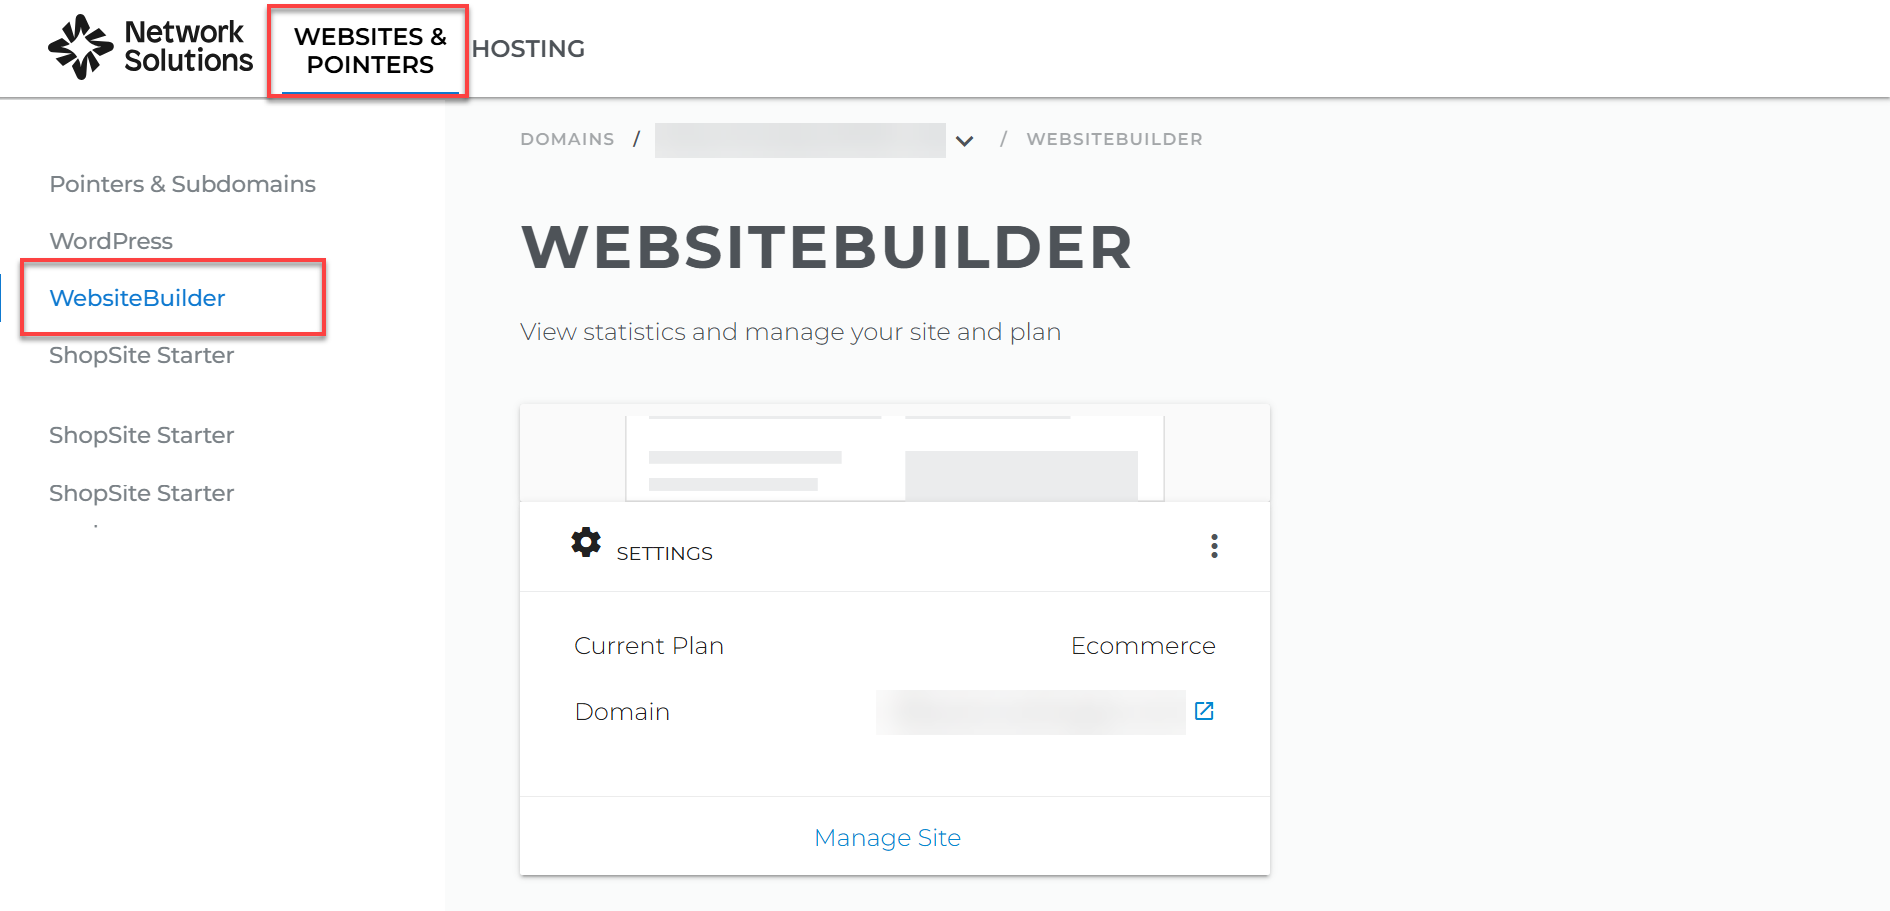
How to activate Integrated Shipping with the Legacy WebsiteBuilder editor
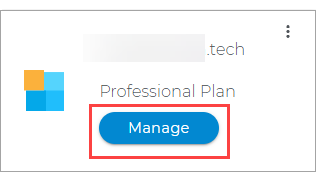
- To launch your Legacy Website Builder editor, click Manage.
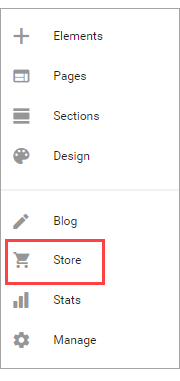
- Once you are in, click on the Store Section on the left menu.
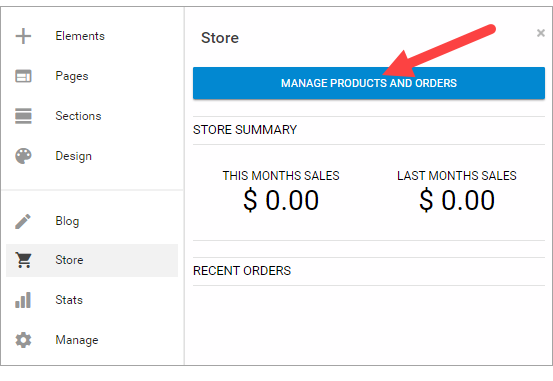
- Then hit Manage Products and Orders.
- Inside the Manage Store settings, click on Advanced Features.
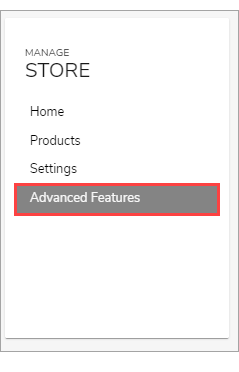
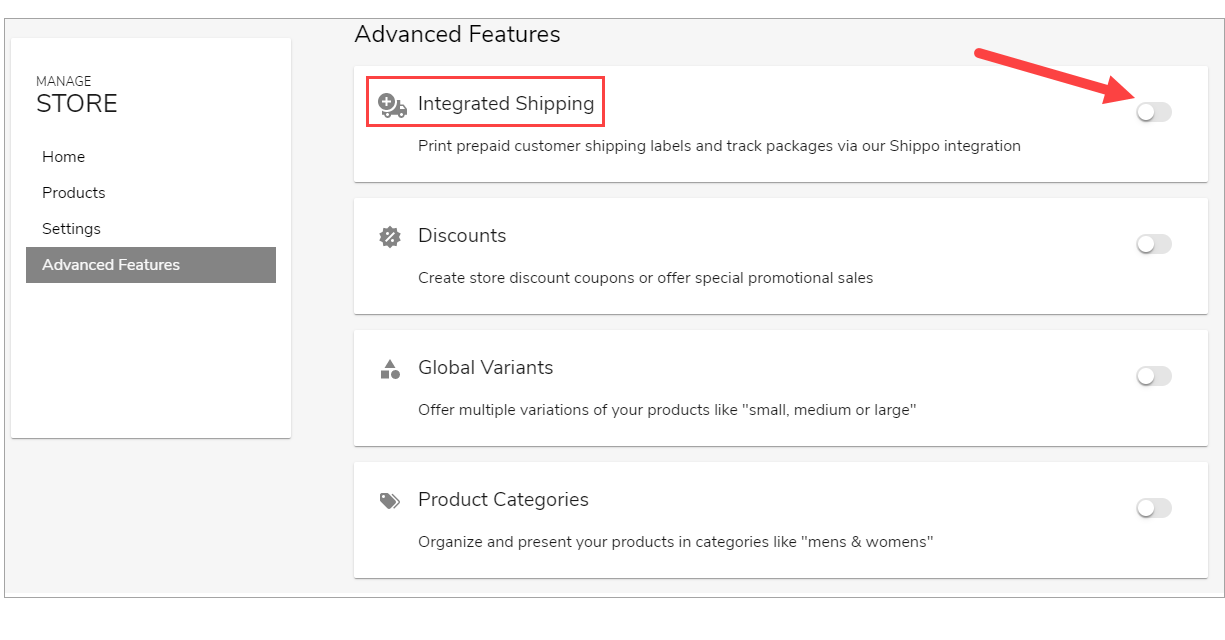
- Look for Integrated Shipping and turn it on.
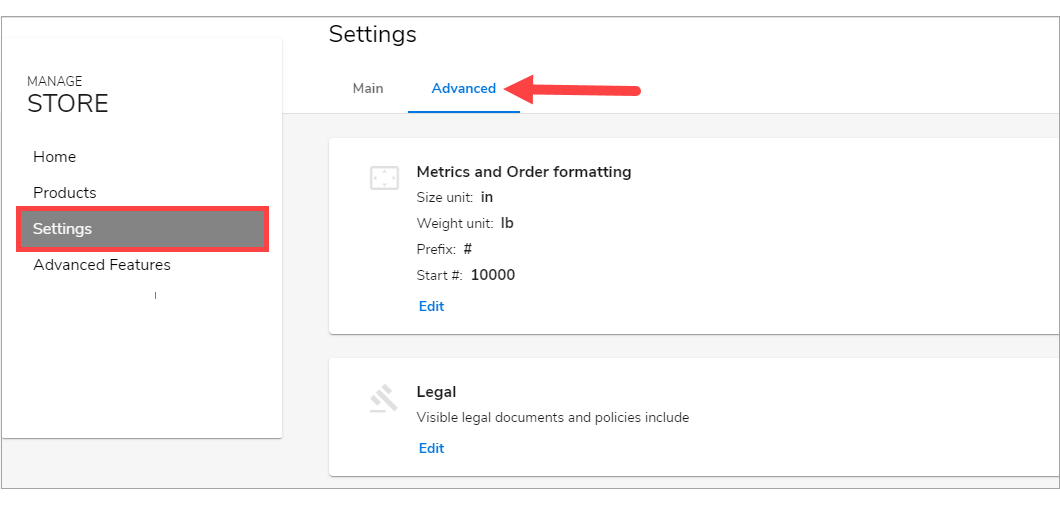
- Then on the left menu, click Settings and click Advanced
- Scroll down and click Set up with Shippo.
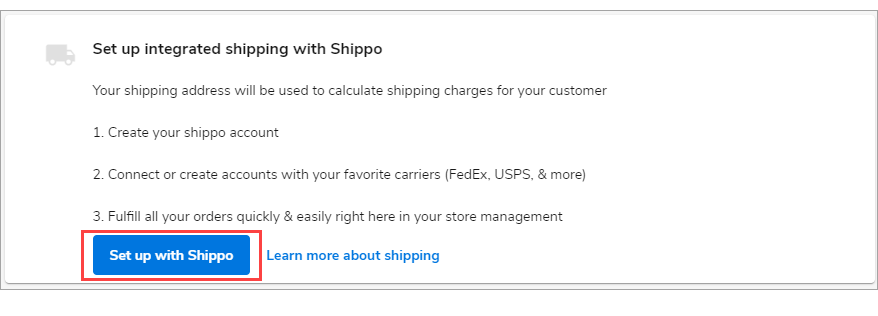
Note: To know how to set up Shippo, just click here.
How to activate Integrated Shipping with the Express editor
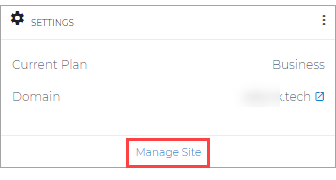
- To launch your Website Builder editor, click Manage Site.
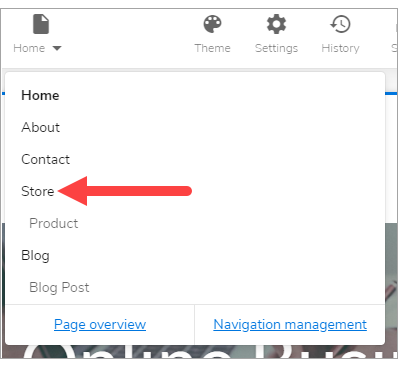
- On the top section of your editor screen, look for the drop-down of pages, then click Store.
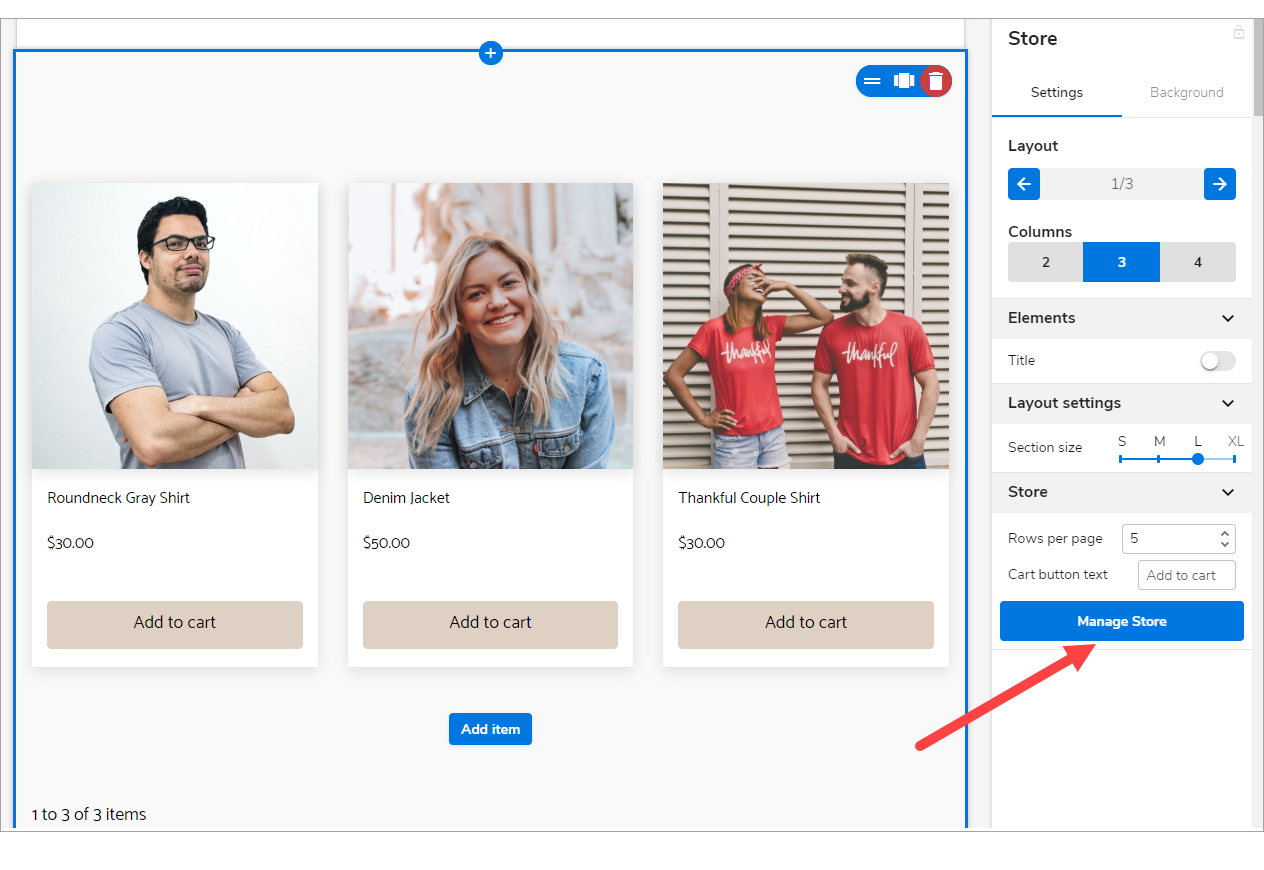
- Hover your mouse to one of the sections and notice that several options will slide on the right pane. Look for Manage Store.
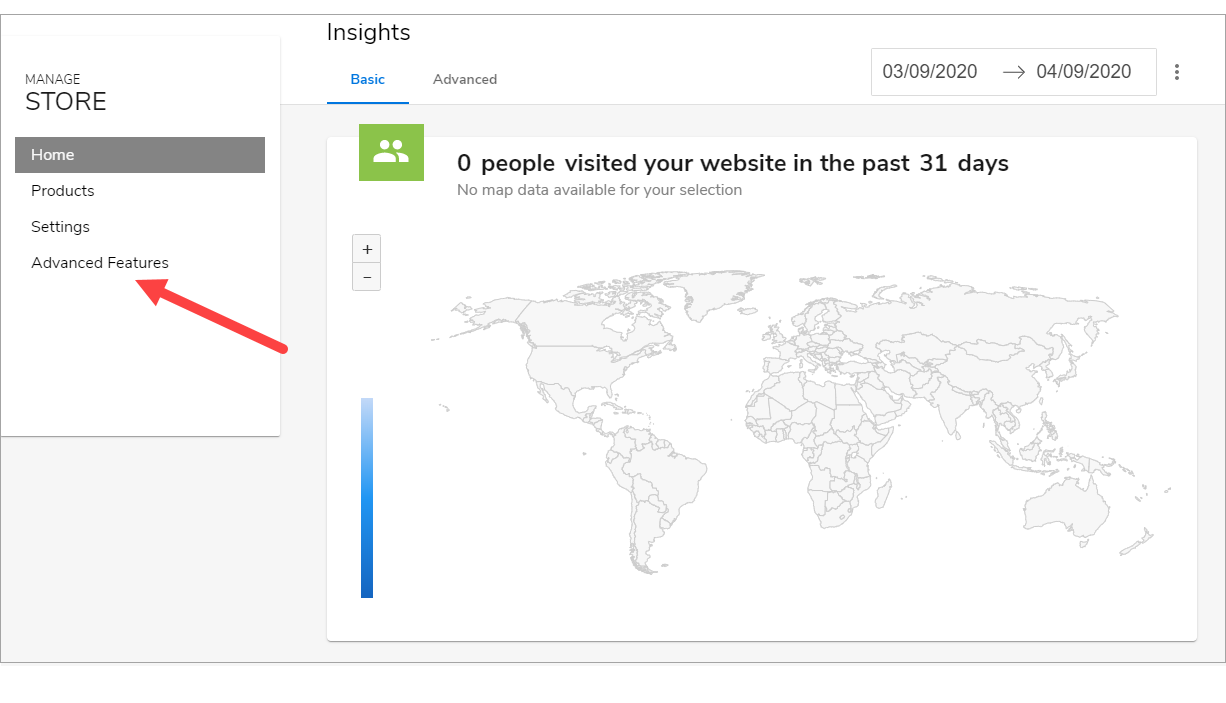
- On the left menu inside the Manage Store page, click Advanced Features.
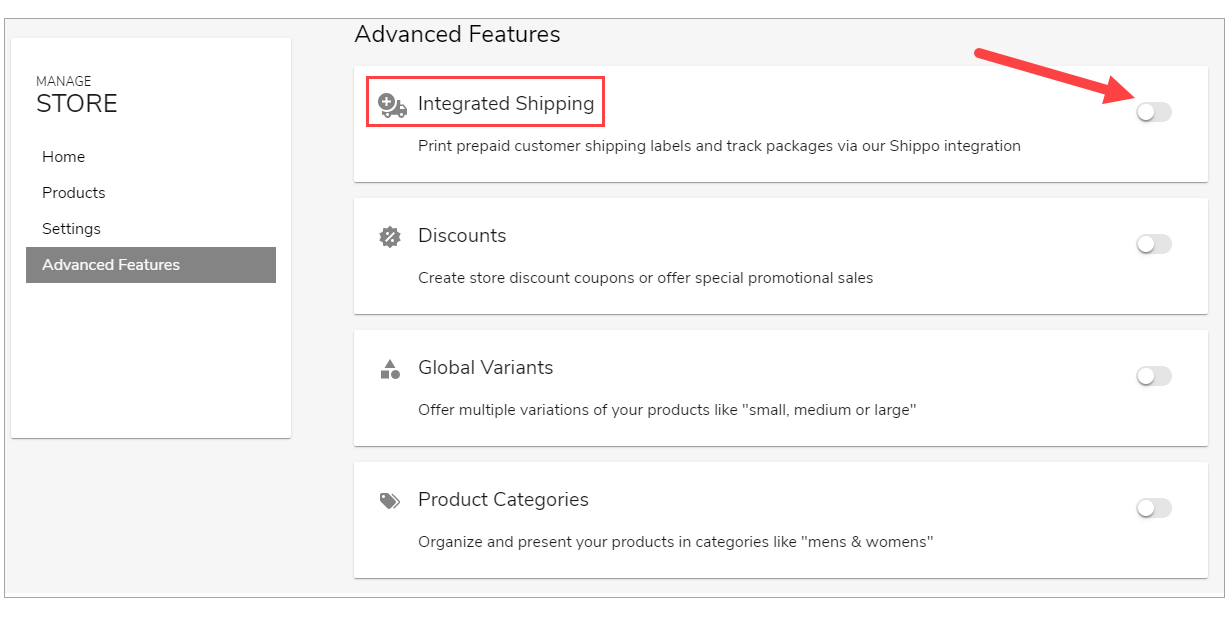
- Look for Integrated Shipping and turn it on.
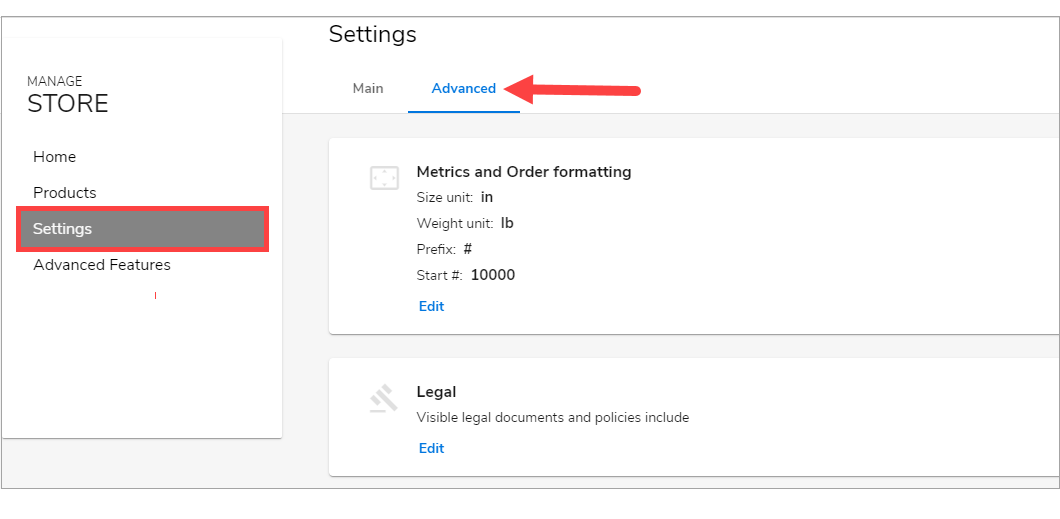
- Then on the left menu, click Settings and click Advanced.
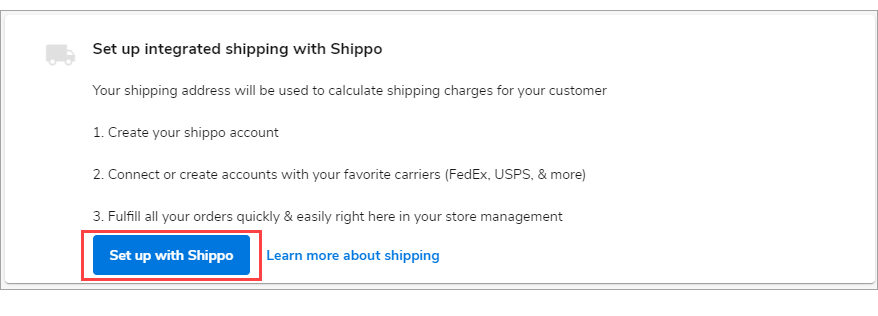
- Scroll down and click Set up with Shippo.
How to set up Shippo
Creating an account
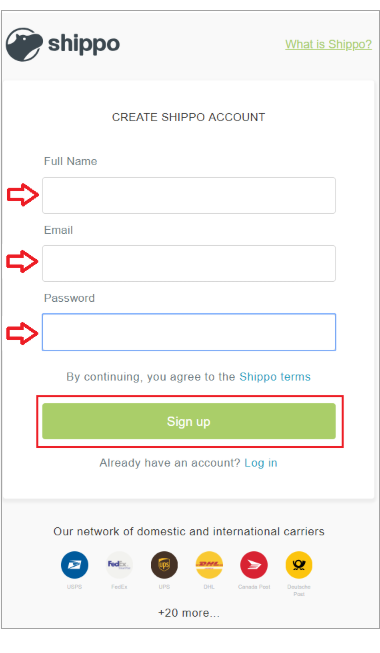
- After clicking Set up with Shippo, enter the details required, and select Sign up to continue.
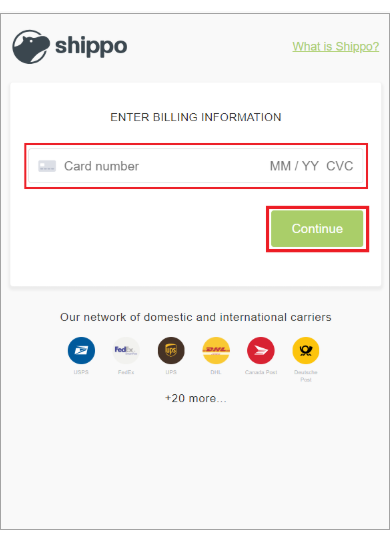
- Enter your billing information, and select continue.
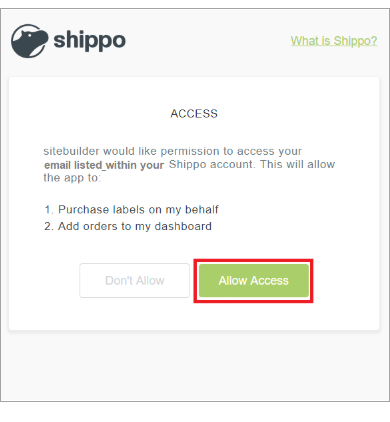
- Be sure to Allow Access to complete the account creation.
Setting up Carriers
Once you create your account, you will need to set up the carriers you would like to provide.
*USPS is set up automatically for domestic customers; you can update the other carriers later.
- From your Shippo Account, select Add New Carrier from the top left corner.
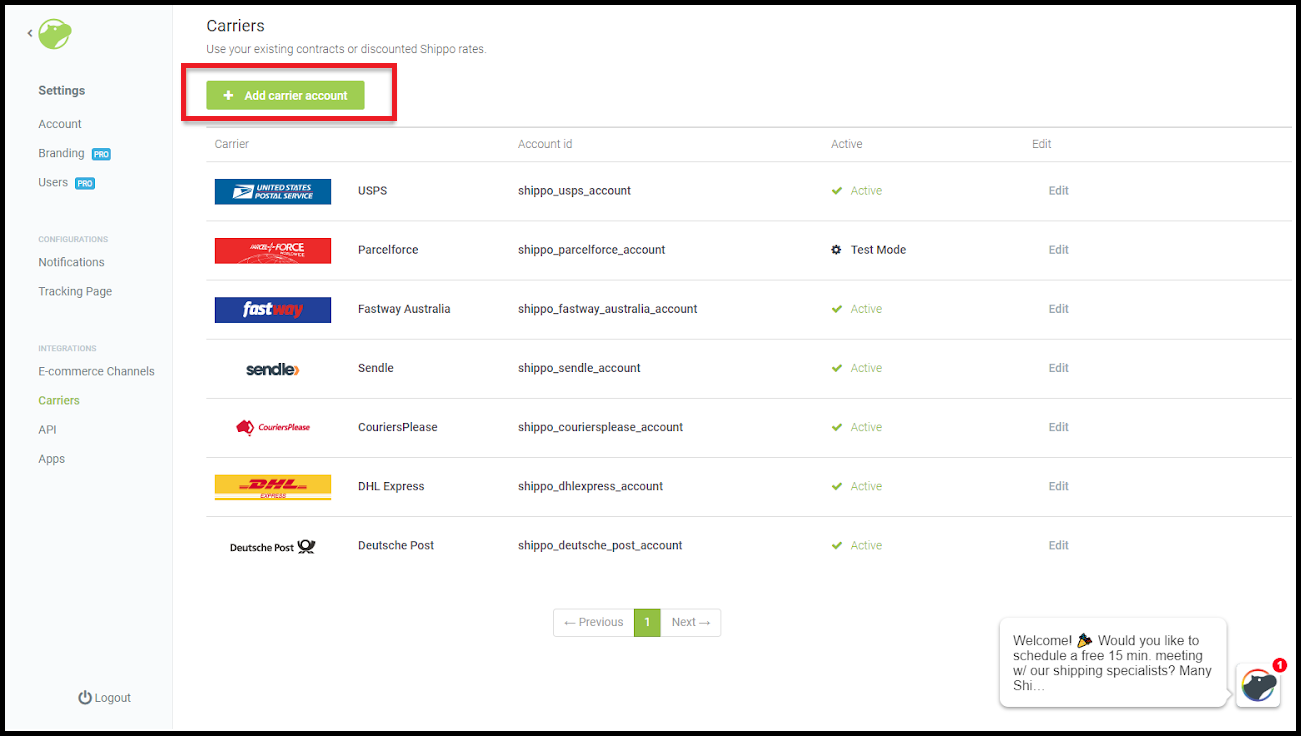
- You can Add New or enter an existing account (i.e., FedEx, UPS, or DHL).
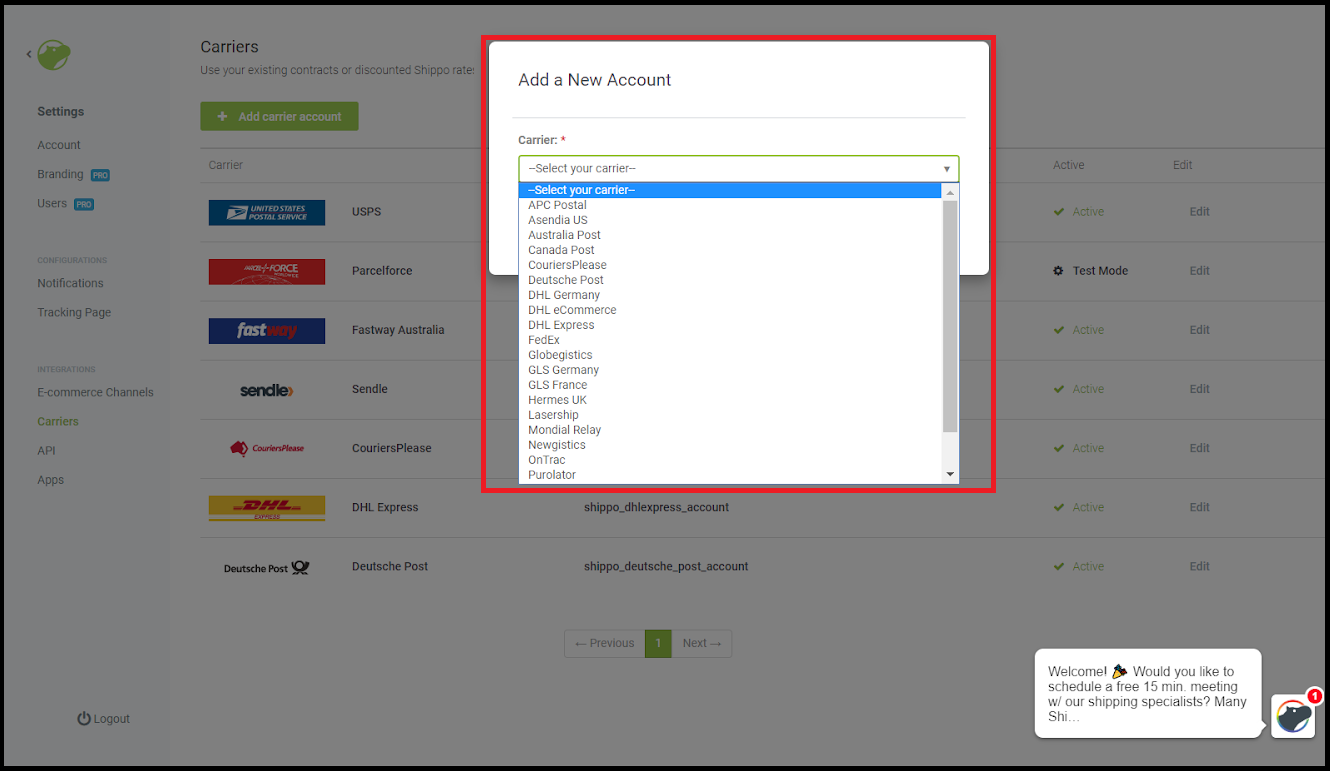
- Once complete, you will navigate back to your WebsiteBuilder account to set up default package sizes.
Enter default package size
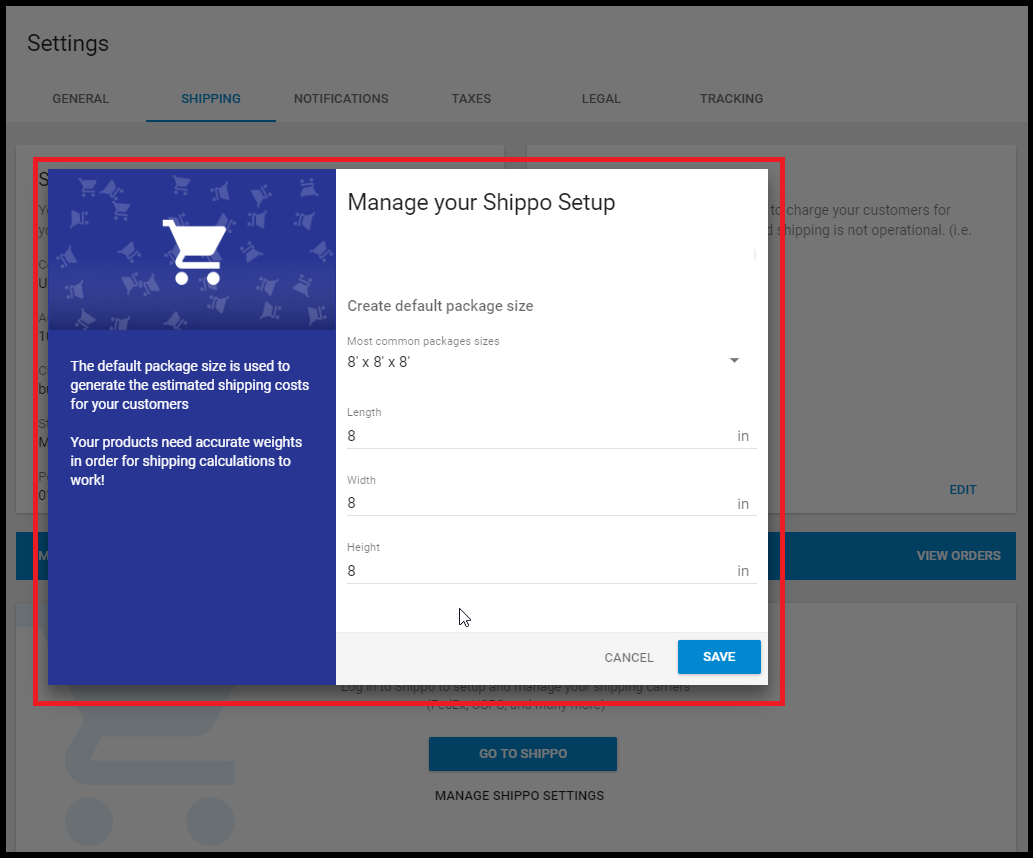
Once you have selected your carriers, navigate back to your account, and add your default package size. The integrated shipping tool will begin the process of estimating shipping costs based on this information.
- Enter your default package size based on the most common item(s) you will ship.
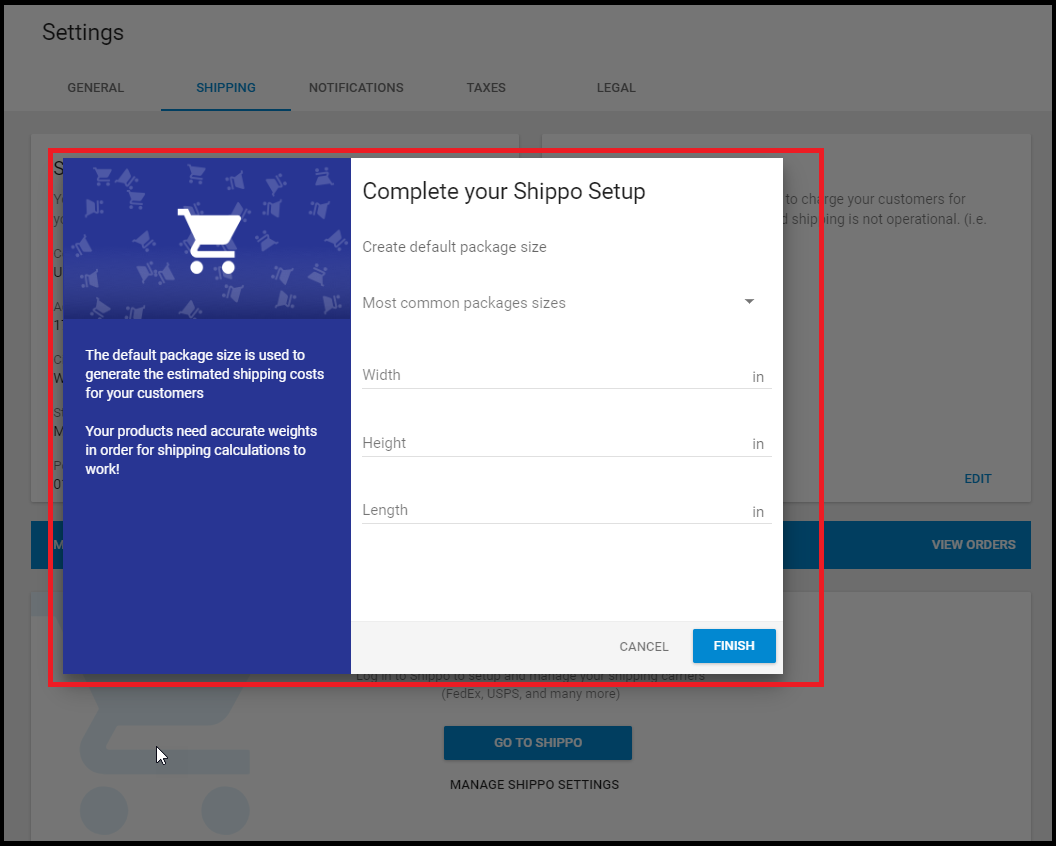
- Once you have added your default package size, click Save to complete this process.
Enter product weights
The last step to setting up Integrated Shipping is to enter the weights for each product you add to your store. To add product weights, first, you may want to review the process for Managing Products, which will cover how to add a product.
- Inside the Add Product page, look for Advanced Settings and click Weights.
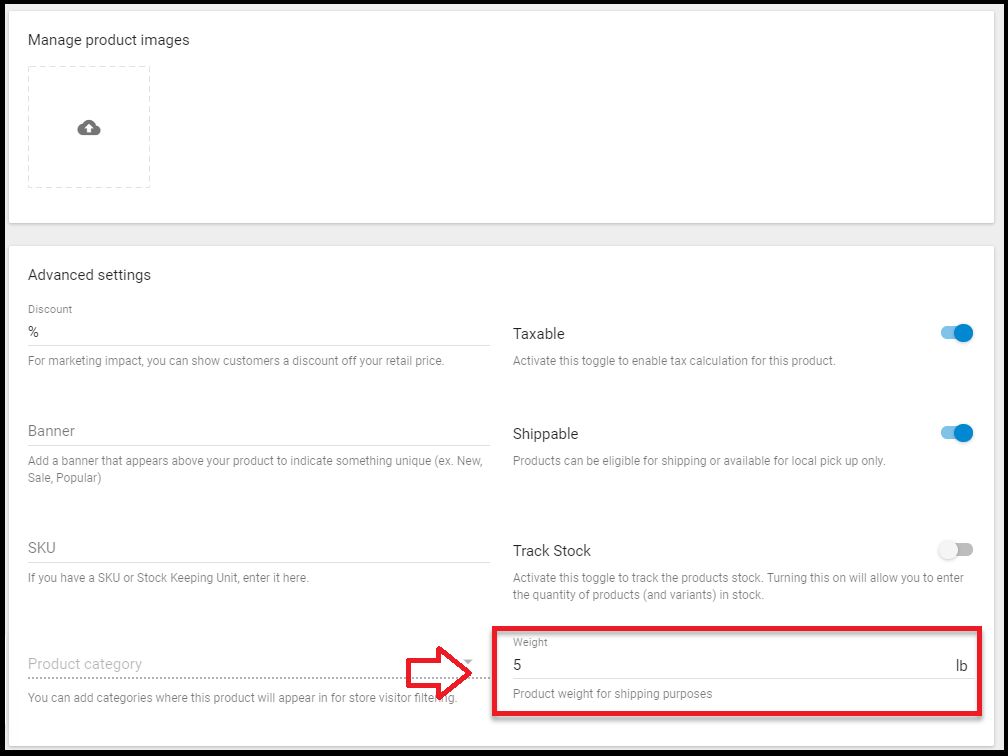
- Enter in all your product details as needed and Save.
Note: The entry of basic shipping settings is required. Flat rates are used as a fallback for the store customer charges. For example, If a product's weight isn't set or experience errors. The "free shipping at a certain order value" is still supported with integrated shipping.
Get practical tips and product updates on LinkedIn.
Follow Network Solutions
Did you find this article helpful?