How to activate and configure cWatch CDN settings
A Content Delivery Network (CDN) is a distributed network of servers designed to deliver website content more quickly, reliably, and securely to visitors worldwide. By reducing page load times, improving availability, and helping protect websites from performance and security-related issues, a CDN plays an important role in enhancing the overall user experience. To fully benefit from these capabilities, it is important to activate and configure cWatch CDN correctly. This guide explains how to activate CDN using the available setup methods, configure CDN settings through the cWatch portal, and manage key cWatch CDN features to help optimize website performance, availability, and security.
In this article, we will discuss:
Accessing cWatch CDN
- Log in to your account via https://www.networksolutions.com/my-account/login.
- Click Security from the left navigation menu.

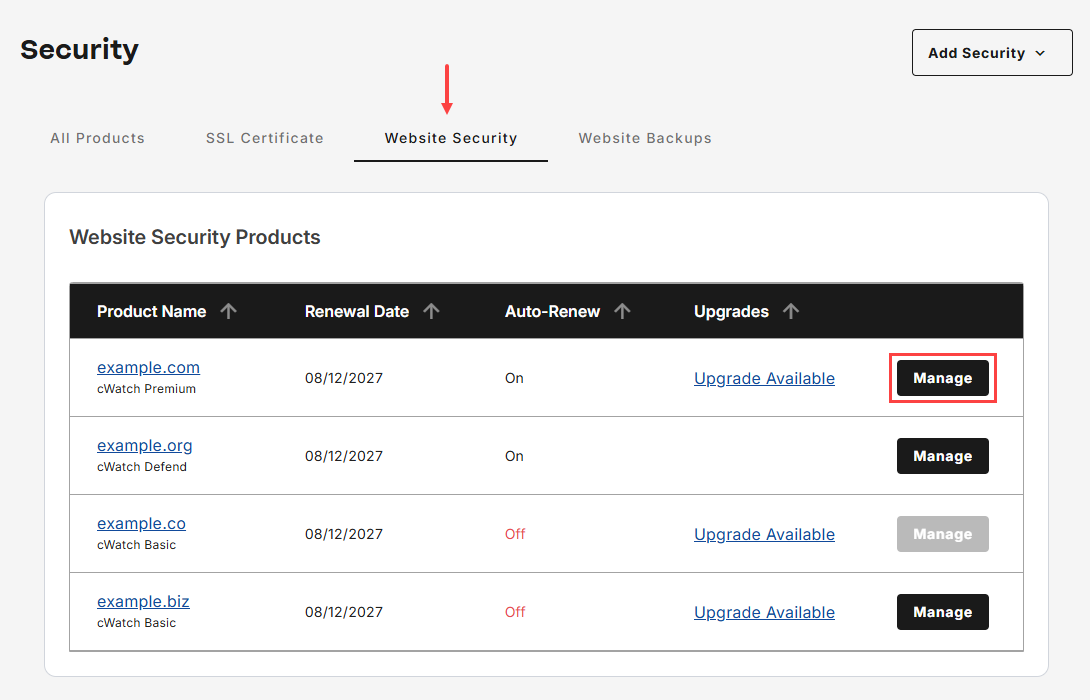
- Go to Website Security, then tap Manage for the domain that you would like to access cWatch.
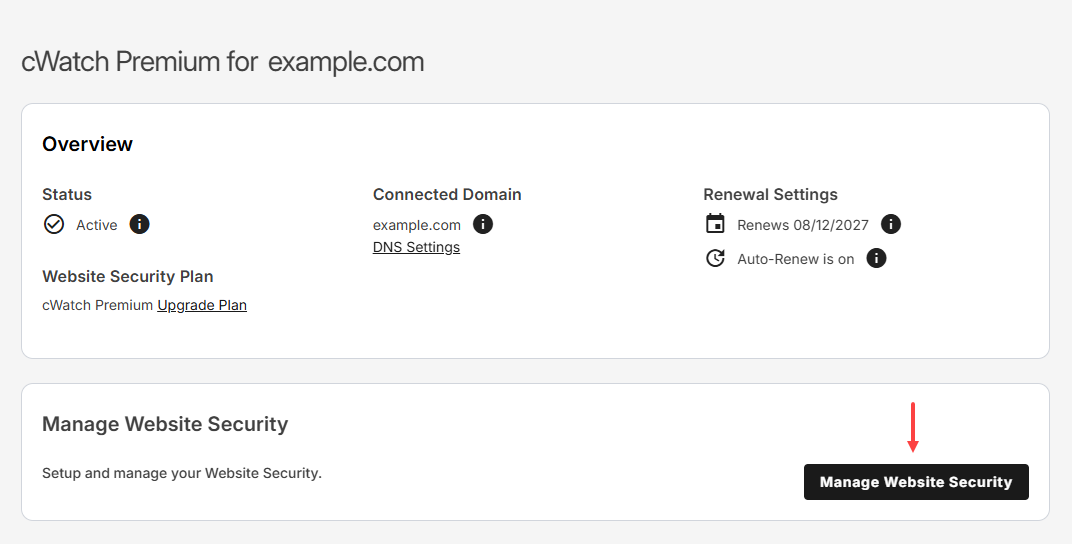
- Tap Manage Website Security to launch cWatch portal.
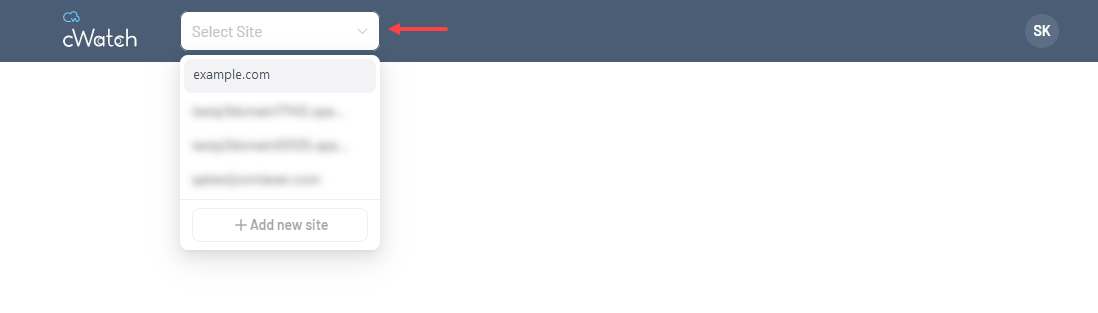
- Ensure that you select the correct domain from the drop-down menu before proceeding with CDN activation and configuration.
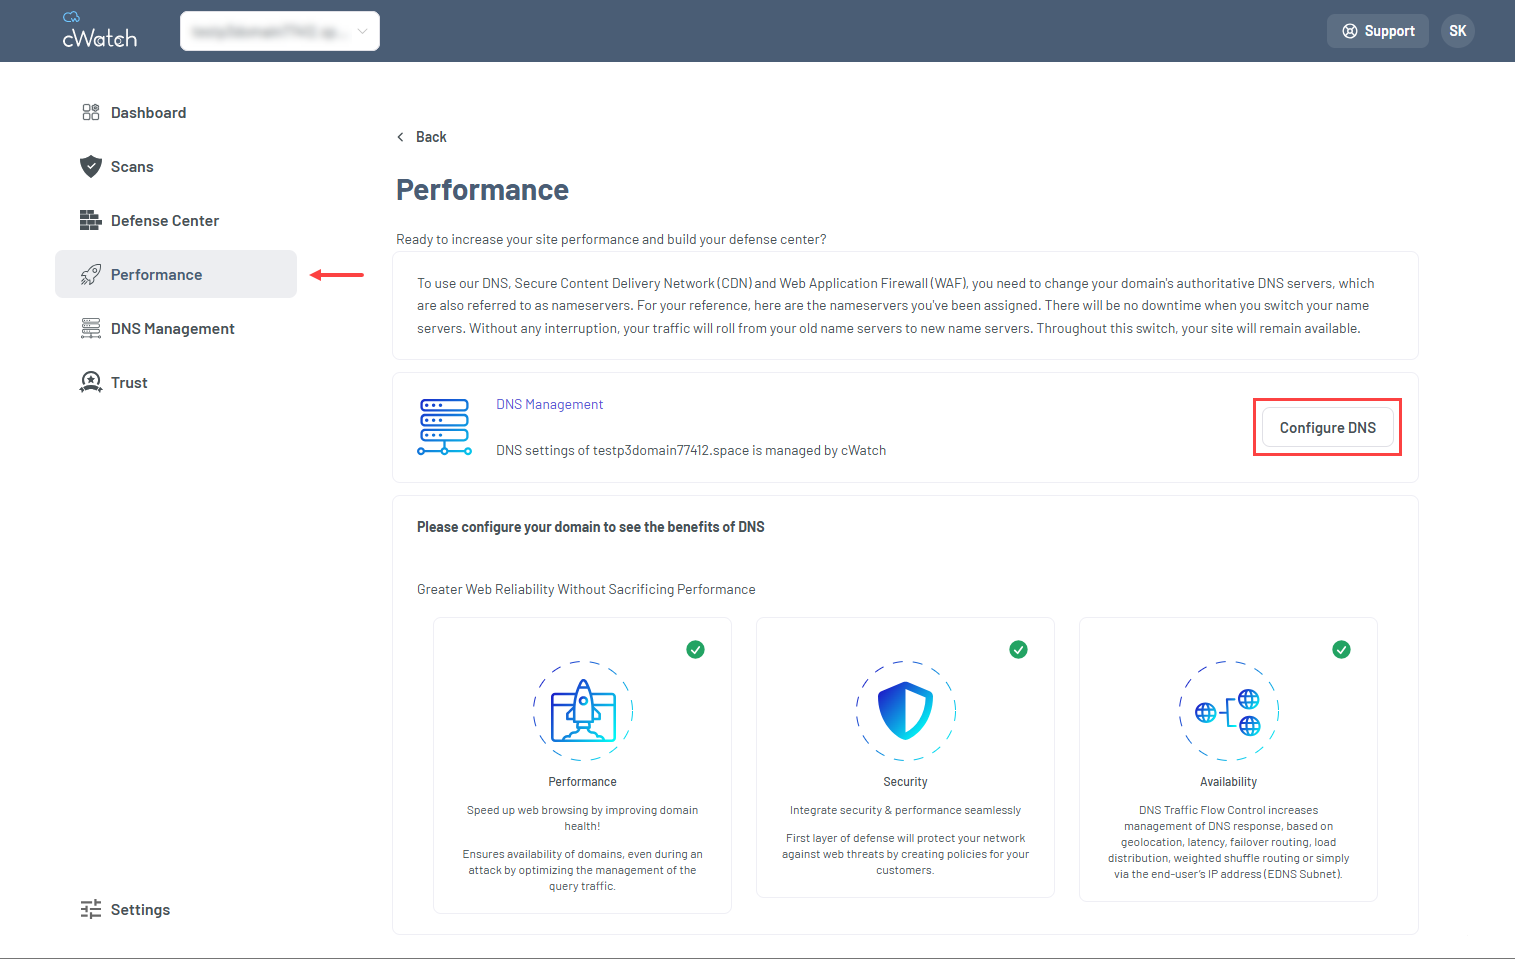
- Go to Performance, then click Configure DNS. Alternatively, you can also click Setup CDN from your main dashboard to navigate directly to this section.
Methods for activating cWatch CDN
Activating the Content Delivery Network (CDN) enables improved website performance, enhanced security, and increased availability. Depending on your DNS setup and registrar capabilities, you can activate a CDN using either of the following methods:
This method delegates DNS management to the CDN platform and automatically enables DNS, CDN, and WAF services.
Prerequisites
- Access to your domain registrar account
- Permission to modify domain nameservers
Activation steps
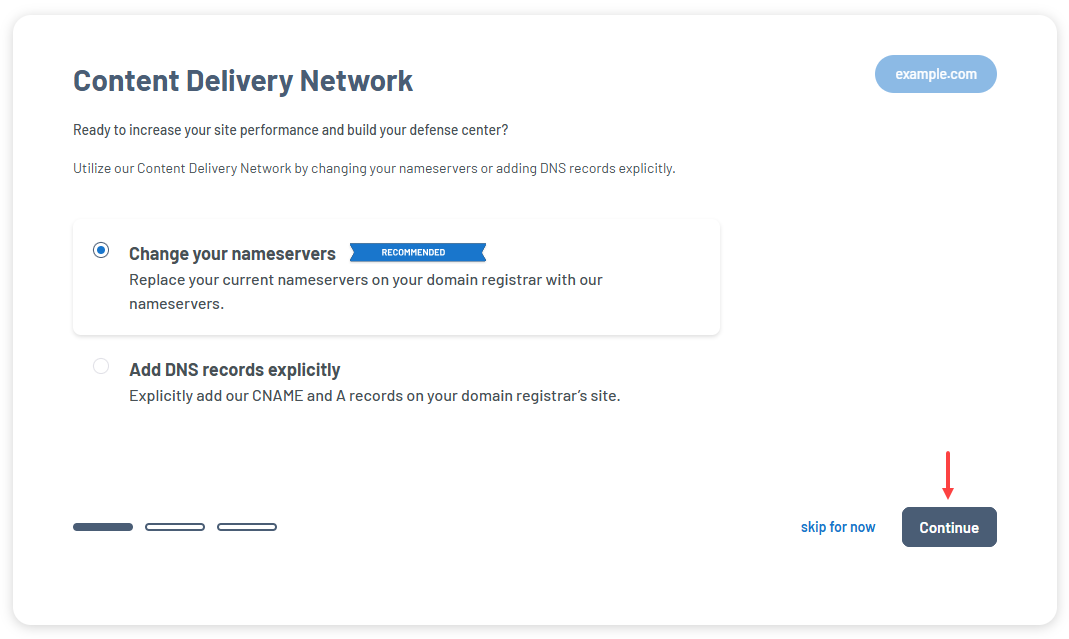
- Select Change your nameservers, click Continue.
- Replace your current nameservers with the following assigned nameservers.
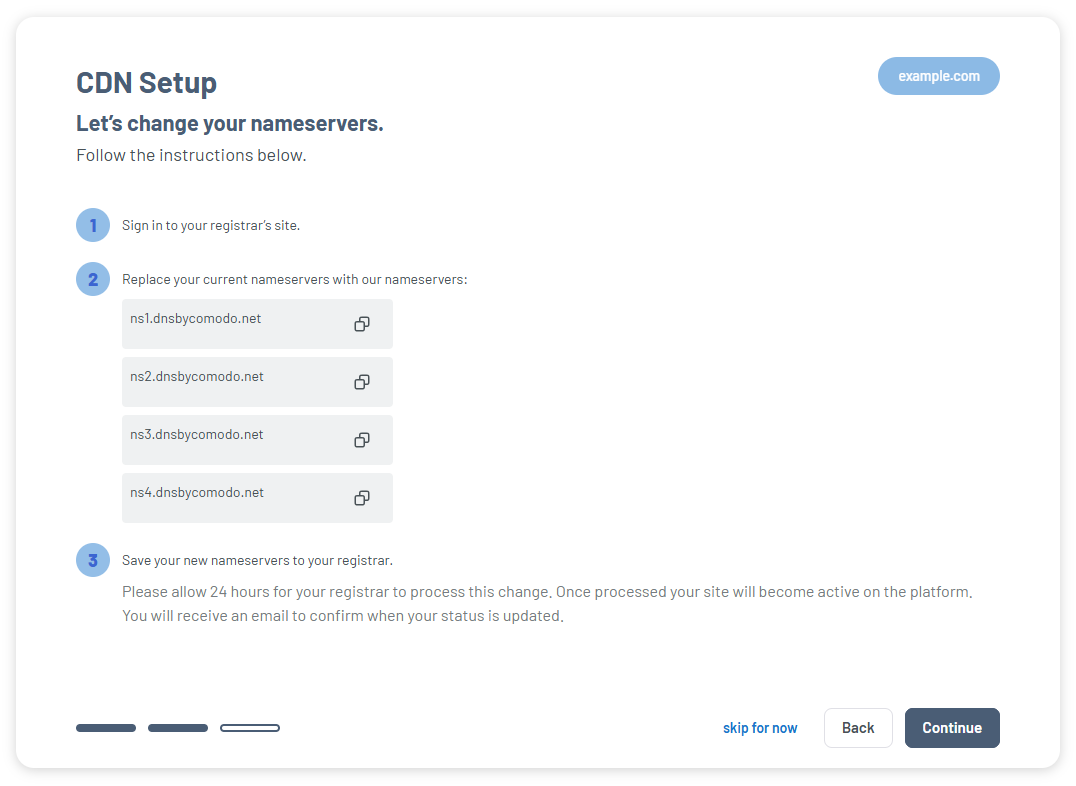
- Save the updated nameservers and allow up to 24 hours for the registrar and DNS infrastructure to process changes.
- Once the process is complete, go to your cWatch Settings, select Content Delivery Network, and click Check Propagation.
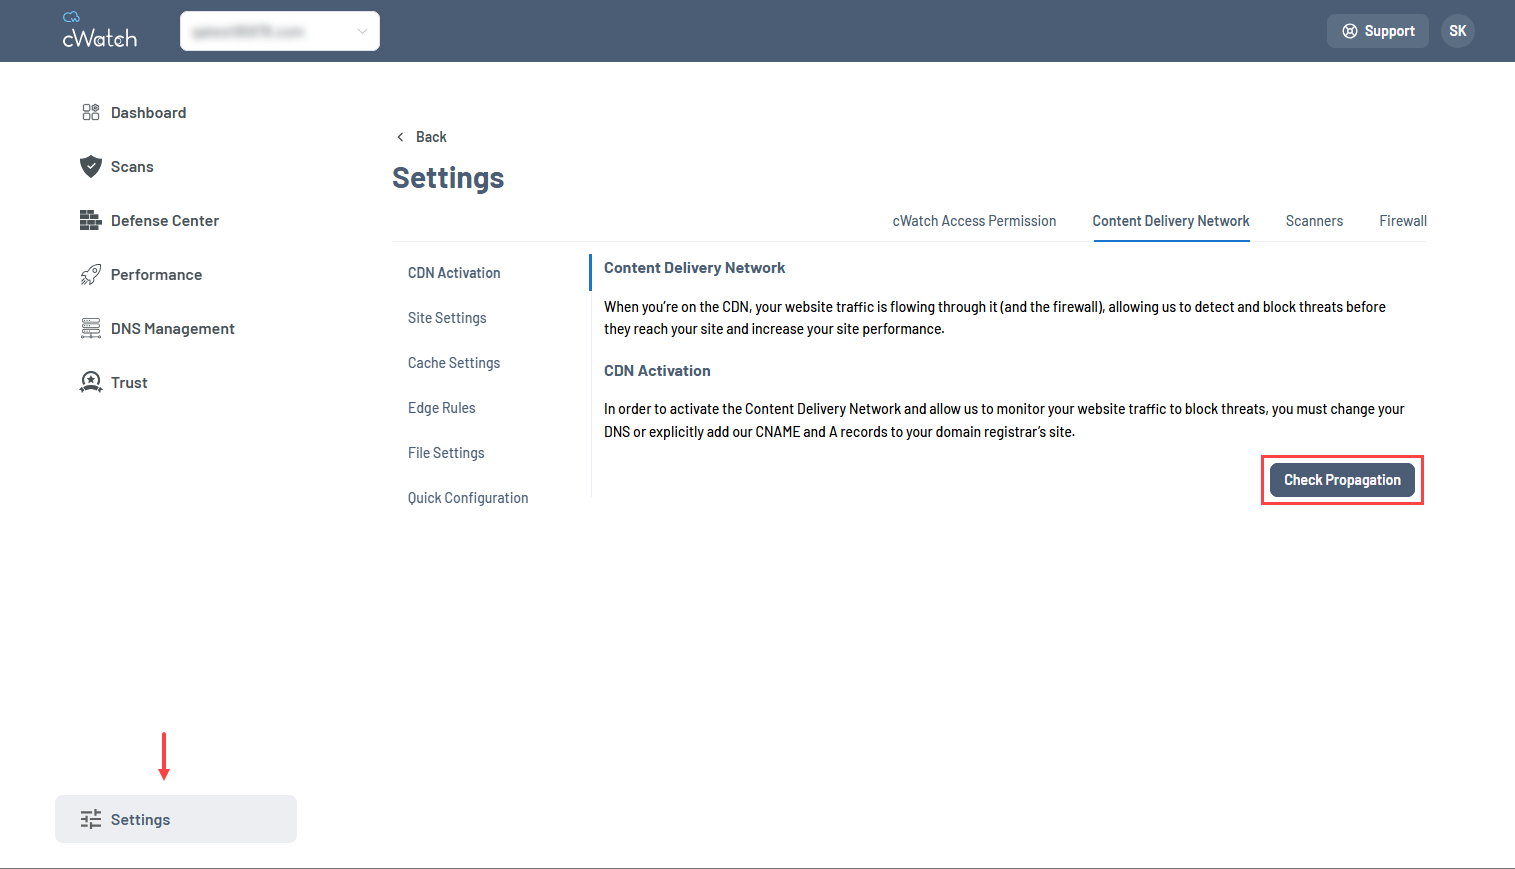
- After completing steps 1 and 2, click Continue to check that the CDN has been successfully configured and is ready to be managed through the platform.
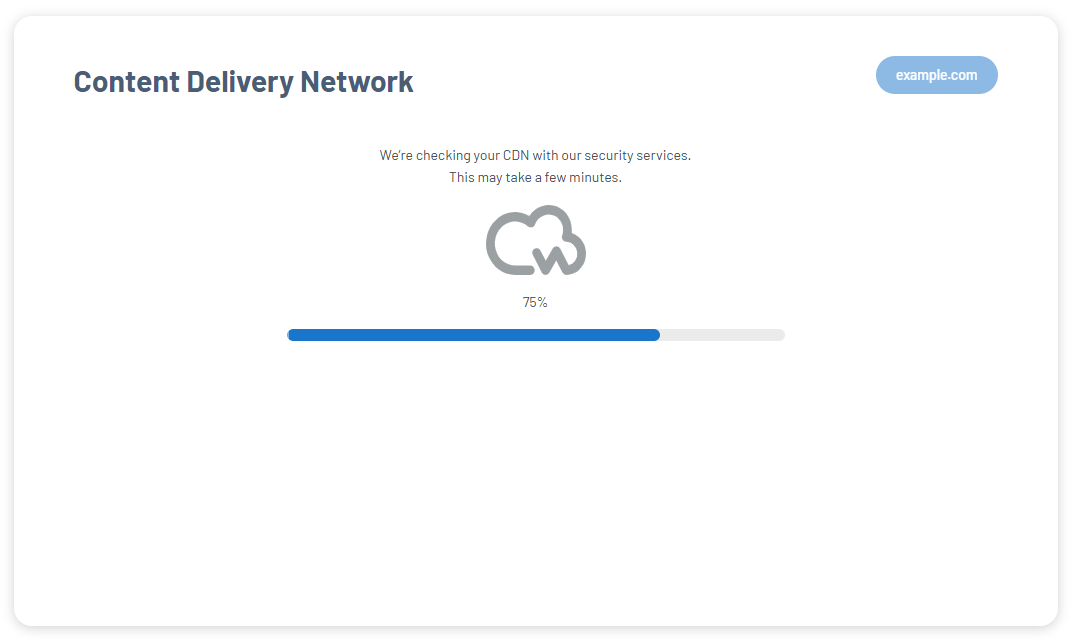
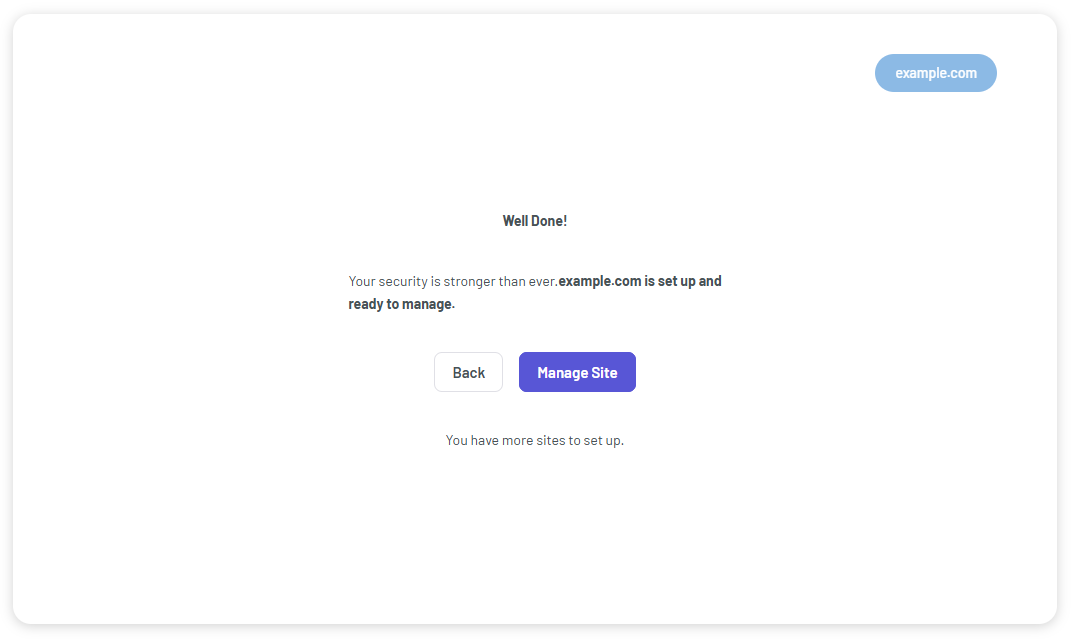
- Once verification is complete, a confirmation message will indicate that the site has been successfully configured and is ready for management.
If changing nameservers is not preferred, CDN functionality can be activated by adding the required DNS records to your existing DNS provider.
Prerequisites
- Access to the DNS management console for your domain
- Permission to create or update DNS records
Activation steps
- Select Add DNS records explicitly, then click Continue.
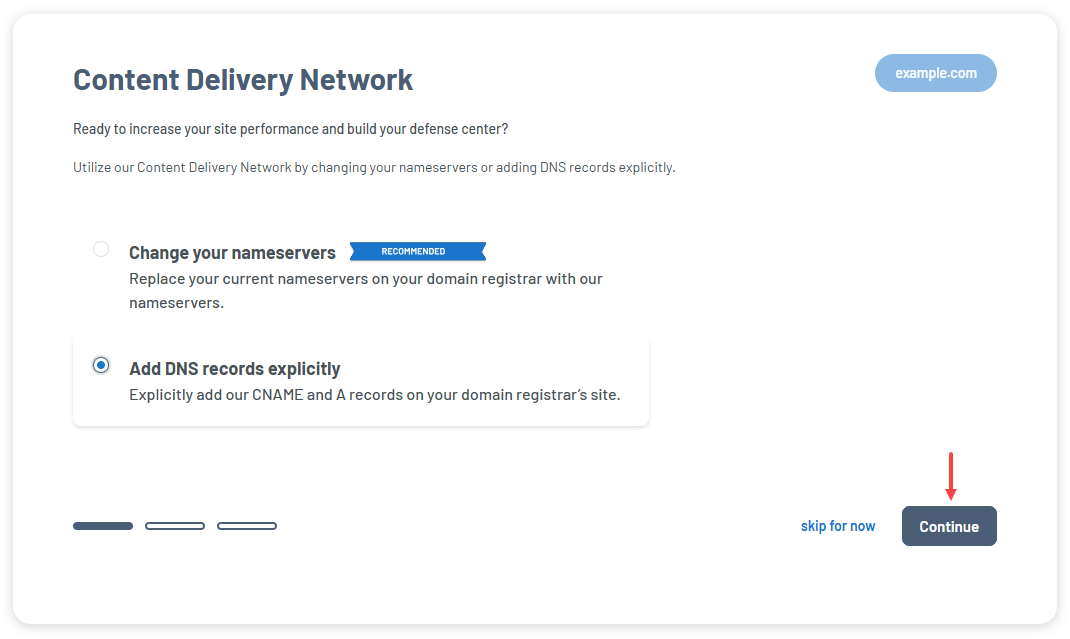
- Create and add the required DNS records.
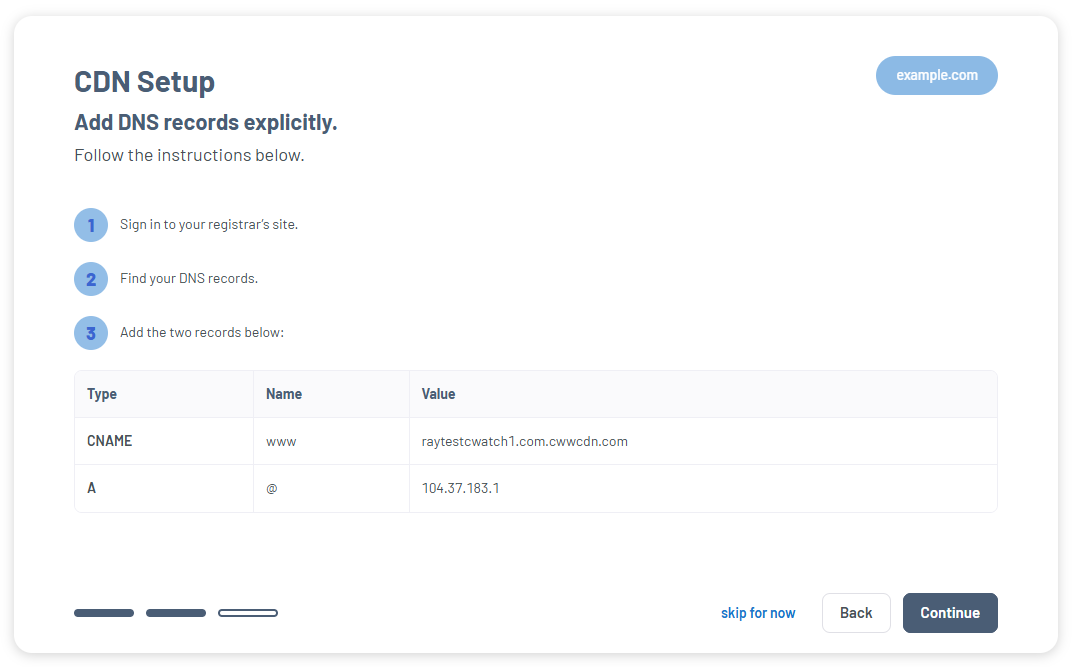
- Allow up to 24 hours for the DNS changes to become active. The time required may vary depending on your DNS provider and Time to Live (TTL) settings.
- Once the records are active, go to cWatch Settings, select Content Delivery Network, and click Check Propagation.
- After completing steps 1 and 2, click Continue to check that the CDN has been successfully configured and is ready to be managed through the platform.
- Once verification is complete, a confirmation message will indicate that the site has been successfully configured and is ready for management.
cWatch CDN configuration settings
After successfully activating the CDN, you can manage and customize its configuration through the cWatch Portal. To access these settings, navigate to Settings and select the Content Delivery Network tab.
The configuration options available within this section allow administrators to control how website content is delivered, cached, and optimized across the CDN network. Proper configuration helps improve website performance, strengthen security, enhance availability, and ensure efficient communication between the CDN and the origin server.
The following configuration sections are available:
- Site settings: Configure the connection between the CDN and the origin server, including origin IP, communication protocol, SSL settings, and connection parameters.
- Cache settings: Manage how content is cached on CDN edge servers to improve response times and reduce load on the origin server.
- Edge rules: Create custom rules to control request handling, redirects, rewrites, and content delivery behavior.
- File settings: Define caching and delivery behavior for specific file types and website assets.
- Quick configuration: Apply commonly used CDN settings through a simplified configuration interface.
Review
Successfully completing the steps to activate and configure cWatch CDN provides access to the CDN management features available within the cWatch portal. Whether you activate CDN through nameserver changes or DNS records, you can configure CDN settings that include origin connection parameters, caching controls, edge rules, and file delivery options. The available cWatch CDN configuration tools allow administrators to customize how content is handled and delivered across the CDN environment.
Get practical tips and product updates on LinkedIn.
Follow Network Solutions