How to get started with CodeGuard
CodeGuard setup can be done in just a few simple steps. Learn how to access and set up your CodeGuard service.
What to expect:
- If your subscription is set to renew on or after May 15, 2026, it will be automatically moved to Xcitium Backup.
- Backups will begin on your provisioning date in Xcitium Backup.
- If you have any critical backups, we encourage you to secure and download them. Please refer to the steps below.
- The Xcitium Backup service becomes available in your account seven days before your renewal date. If you manually renew your subscription, please note that your request will not be processed until the 7‑day timeframe begins.
In this article, we will discuss:
Accessing CodeGuard in the account manager
Follow the steps below to access your dashboard for CodeGuard integration:
- Log in to your account via https://www.networksolutions.com/my-account/login.
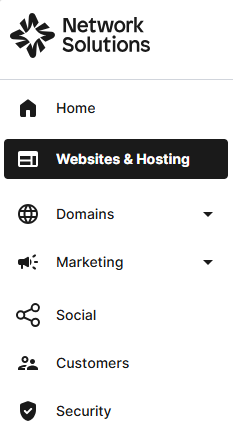
- Click Websites & Hosting from the left navigation menu.
- Navigate to the hosting package that you want to access the backup for, then click Manage to continue.

- Scroll down and go to Security and select Cloud Backup to continue.

- In the Security section, navigate to Website Backups and click Manage for the CodeGuard package linked to your hosting package.

- Click Manage in the Manage CodeGuard section to launch your CodeGuard dashboard.

Adding a website backup
To add a website backup to CodeGuard, follow the steps below. You will need your FTP/SFTP or MySQL credentials to add your website.
- Scroll down to Back up a Site and click Add FTP/SFTP Website.

- Enter the information required on your screen, then click on the Test Website Connection button.

- Select a Root directory by ticking the box next to the correct folder, then click the Select Root Directory button.

- Select the website content you would like to back up by ticking the box next to the desired folders. Then, click on Begin First Backup.

- You have successfully added your website.

Adding a database
After you have added a website, you can now add a database. Follow these steps:
- You will have the following options:
- After you have added a website, you will be shown the option to add a database. Click the Add Database Now button.
- From your dashboard, you can scroll down to the Website Backup section and then click on the Actions drop-down. Select Add Database.

- Enter your database hostname or IP address, then click the Test Connection button.

- Check for firewalls. Make sure that the IP addresses are properly whitelisted before you proceed to the next step. Once you've made the necessary steps, click Next Step.

- Whitelist the IP addresses. If each of the IP addresses is not whitelisted, connection attempts will be blocked. Once you have made the necessary steps, click Next Step.

- Add your credentials, then click Next Step.
- Select the databases that you would like to back up. If you want them all, click Select All. Click Add Databases.
You have added your database. You can see the progress of the database backup on the next page.
Review
CodeGuard configuration involves adding a website and a database. In this guide, you will learn how to access CodeGuard, add a website or websites for backups, and a database, especially if your website is using a CMS like WordPress, Drupal, etc. With CodeGuard, you can make sure that your website and databases are backed up.
Get practical tips and product updates on LinkedIn.
Follow Network Solutions