Knowledge Base
Categories: Powered by Network Solutions
Powered By Network Solutions: WebsiteBuilder - How to Add a Header Image
Follow these steps:
- Log in to your Account Manager via https://www.networksolutions.com/my-account/login.
- On the left side of the page, click Hosting.

- If you only have one hosting package, you will be taken directly to the Hosting control panel.
- If you have multiple hosting packages, you will need to select a package name and then click the MANAGE button to access the Hosting control panel.
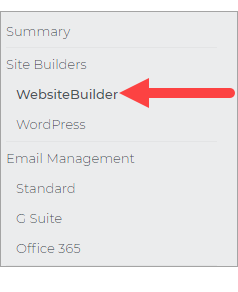
- On the left pane, click on WebsiteBuilder, under Site Builders.
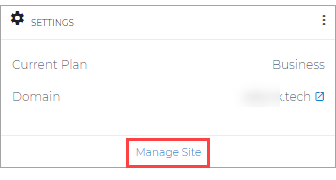
- Click Manage.
For Legacy WebsiteBuilder For WebsiteBuilder Express 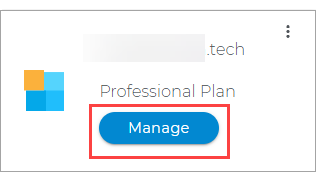
- Click Manage.
- This action will open your WebsiteBuilder screen on a new tab:
Legacy WebsiteBuilder looks like this: WebsiteBuilder Express looks like this: 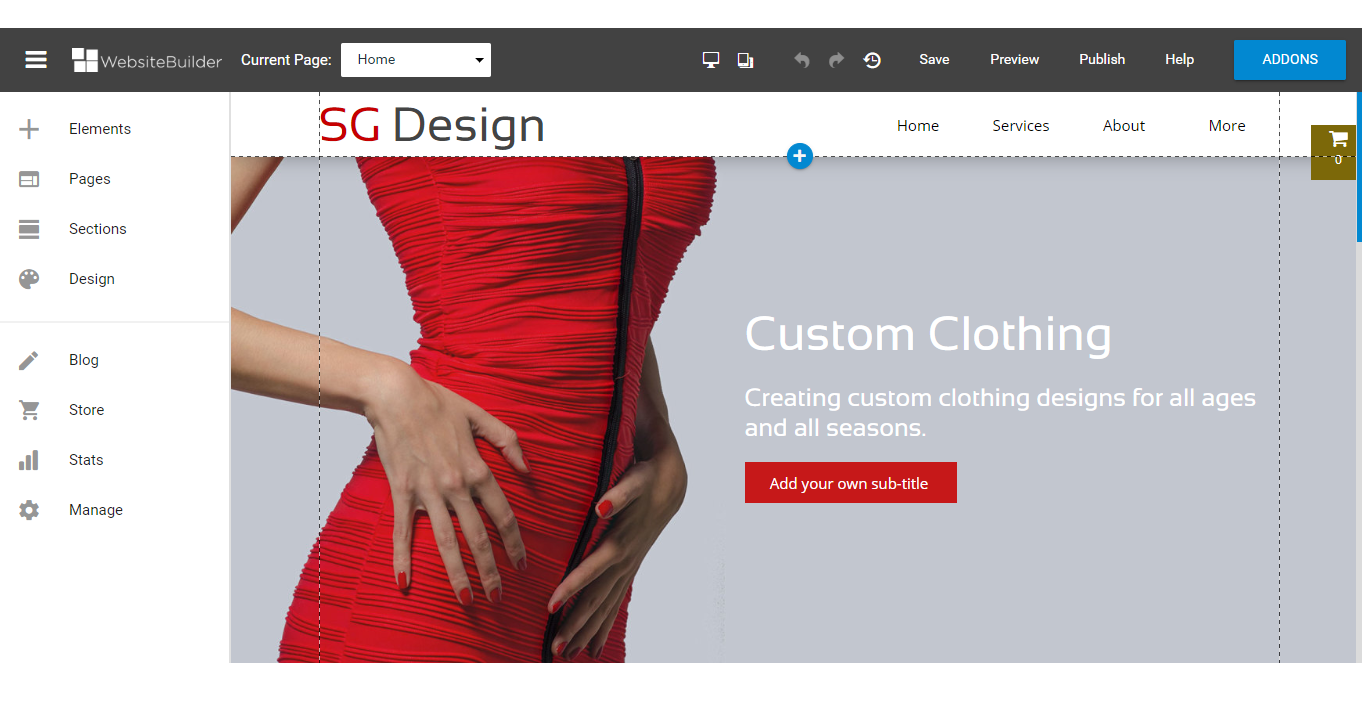
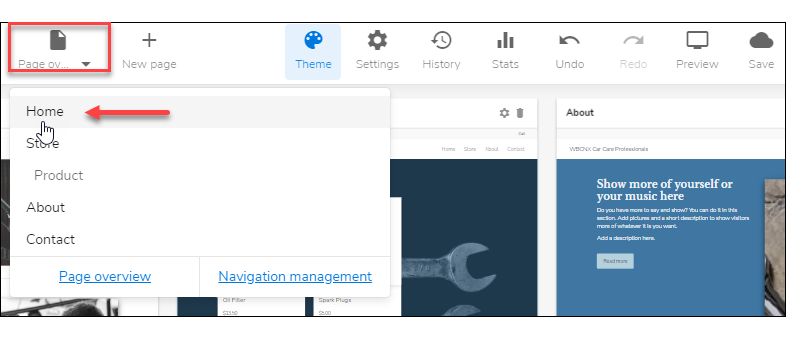
- Click on the Page Selector on the upper left, and select Home.
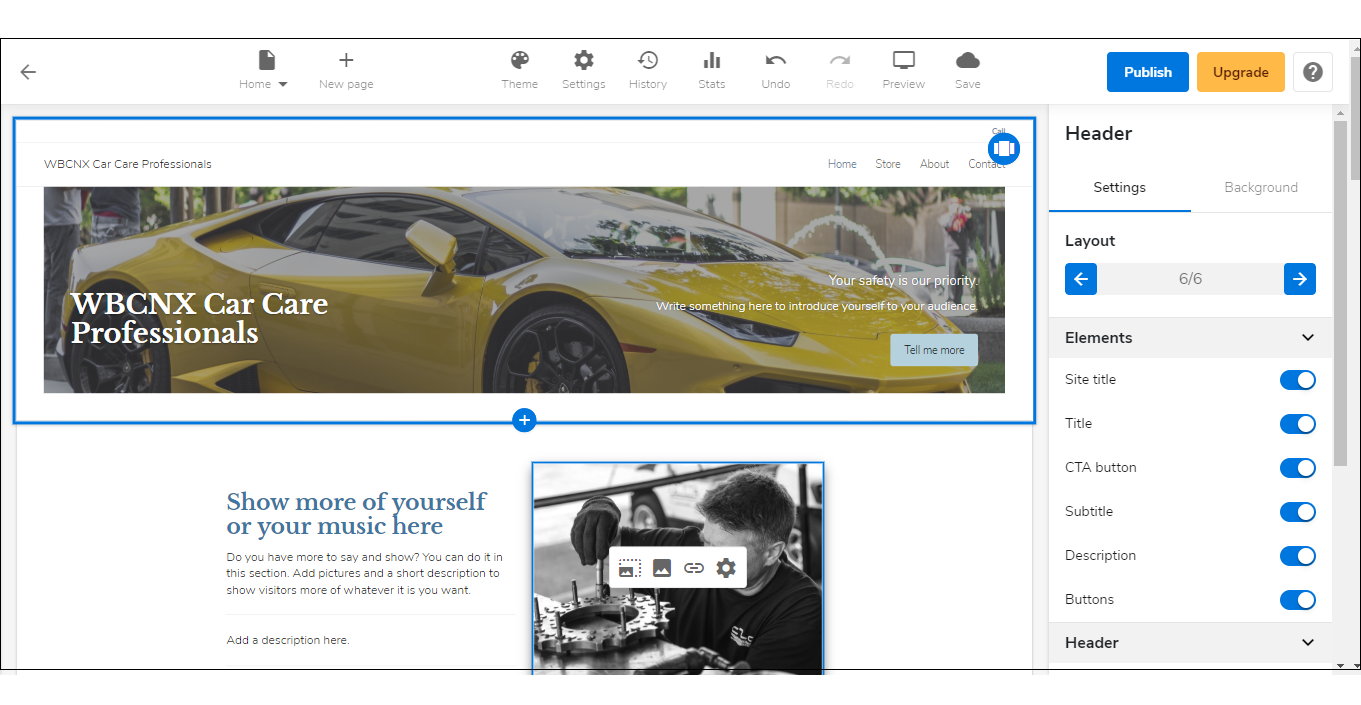
- Click the Home section of your page.
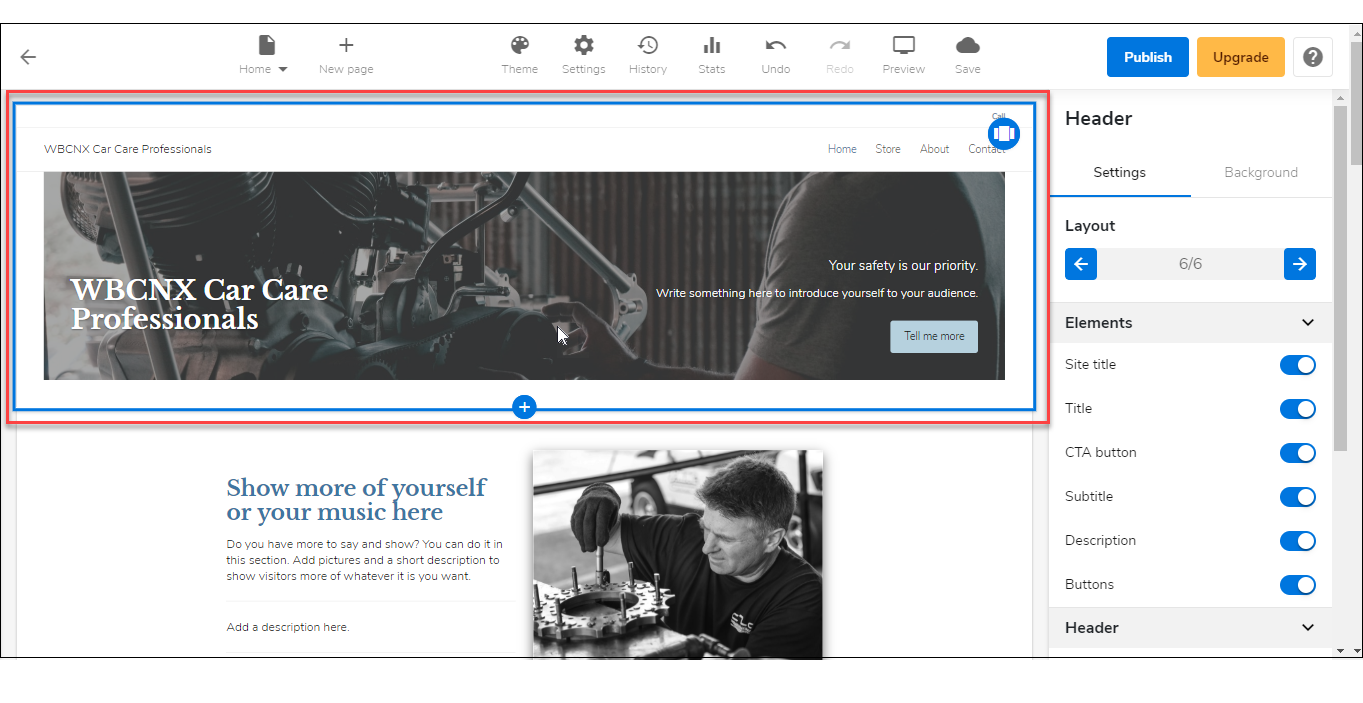
- On the right pane, under Header. Click on the Background tab, select Image, and click the Replace button.

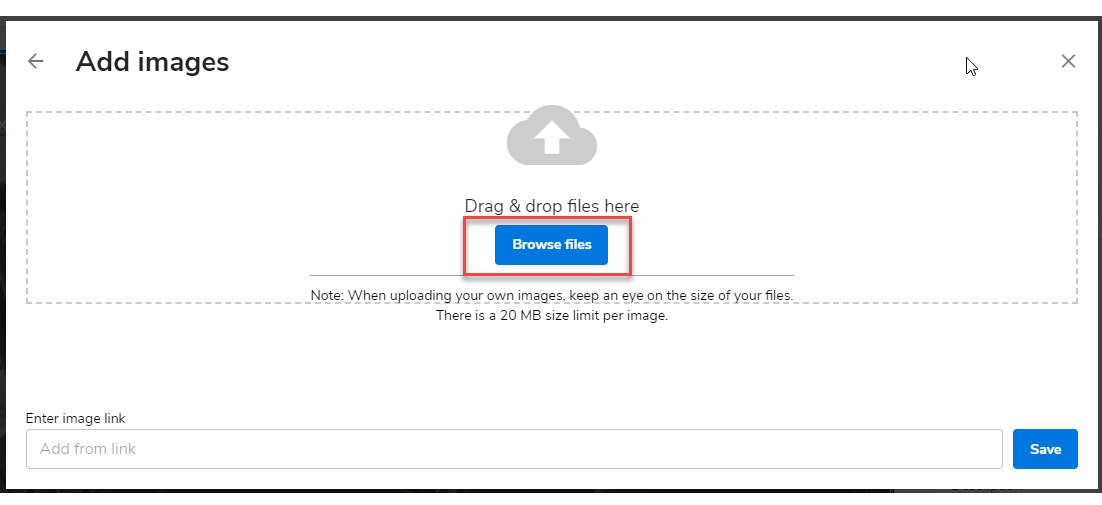
- The Image Library will pop up. From here, you can either choose from the Free Images collection or your collection (My Images). If you don't have any pictures saved in your library, or if you want to upload a new one, click on the Add button.
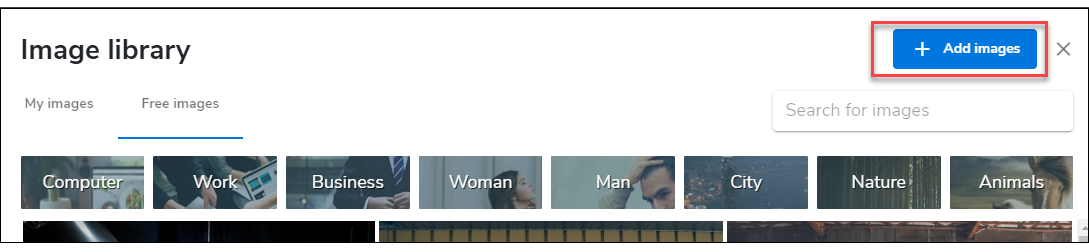
- Here, you can either drag and drop or simply Browse your computer and locate the image you want to upload.
- Don't forget to save your work by clicking the Save icon. Once saved, click on the Publish button on the upper part of your editor screen. Remember that changes are only visible after you have saved and published your work.

Related Articles
Get practical tips and product updates on LinkedIn.
Follow Network Solutions
Did you find this article helpful?