Knowledge Base
Categories: Powered by Network Solutions
Powered By Network Solutions: WebsiteBuilder - How to Adjust and Edit Images
Note: We offer two different versions of WebsiteBuilder. Our original implementation of the builder is the Legacy WebsiteBuilder Editor, while WebsiteBuilder Express Editor is the newest interface commonly found in the Foundation dashboard. It is not possible to upgrade a Legacy WebsiteBuilder site to the Express Editor. The site will need to be recreated with the Express Editor. All new WebsiteBuilder installations will be the Express Editor.
Follow the instructions that match your WebsiteBuilder version.
Legacy WebsiteBuilder Editor vs. Express Editor
| Legacy WebsiteBuilder | WebsiteBuilder Express Editor |
 |
 |
- How to Launch the WebsiteBuilder
- Legacy WebsiteBuilder Editor: How to Adjust and Edit Images
- WebsiteBuilder Express Editor: How to Adjust and Edit Images
- Related Articles
How to Launch the WebsiteBuilder
- Log in to your account via https://www.networksolutions.com/my-account/login.
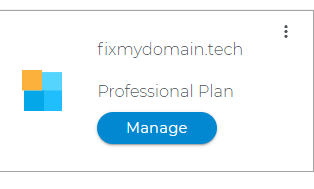
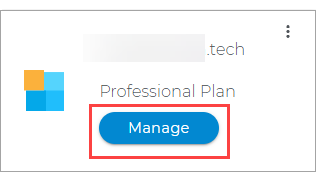
- Click Hosting on the left menu, then click the MANAGE button next to the WebsiteBuilder plan you would like to update.

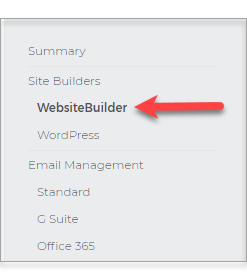
- On the left pane, click on WebsiteBuilder.
Legacy WebsiteBuilder Editor: How to Adjust and Edit Images
- To launch your Legacy WebsiteBuilder Editor, click Manage.
- Click on the image you want to edit.
- Select the type of changes you want to make.
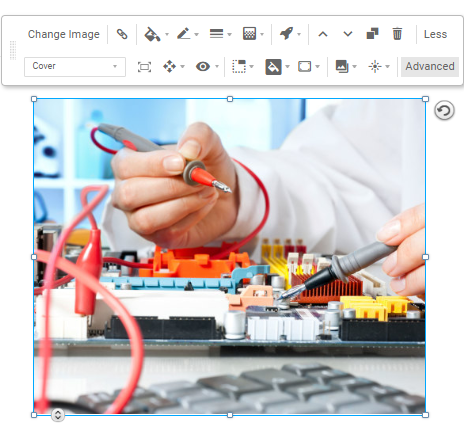
- Once done, make it a habit to Save changes.
- If you are ready to publish the changes, click on Publish in the upper right corner.

WebsiteBuilder Express Editor: How to Adjust and Edit Images
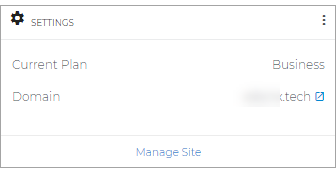
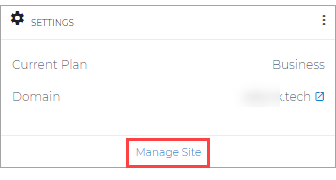
- To launch your WebsiteBuilder Editor, click Manage Site.
- On the WebsiteBuilder editor, hover the mouse to the image you want to adjust. Afterward, these options will show.
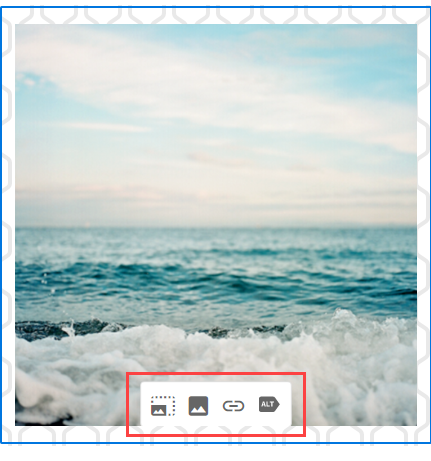
- By clicking on
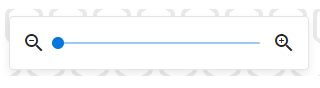
 , you will get to see a slider to zoom in or out of the image.
- By clicking on
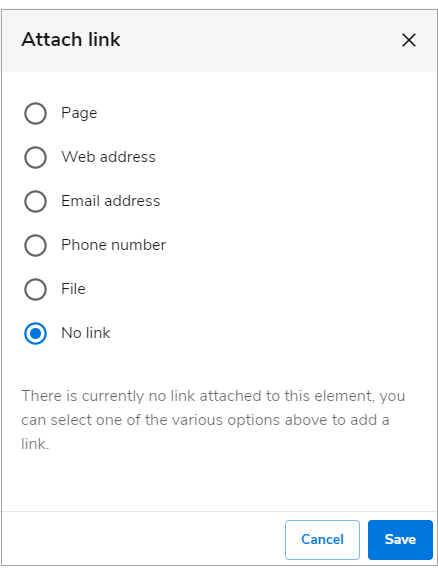
 , it provides an option to link the image to a page, web address, etc. Do not forget to Save.
- If you click on
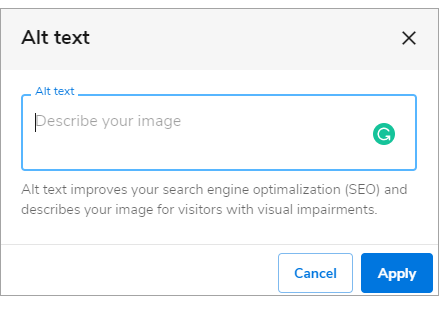
 , it provides an option to put Alt Text. This helps visitors with visual impairments. Make sure to hit Apply.
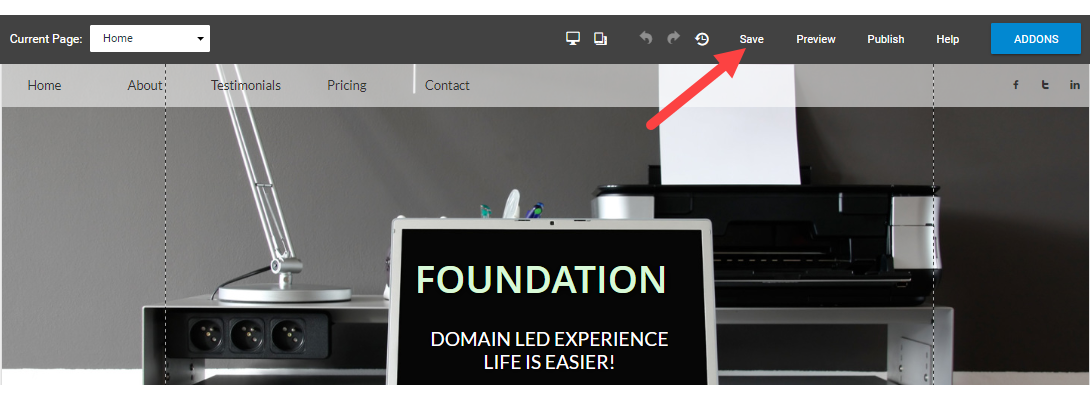
- Once editing is done, click on Save. If you want to make all changes to be updated on your live website, click Publish. Both these options are placed on top of your editor.
Note: if you only save changes, it will not appear on the website unless you click Publish.

Related Articles
Get practical tips and product updates on LinkedIn.
Follow Network Solutions
Did you find this article helpful?