Powered By Network Solutions: WordPress - How to Enable or Disable WP_Debug
If you receive an error on your WordPress site and are unsure about it, you can enable wp_debug mode within the website’s wp-config.php file. Enabling the debugging feature will help you identify and troubleshoot code errors in the core software, themes, and plugins.
Managing WP_Debug Mode
For accounts created before April 2024
- Launch your FTP client to connect to your hosting server. To learn how to connect to your hosting server using FTP, visit the How to Connect Using an FTP Client article.
- Once connected, navigate to your site's folder (document root) and download the wp-config.php file.
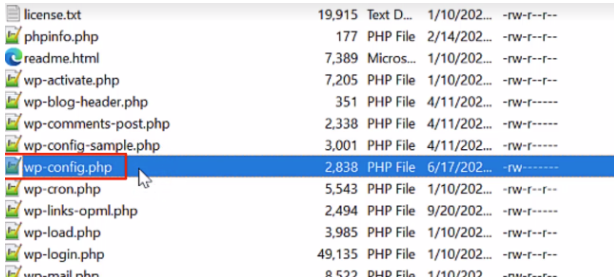
- Edit the wp-config.php file using a text editor, such as Notepad.
- Look for the script define( 'WP_DEBUG', false );.
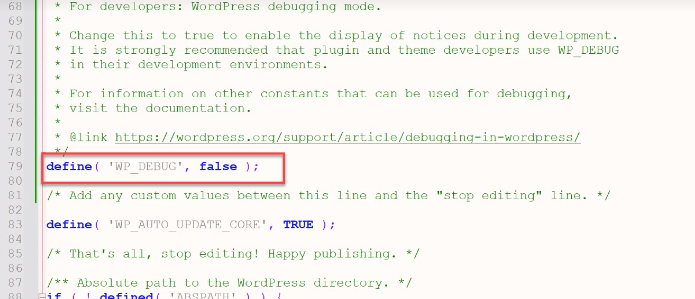
- Change the 'false' value to 'true'. Be sure not to accidentally delete any additional characters or text, as it could cause another critical error.
- Save the file after making the change.
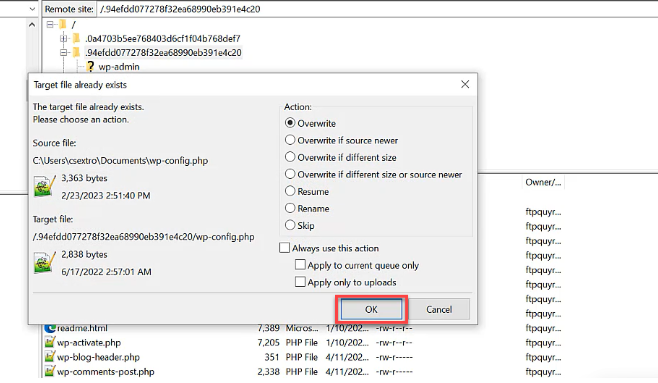
- Go back to FileZilla and re-upload the wp-config.php file you just edited. Select OK to overwrite the file.
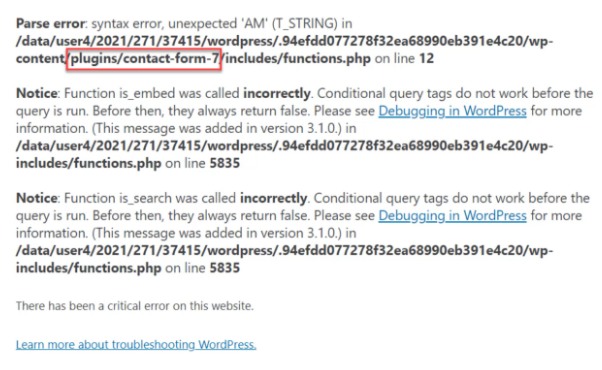
- Refresh your website to trigger the error codes. In the screenshot below, we can see that the error is due to a plugin called Contact Form 7.
- Using your FTP client, navigate to the plugin folder and rename the Contact Form 7 (contact-form-7) folder.
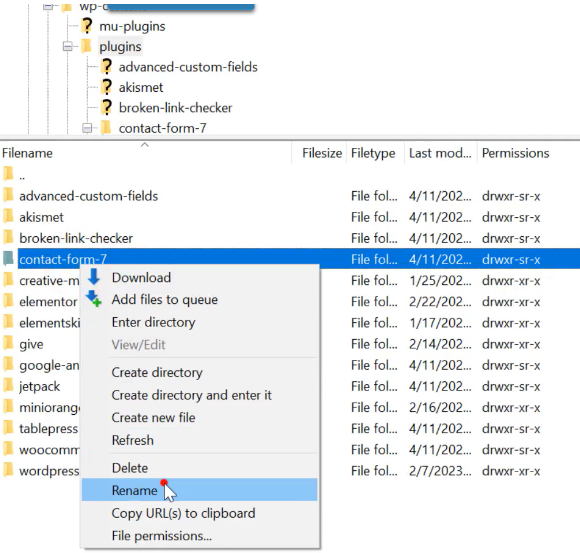
- If this is the cause of the error, breaking that connection by renaming the file should allow the site to come back without the error.
For accounts created after April 2024
- Log in to your Account Manager via https://www.networksolutions.com/my-account/login.
- From the left-hand menu, click the Hosting tab.

- If you have a single hosting package in the account, you will be redirected to the Foundations control panel. If you have multiple Hosting packages in your account, click the MANAGE button on the respective Hosting package that you need to access.

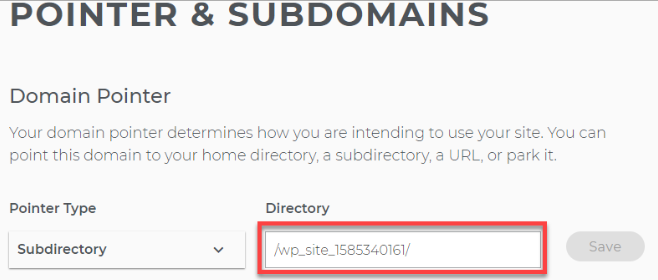
- Select Pointers & Subdomains on the left-hand menu.
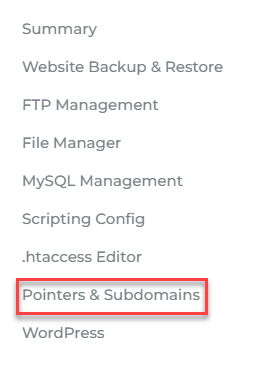
- The next page will show you the directory or path where the WordPress files are located. Take note of the directory.
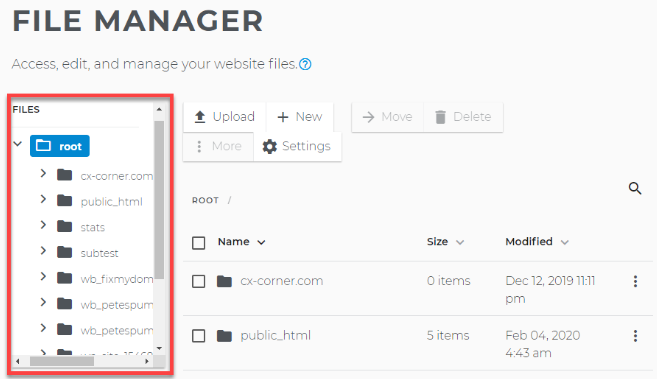
- Navigate back to your hosting settings page and click File Manager on the left pane.
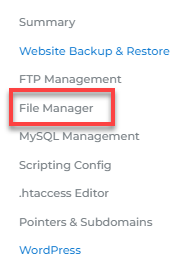
- Within File Manager, navigate to your site's folder or directory you've taken note of earlier.
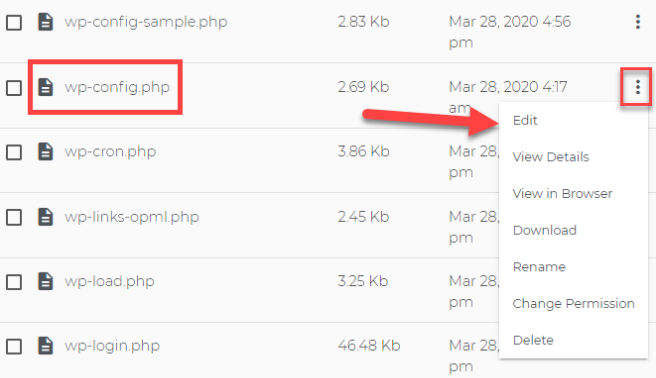
- Locate your site's wp-config.php, click on the three-dotted icon on the right, and then select Edit.
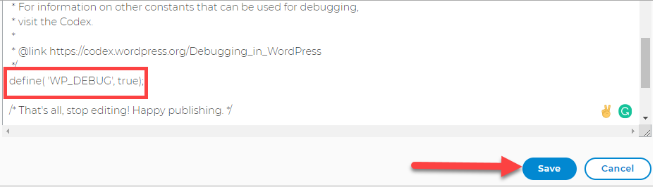
- To enable WP_Debug, change the last line to: define( 'WP_DEBUG', true).
- To disable WP_Debug, change the last line to: define( 'WP_DEBUG', false).
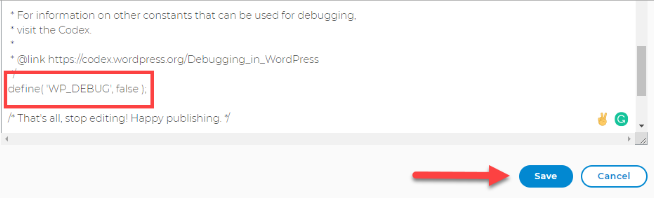
- Click Save.
Are there more debugging tools?
WP_Debug is designed to work with additional tools, which are enabled in the same way as WP_Debug.
define('WP_DEBUG_LOG', true);
define('WP_DEBUG_DISPLAY', false);
Learn more about WP_Debug_Log and WP_Debug_Display by visiting WordPress.org.
Want to learn more about WordPress?
WordPress: Tutorial Videos: To help you easily grasp the basics of creating a WordPress website, you have created several free tutorial videos. These videos were designed to be followed in order, but you are welcome to view whichever one best suits your needs.
You can always check out WordPress.org and browse their codex or online help forums.
Get practical tips and product updates on LinkedIn.
Follow Network Solutions