Email Marketing app – Creating and sending campaigns
An email campaign is a simple tool for sending professional updates to your clients. It allows you to share your latest news and offers directly to their inboxes. By sending these emails, you can drive more traffic to your business and keep your customers coming back.
In this article, we will discuss:
How to create an email campaign
Once you are logged in to your Network Solutions account, follow the steps below to create an email campaign.
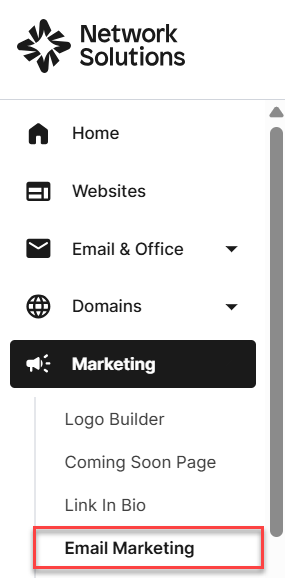
- Click the Marketing tab on the left navigation.
- Click the Email Marketing option.
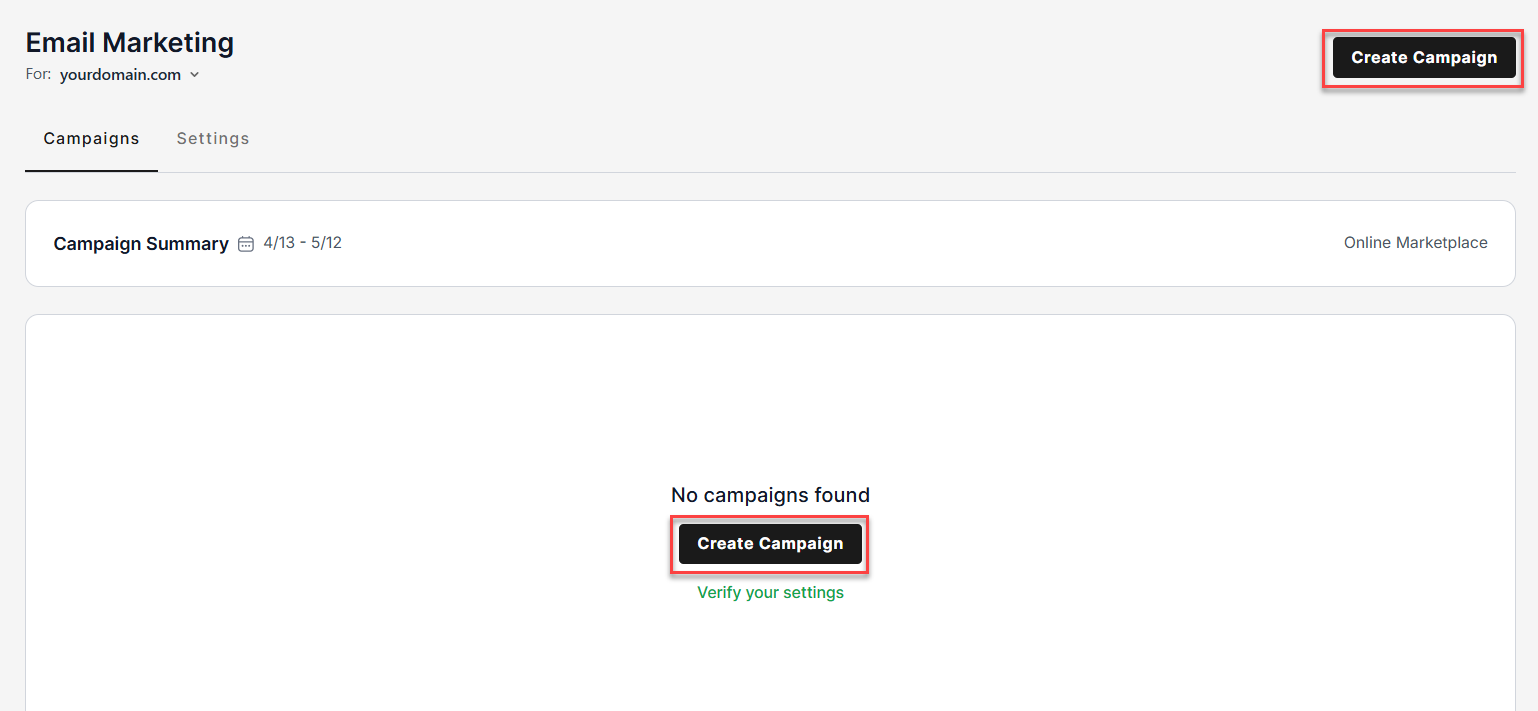
- Click the Create Campaign button in the top right section of the page.
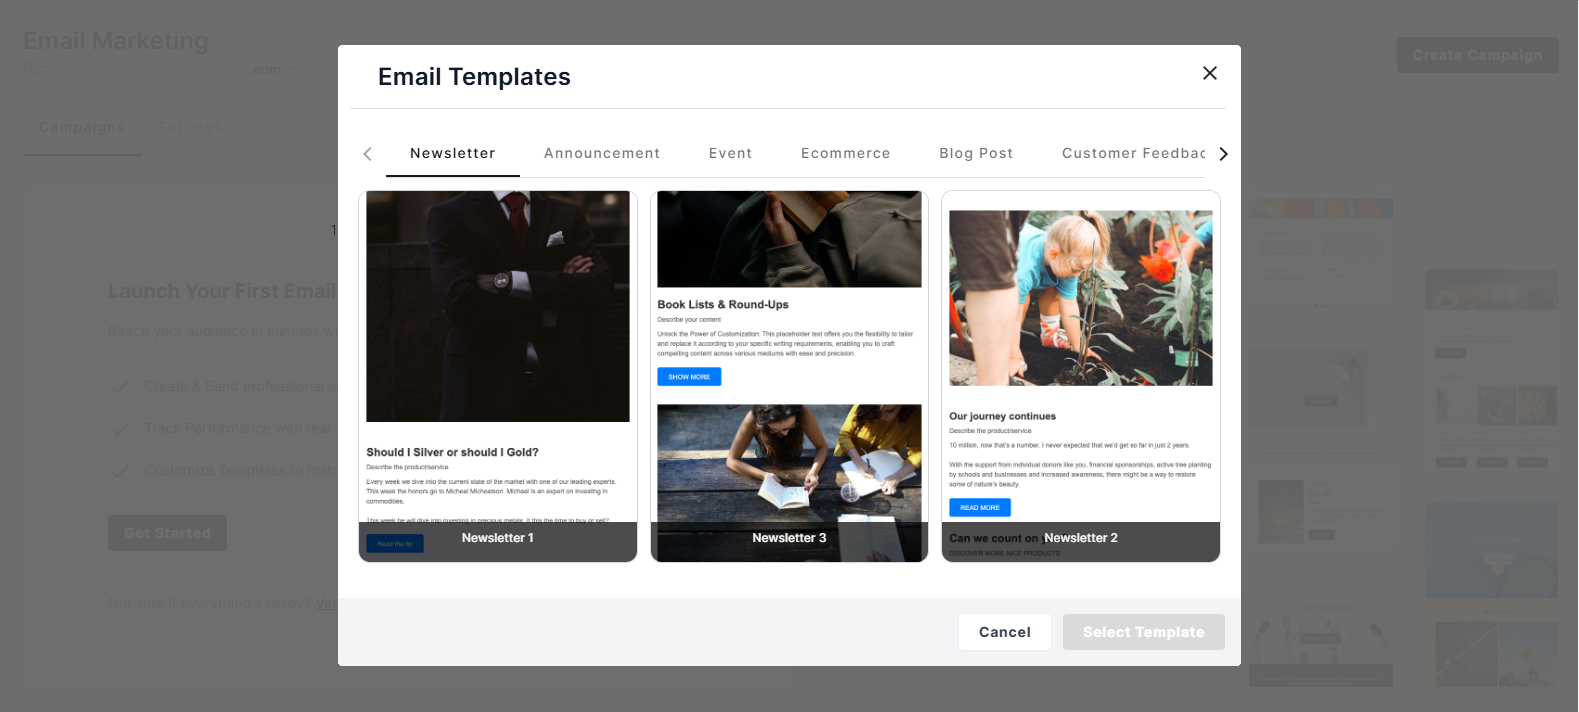
- A pop-up will show, prompting you to select a template. Please select one and click Select Template.
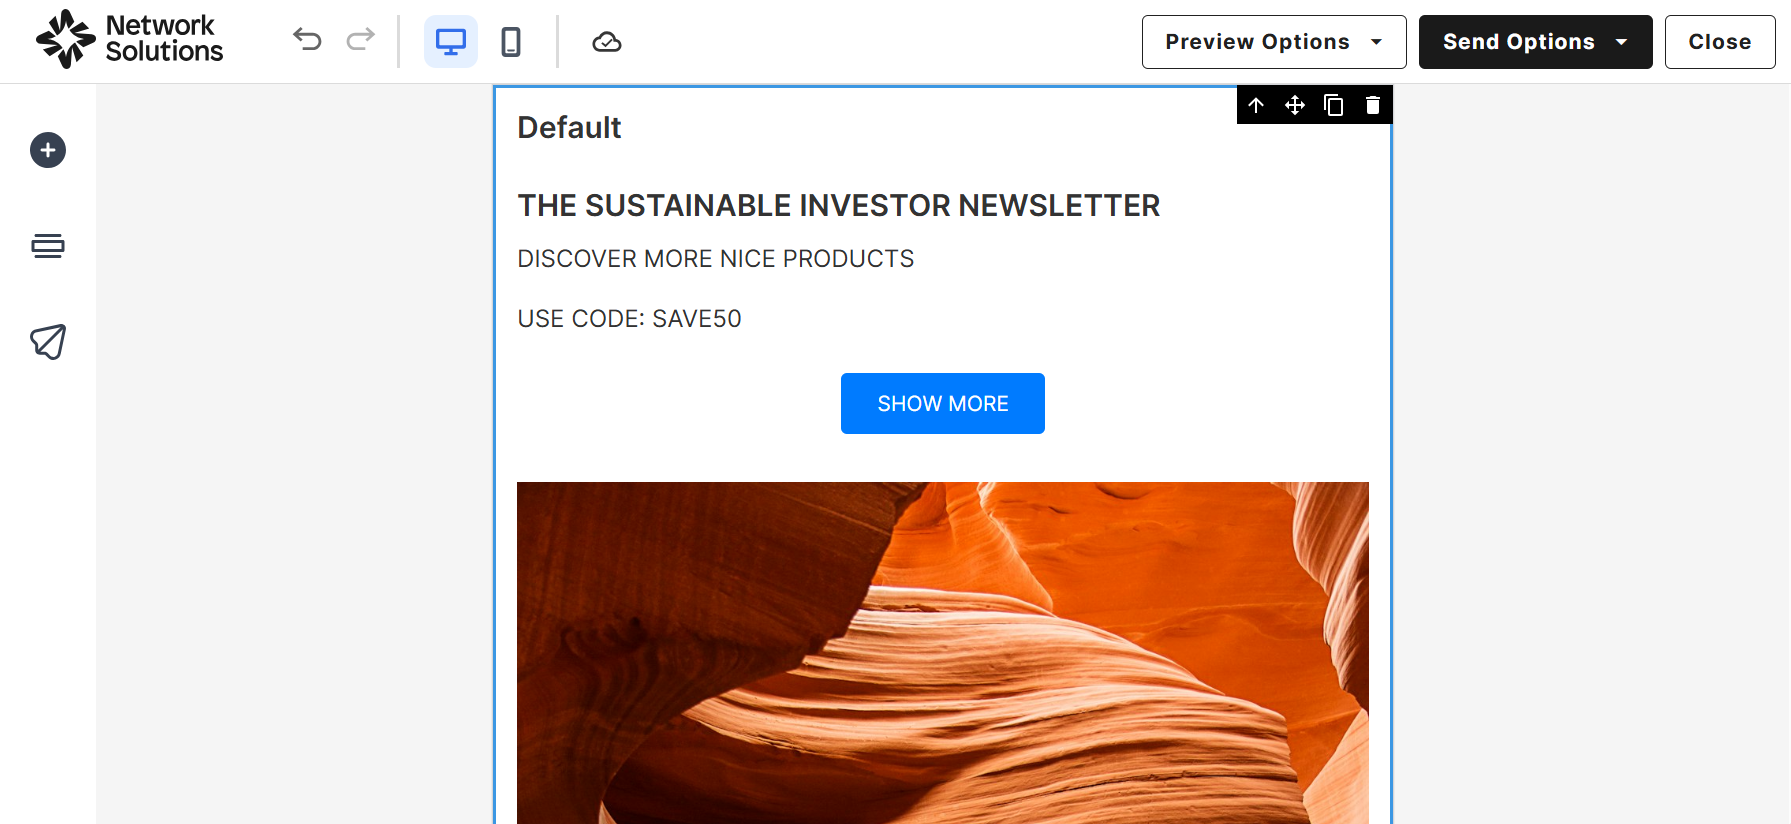
- The campaign editor will open with the chosen template pre-populated, allowing you to customize.
Email campaign templates
When creating an email campaign, you are provided with ready-to-use email campaign templates that can be customized and updated to fit your branding.
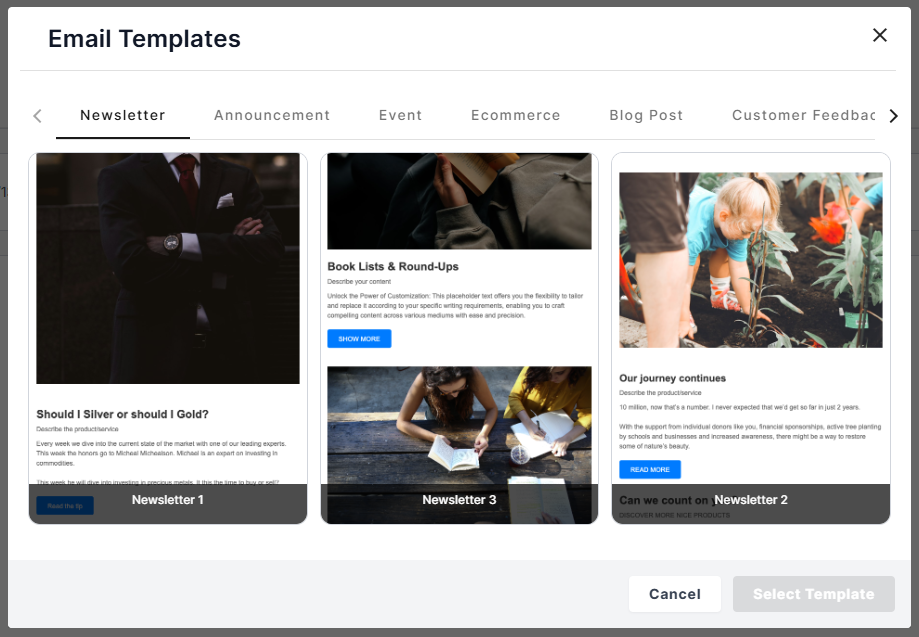
You can select from a variety of templates for you to use, categorized by:
- Announcement
- Blog Post
- Event
- Newsletter
- Ecommerce
- Customer Feedback
Or you can also build from scratch by selecting the Blank Template option.
Once selected, the template will open in the campaign editor, where you can start customizing your email.
Customize your email campaign
Customizing your campaign, you will have options to add and edit an element or a section. This section will discuss in detail the tools you will be provided to tailor your email campaign.
Add element
The element tool allows you to add a variety of elements to your email in order to create professionally designed and easy-to-scan email content.
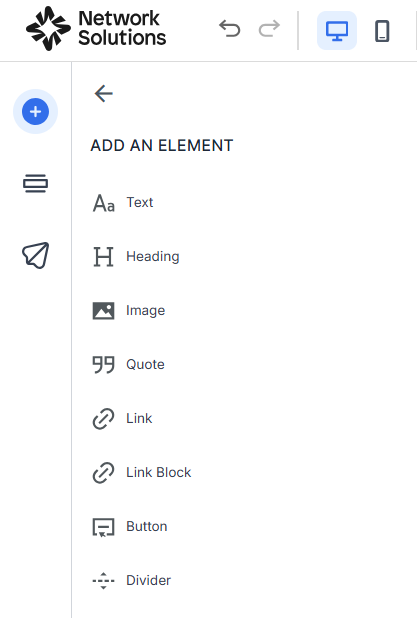
- Text
- Heading
- Image
- Quote
- Link
- Link Block
- Button
- Divider
Add section
The section tool allows you to customize your email layout by dividing your email content for a better design and readability.
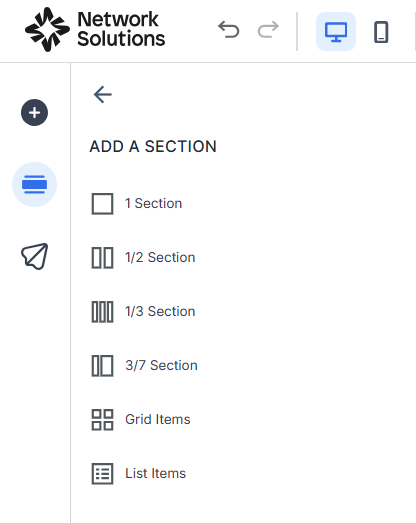
- 1 section
- 1/2 section
- 1/3 section
- 3/7 section
- Grid items
- List items
Edit an element or a section
This section shows the options you can use to modify the created section or element in your email content.
- Text element action bar options:
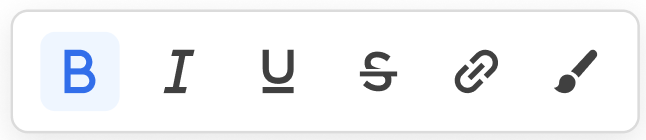
- Bold
- Italicize
- Underline
- Strikethrough
- Link
- Style
- Section action bar options:
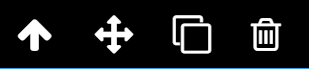
- Select Parent
- Drag and Move
- Copy
- Delete
- Floating Toolbar
Important: The options you see depend on the element you are working with. Some elements may not have all three options available.
- 3 options: Dimension, Typography, and Design
- Dimension:
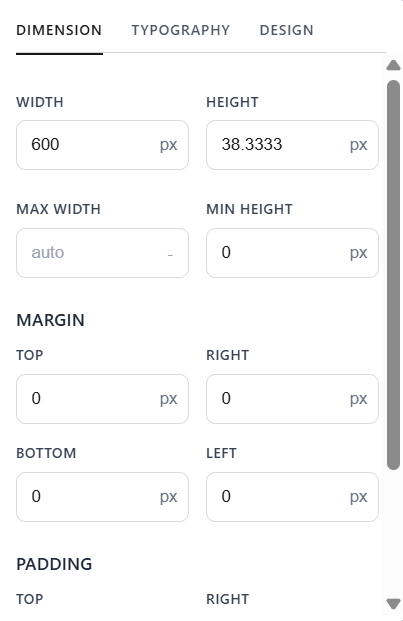
- Spacing
- Margin
- Padding
- Typography:
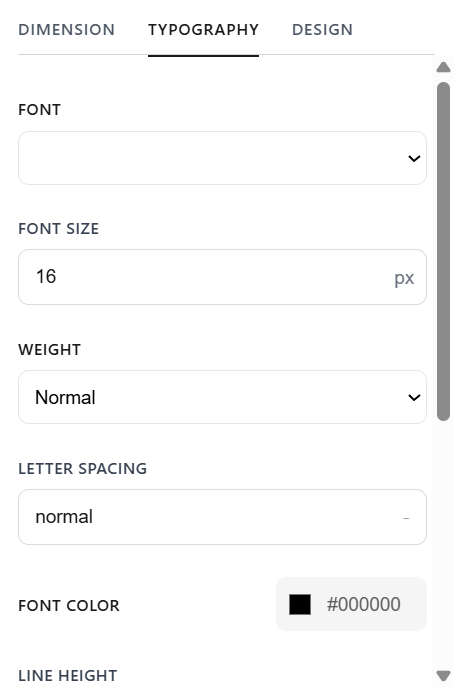
- Font
- Font size
- Weight
- Letter spacing
- Font color
- Line height
- Text alignment
- Font style
- Text Shadow
- Design:
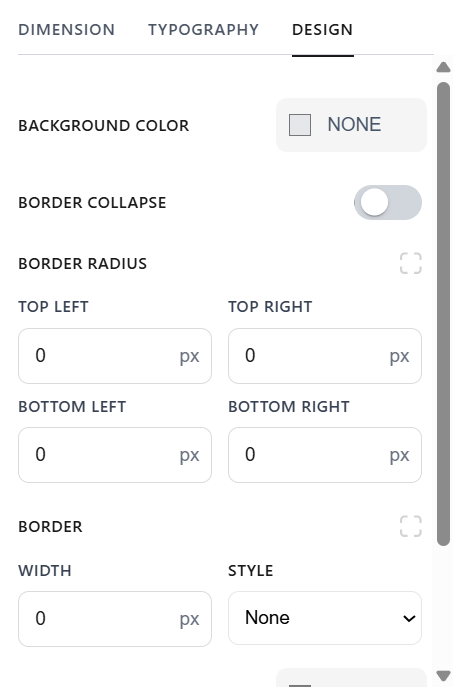
- Background color
- Border radius
- Border
- Background image
- Dimension:
- 3 options: Dimension, Typography, and Design
Campaign setup and settings
To access the campaign settings, click the send settings icon (shaped like a paper plane).
Campaign settings and inbox preview details
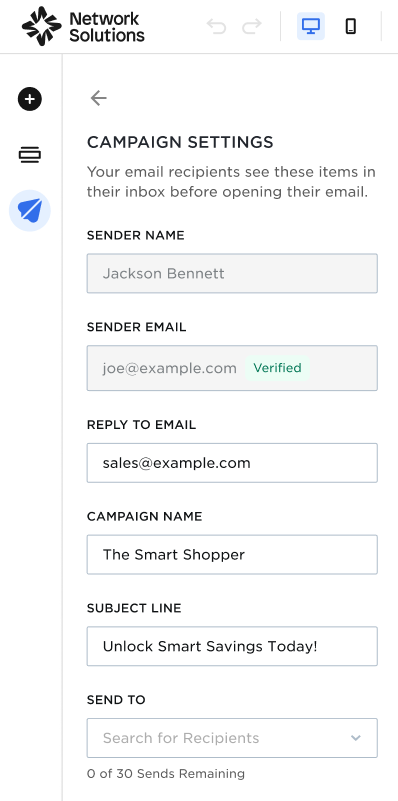
- Sender name - The name of the sender that your recipients will see.
- Update your sender name on the Email Marketing Settings page.
- Update your sender name on the Email Marketing Settings page.
- Sender email - This is the email address that your recipients will see upon receiving the email.
- Manage your sender email on the Email Marketing Settings page.
- Upgrading to a paid plan gives you the option to add multiple sender emails.
- Reply to email - This is the email address that receives responses when recipients click “Reply” on your campaign.
- Manage your reply-to-email on the Email Marketing Settings page.
Note: When using the free Email Marketing app, the reply-to email automatically mirrors the sender and cannot be customized.
- Upgrading to a paid plan allows you to select a different reply-to-email from your sender email.
- Manage your reply-to-email on the Email Marketing Settings page.
- Campaign name - This is your campaign name. We recommend a name you will recognize later when you look at your Campaigns tab and want to see results.
- Subject line - This is the subject line that your recipients will see when receiving the email. We recommend making it something personal and catchy to encourage your customers to open your email.
- Send to - This is where you can select the recipients of the email campaign. This is linked to your Customers app, and you can select from your predefined lists, individual contacts, or a combination of both.
- Upgrade to a paid plan to increase your sending limits and connect with a wider audience.
How to preview and send a test campaign
Check the look and feel or test your email campaign prior to sending it out to your recipients.
Preview
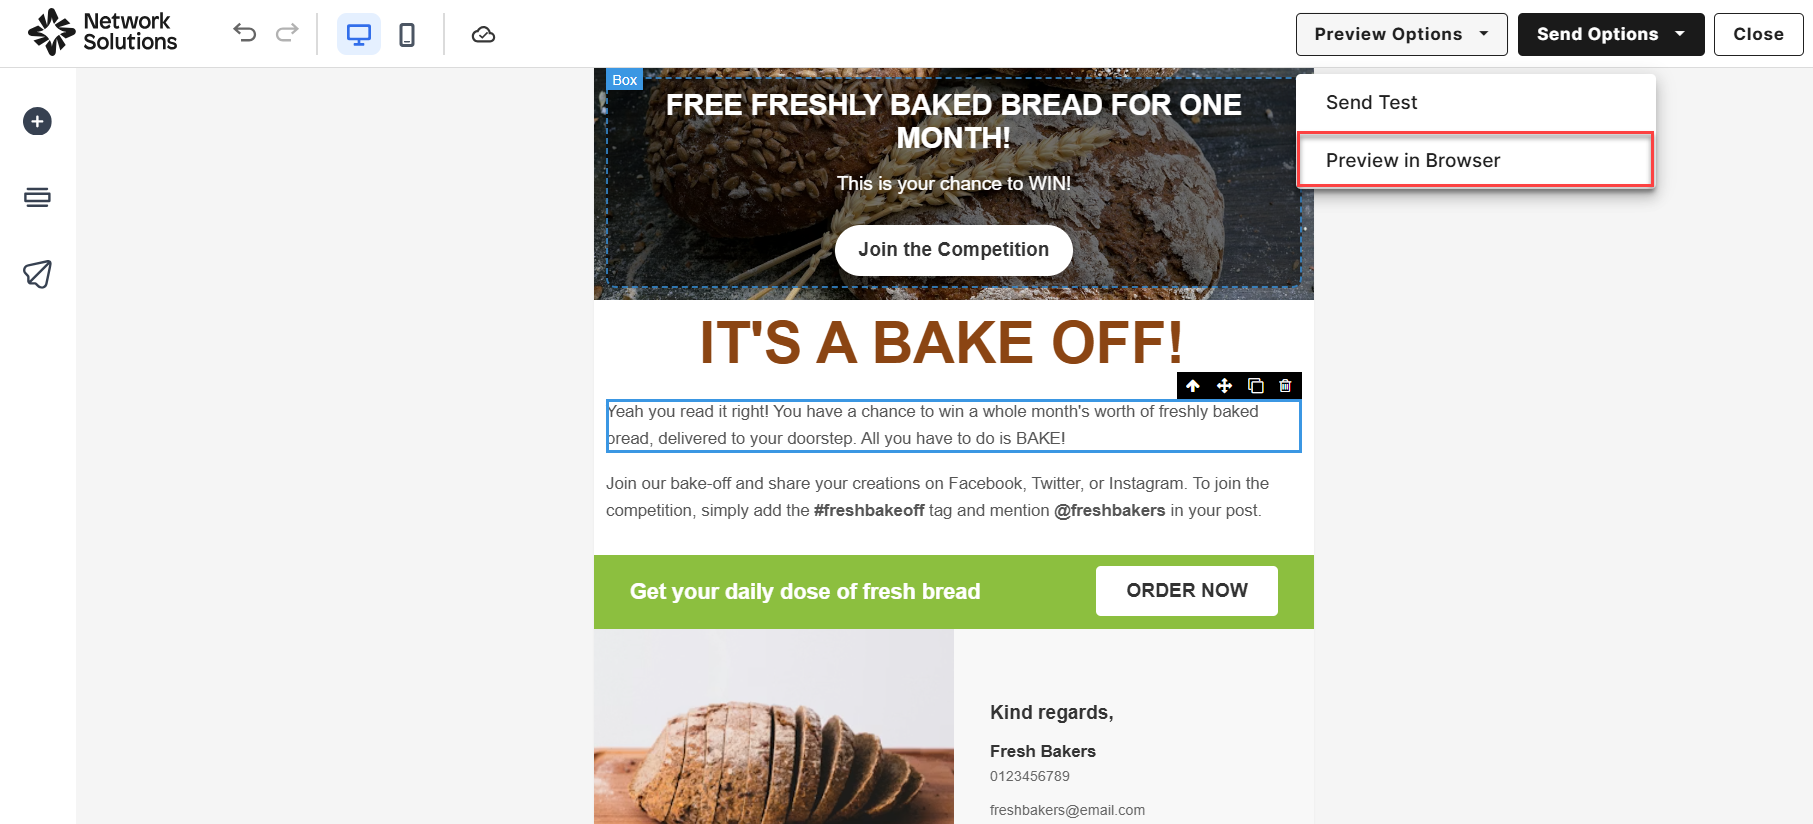
Preview your design to see exactly how your email will look in your customer’s inbox.
- In your campaign editor, click the Preview Options button found at the top right side.
- Select the Preview in Browser option.
Sending a test campaign
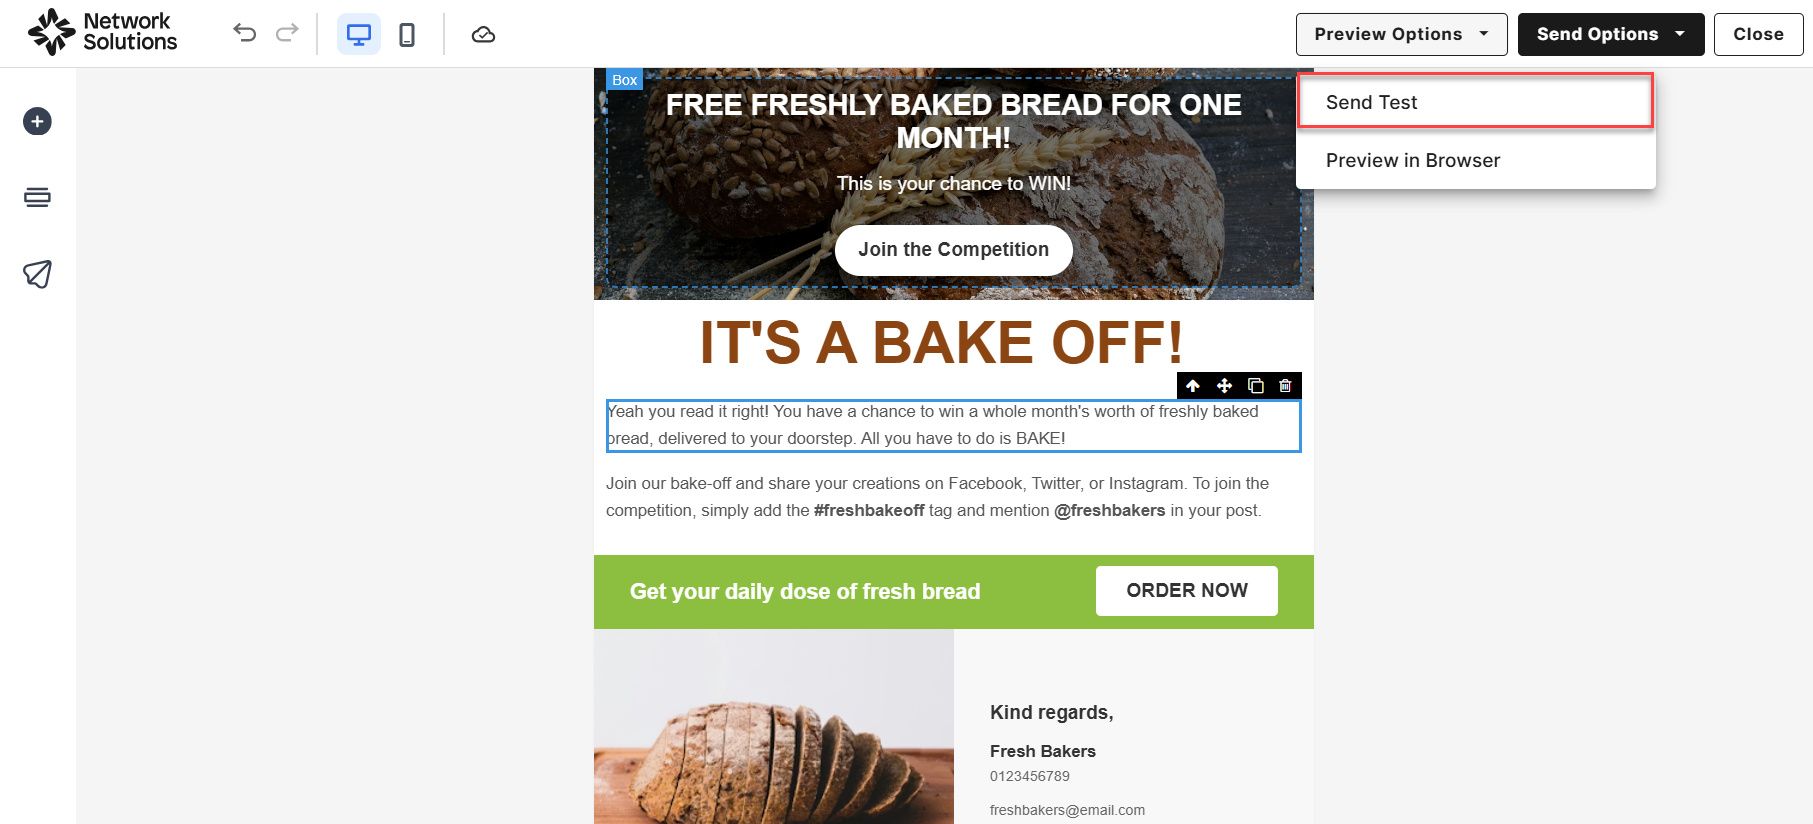
Perform a test send to identify potential delivery issues or broken links before your campaign goes live.
- In your campaign editor, click the Preview Options button found at the top right side.
- Select the Send Test option.
- Enter the email address you want to send the test email to.
Important: You can use up to 3 email addresses for testing.
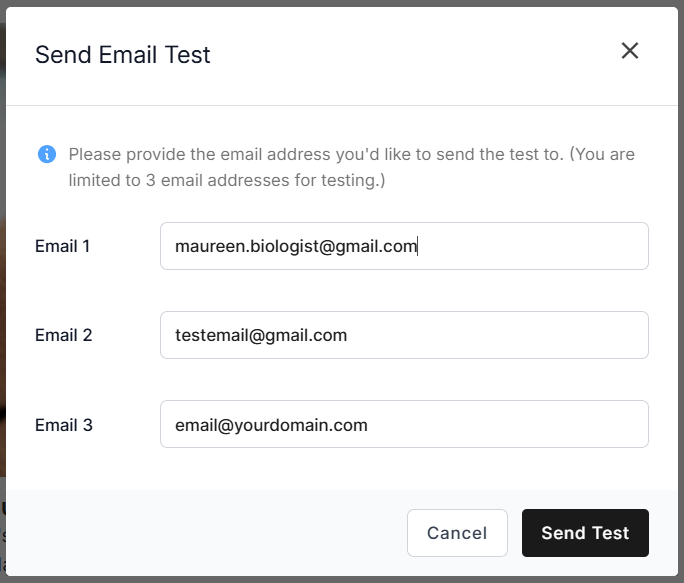
- Click Send Test to proceed.
A success message will appear in the top-right corner of the campaign editor, confirming that the test email was sent. After sending a test campaign, check your email to review the content and formatting.
The disclaimer:
"THIS IS A TEST EMAIL ONLY.
This email was sent by the author for the sole purpose of testing a draft message. If you believe you have received the message in error, please contact the author by replying to this message. Creativ.email takes reports of abuse very seriously. If you wish to report abuse, please forward this message to [email protected]."
How to send an email campaign
With your design complete, use the following steps to navigate the final checks and send your email campaign.
To send a campaign, you need to add recipients first.
Add your recipients
Select which recipients will receive your email campaign.
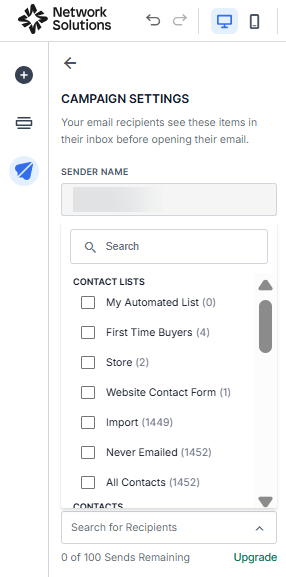
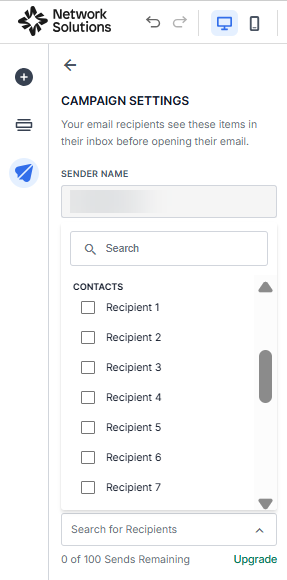
- In the campaign editor, click the pape rplane icon.
- Go to the Send To at the bottom.
- Click the drop-down and select the recipients you want to receive the email campaign.
- Send to a contact list
- Send to individual recipient
Important: Check these articles if you want to know more about:- Network Solutions' Customers app
- Manage your contacts.
- Create a custom list, automated list, or import a contact list.
- Add a new recipient that's not on the drop-down list.
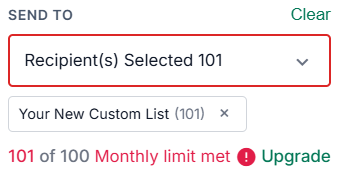
- Send to a contact list
Campaign checklist
Finalize your campaign setup before sending your email campaign.
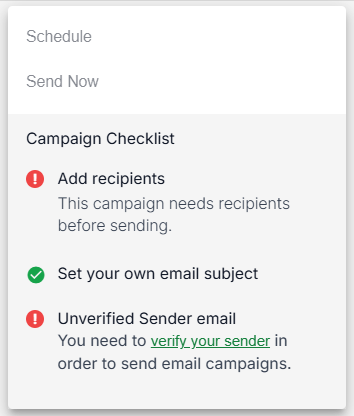
- Add recipients - Select the recipients you want to receive the email. You can send to one or more lists of contacts, individual contacts, or a combination of both lists and individuals when creating your recipient list.
Note: Due to compliance regulations, recipients must have the “I have permission to send email’ flag on in their Customer profile to receive your emails. Customers in your lists with this flag off will not be included in the count and will not be sent the email.
- Set your own email subject - Make an email campaign subject that would entice your readers.
- Verify sender email - To be able to test and send out your email campaigns. For your protection, and ours, we must verify that you are the legitimate owner of the email address you will be sending from.
Send your campaign
Complete the process by sending your campaign.
- In the campaign editor, once you have completed the campaign checklist.
- Click the Send Options button at the top right side.
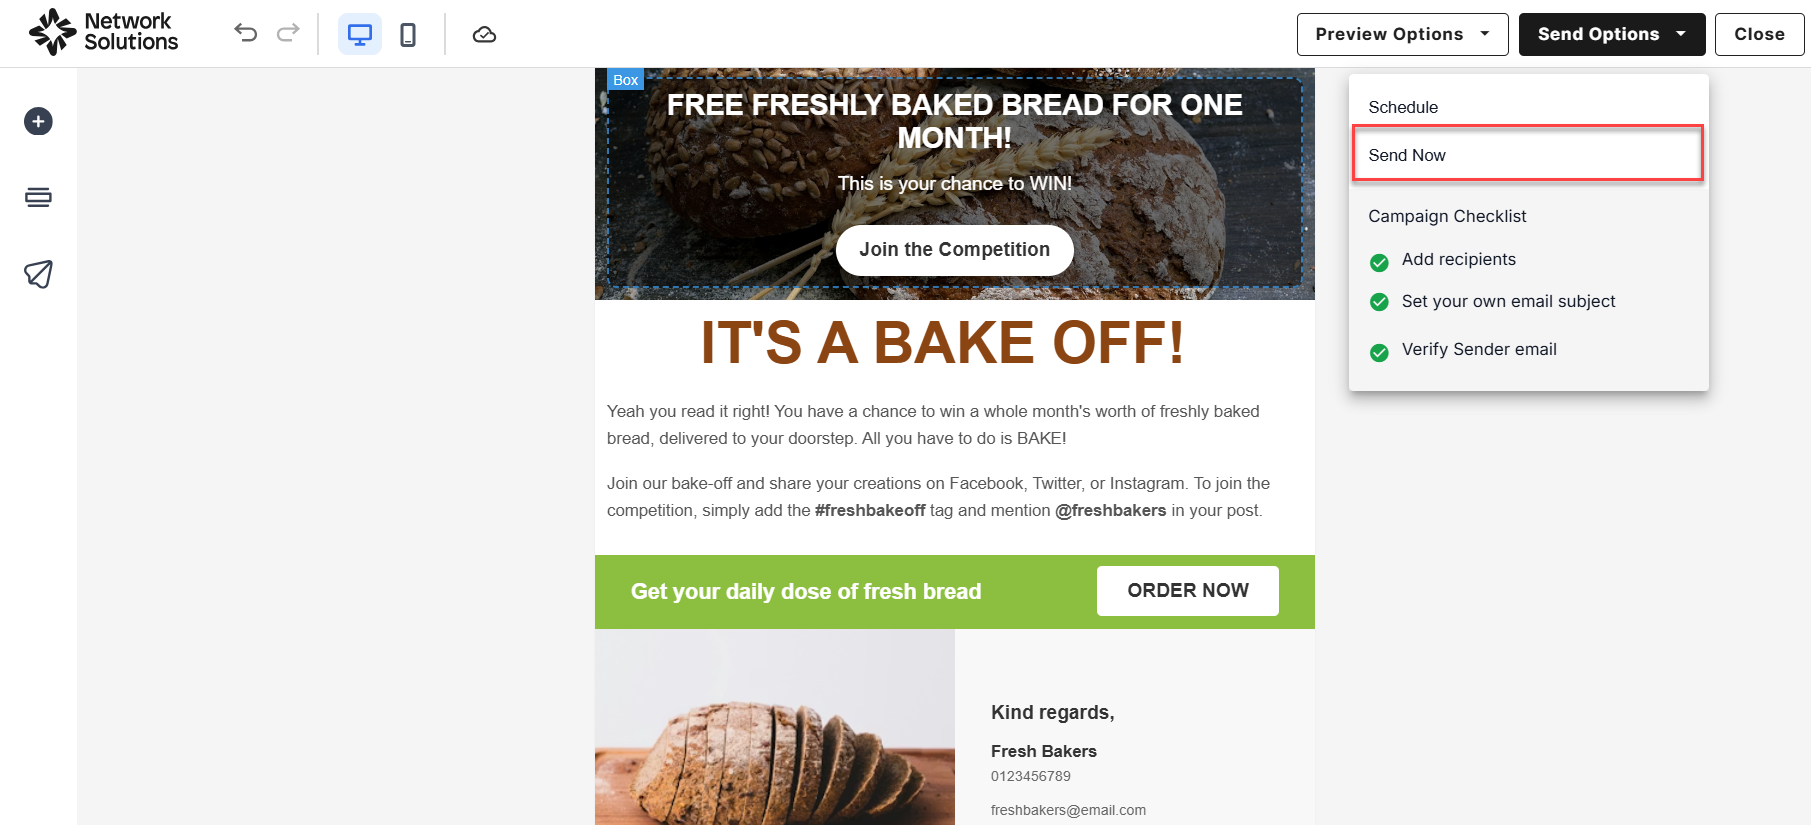
- Click the Send Now to proceed.
How to schedule a campaign
Schedule your campaign to reach your audience at the most impactful time without needing to be online.
- In the campaign editor, click the Send Options button found at the top right side.
- Select the Schedule option.
- In the pop-up, select your preferred date and time for the email campaign to be sent by choosing from the drop-downs.
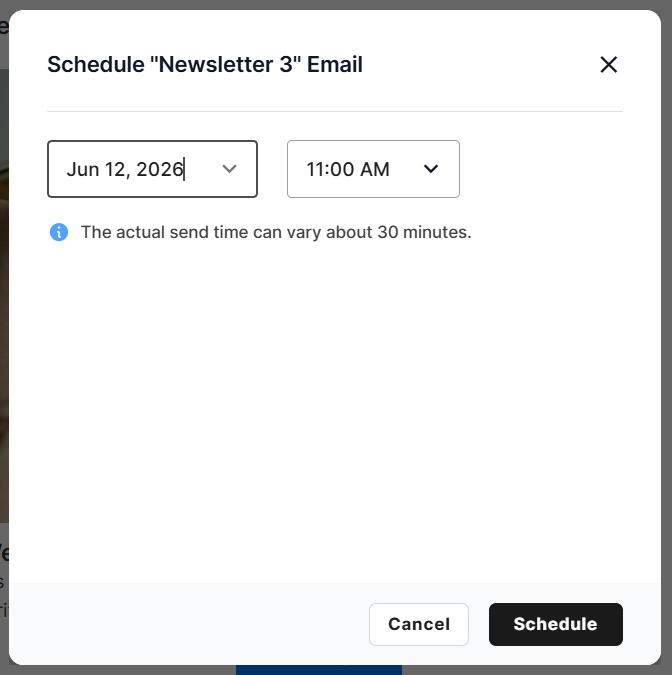
- Then click the Schedule button to proceed.
A success message will appear in the top-right corner of the campaign editor, confirming that the campaign is scheduled.
Review
Understand the end-to-end process of creating and sending marketing emails through your Network Solutions Email Marketing app. Master the tools available for creating a polished presence in your audience's inbox - everything from layout structure and customization to testing and scheduling steps.
Get practical tips and product updates on LinkedIn. Follow Network Solutions