Key takeaways:
- While website builders are popular, every single website on the internet is built on HTML. Learning to code your own site with HTML, CSS, and JavaScript gives you full creative freedom and is a foundational skill for a career in web development.
- If HTML is the skeleton, CSS is the skin and clothes. CSS lets you control how your website looks, from colors and fonts to the overall layout. This separation of concerns—HTML for structure and CSS for style—is a key principle of modern web design.
- You don’t need any expensive software to get started. You can use a free code editor like Visual Studio Code and a free hosting service like GitHub Pages to create and publish your first website at no cost.
Can you build a website with HTML this 2025? The simple answer is yes, and it’s the best way to gain full creative control.
While pre-built, drag-and-drop tools are popular for their speed, they often box you into a limited set of designs and features. Think of them as building with a pre-packaged kit—you can only assemble what’s in the box.
Learning how to build a website with HTML is different. You’re starting with the raw building blocks—the foundational structure of every page on the web.
This hands-on approach gives you the power to design a website that’s truly unique and without any limitations. By mastering HTML, you’re not just creating a page; you’re gaining an essential skill that allows you to understand and build anything on the web from the ground up.
What you need before you start
To code your own website, you don’t need expensive software. Just a few simple tools will get you started on your journey to make a website with HTML.
- A code editor
- A browser
- Personal assets (optional)
A code editor
This is where you’ll write your code. While a basic text editor works (like Notepad), a dedicated code editor like Visual Studio Code (VS Code) or Sublime Text is highly recommended. They provide features like syntax highlighting and automatic formatting that make coding much easier to read and manage.
A web browser
You’ll use a browser like Chrome, Firefox, or Safari to open your HTML files and see your website come to life. This is your testing ground to ensure everything looks and works correctly.
Optional assets
To make your website truly personal, you can gather your own assets, such as images, logos, or other media files. This allows you to create a unique design that reflects your personality or brand.
If you already have these, then we proceed to the step-by-step guide on how to build a website with HTML:
- Plan your website layout
- Set up your HTML project
- Add core HTML elements
- Structure with containers
- Style your site with CSS
- Add interactivity (optional)
- Customize and expand
- Publish your site
Let’s get into the detail of each step below.
Step 1. Plan your website layout
Before you create a website, of course, you need to plan its layout. You need to do it with a clear idea of how it will be like. You must plan where elements will be in the planning stage. This way, you can draft a structure that saves you time and effort for how the layout will be like for your website.
A common and effective website layout includes:
- Header. This is at the top of the page and often contains your website’s logo and title.
- Navigation. A navigation menu helps visitors move between pages on your site.
- Body (main content). Images, texts, and other information about what you do and offer is the core of this page.
- Footer. Located at the bottom of the page, this section typically holds copyright information, contact details, or links to social media.
Having this basic structure in mind before you start coding makes the entire process more efficient and ensures your website is easy for visitors to use.
Step 2. Set up your HTML project
Once you already have a layout plan, you can begin the actual website development.
The first thing you’ll need to do when learning how to build a website from scratch is to organize your files.
- Create a project folder. On your computer, create a new folder for your website project. Give it a simple, descriptive name like my-first-website. All your website’s files will be stored here to easily manage your project.
- Create your first file. Inside your new project folder, create a new file (usually using the Notepad app) and name it index.html. Your index file is the most important file of your project, as this is what browsers look for to display your site.

- Add the HTML skeleton. Open your index.html file in your code editor and add the basic HTML boilerplate. This structure is the foundation for every webpage and includes the following tags:
- <!DOCTYPE html>. This isn’t an HTML tag, but a declaration that tells the web browser which version of HTML to use. It should always be the very first line of your code.
- <html>. This is the root element of your page. All other content, including the <head> and <body> tags, must be nested inside it.
- <head>. This section contains information about the page that isn’t visible to the user. It’s where you’ll put the page title, which shows up in the browser tab. You’ll also include meta tags here—these help define how your page behaves and how it’s interpreted by browsers. Usually, this also contains the meta tags <meta charset=”UTF-8″> and <meta name=”viewport” content=”width=device-width, initial-scale=1.0″> to make your website more accessible, responsive, and user-friendly.
- <body>. This is the main content area of your page. Everything you see when you visit a website—the text, images, and links—is placed inside the <body> tags.
By understanding what each of these core tags does, you’ll be able to build a solid, well-structured foundation for your website. This is the simple setup that underpins every complex website you’ve ever visited.
Step 3. Add core HTML elements
With your project set up, you can now begin to add the core building blocks that will make a website with HTML truly functional.
These are the elements that create the content and structure that your visitors will see. Let’s go through each of them and slowly combine them to see how they work together.
- Headings & paragraphs (<h1>, <p>)
- Links (<a>)
- Images (<img>)
- Lists (<ul>, <ol>)
- Semantic elements (<header>, <nav>, <footer>).
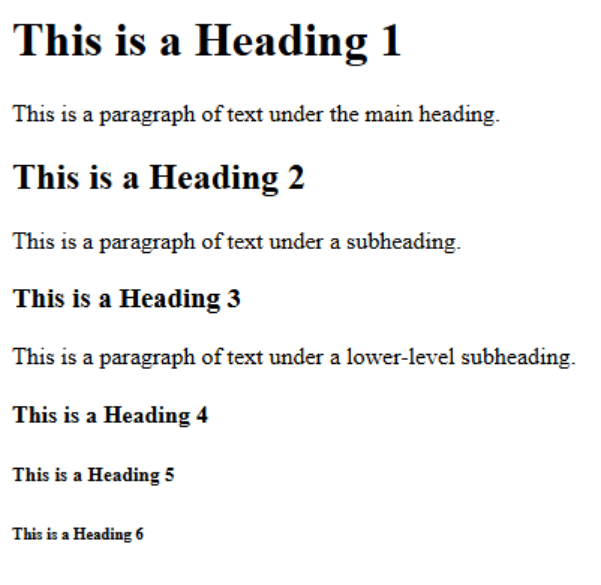
Headings & paragraphs
Use headings (<h1> through <h6>) to define the structure of your content and paragraphs (<p>) for your main text. Think of headings as titles and subtitles; they organize your page and are important for both users and search engines.
Example:
<!DOCTYPE html>
<html lang="en">
<head>
    <meta charset="UTF-8">
    <meta name="viewport" content="width=device-width, initial-scale=1.0">
    <title>HTML Headings</title>
</head>
<body>

    <h1>This is a Heading 1</h1>
    <p>This is a paragraph of text under the main heading.</p>
    <h2>This is a Heading 2</h2>
    <p>This is a paragraph of text under a subheading.</p>
    <h3>This is a Heading 3</h3>
    <p>This is a paragraph of text under a lower-level subheading.</p>
    <h4>This is a Heading 4</h4>
    <h5>This is a Heading 5</h5>
    <h6>This is a Heading 6</h6>

</body>
</html>
Sample output:
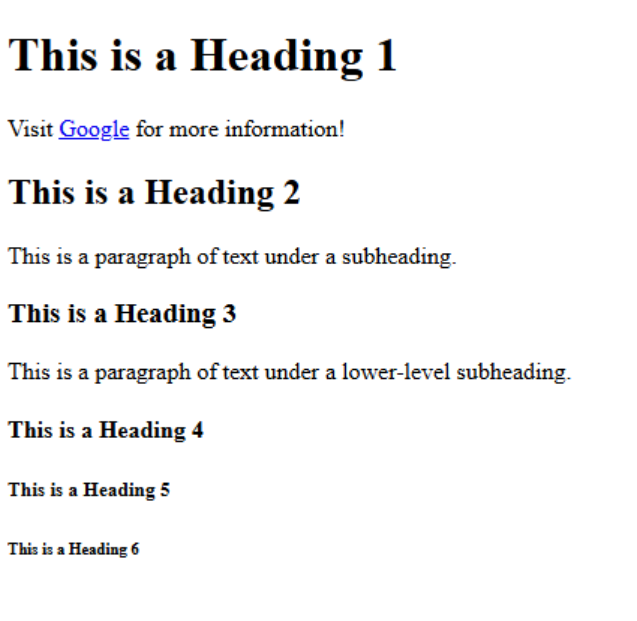
Links
The <a> (anchor) tag is what makes the web a “web.” It allows you to link to other pages on your site or to external websites. You use the href attribute to specify the URL you want to link to, like so: <a href=”https://example.com”>Visit a website</a>.
Example:
<!DOCTYPE html>
<html lang="en">
<head>
    <meta charset="UTF-8">
    <meta name="viewport" content="width=device-width, initial-scale=1.0">
    <title>HTML Headings and Links</title>
</head>
<body>

    <h1>This is a Heading 1</h1>
    <!-- Here's an example of a link tag. The 'href' attribute is the destination URL. -->
    <p>Visit <a href="https://www.google.com" target="_blank">Google</a> for more information!</p>
    <h2>This is a Heading 2</h2>
    <p>This is a paragraph of text under a subheading.</p>
    <h3>This is a Heading 3</h3>
    <p>This is a paragraph of text under a lower-level subheading.</p>
    <h4>This is a Heading 4</h4>
    <h5>This is a Heading 5</h5>
    <h6>This is a Heading 6</h6>

</body>
</html>
Sample output:
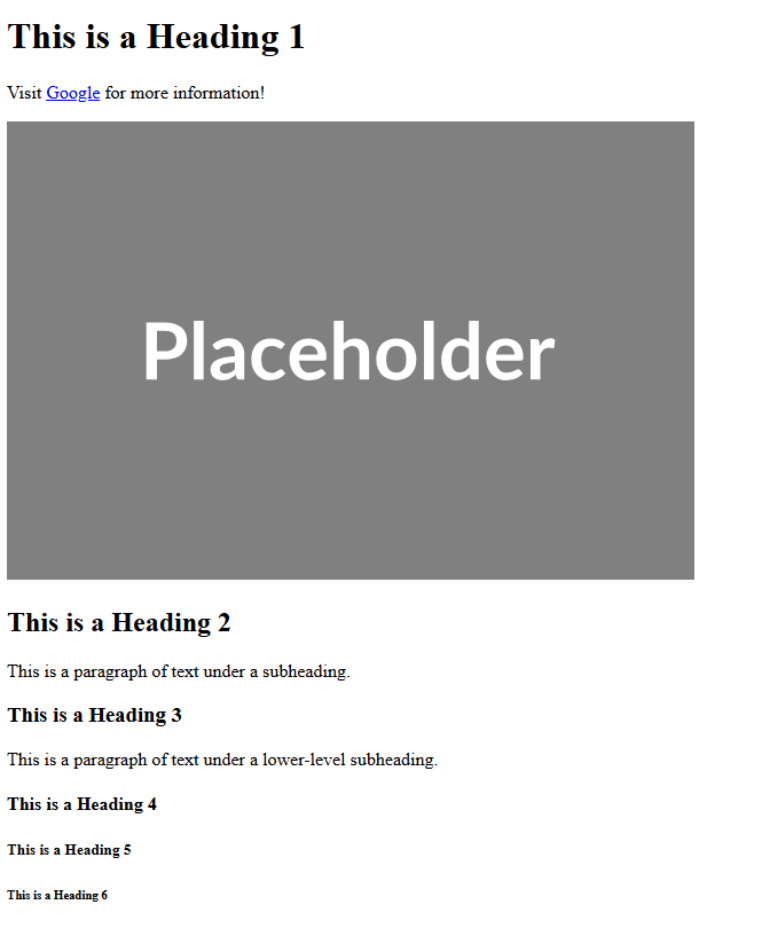
Images
The <img> tag is used to embed images. It is a “self-closing” tag, which means it doesn’t have a separate closing tag. The src attribute is essential, as it points to the location of the image file. It’s also best practice to always include the alt attribute, which provides a text description of the image for accessibility: <img src=”my-image.jpg” alt=”A description of my image”>.
Example:
<!DOCTYPE html>
<html lang="en">
<head>
<meta charset="UTF-8">
<meta name="viewport" content="width=device-width, initial-scale=1.0">
<title>HTML Headings, Links, and Images</title>
</head>
<body>
<h1>This is a Heading 1</h1>
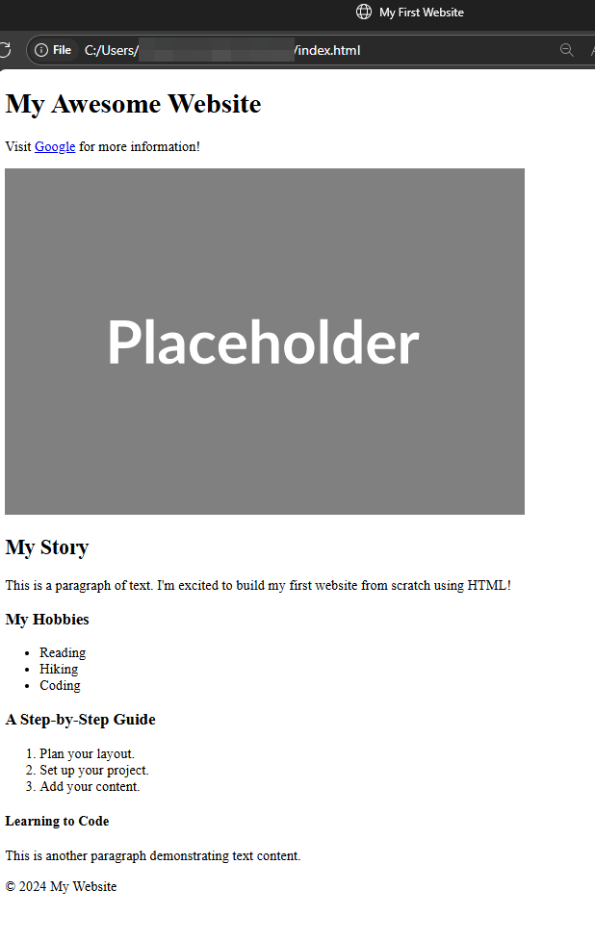
<p>Visit <a href="https://www.google.com" target="_blank">Google</a> for more information!</p>
<!-- This is a placeholder image. The 'src' attribute points to the image URL, and the 'alt' attribute provides a text description for accessibility. -->
<img src="https://placehold.co/600x400/grey/white?text=Placeholder" alt="A gray box with the text Placeholder.">
<h2>This is a Heading 2</h2>
<p>This is a paragraph of text under a subheading.</p>
<h3>This is a Heading 3</h3>
<p>This is a paragraph of text under a lower-level subheading.</p>
<h4>This is a Heading 4</h4>
<h5>This is a Heading 5</h5>
<h6>This is a Heading 6</h6>
</body>
</html> Sample output:
Lists
Lists are great for organizing information. Use the unordered list (<ul>) for bullet points and the ordered list (<ol>) for numbered lists. Each item in the list is defined by a list item tag (<li>).
Example:
<!DOCTYPE html>
<html lang="en">
<head>
    <meta charset="UTF-8">
    <meta name="viewport" content="width=device-width, initial-scale=1.0">
    <title>HTML Headings, Links, Images, and Lists</title>
</head>
<body>
    <h1>This is a Heading 1</h1>
    <p>Visit <a href="https://www.google.com" target="_blank">Google</a> for more information!</p>
    <img src="https://placehold.co/600x400/grey/white?text=Placeholder" alt="A gray box with the text Placeholder.">
    <h2>This is a Heading 2</h2>
    <p>This is a paragraph of text under a subheading.</p>
    <h3>This is a Heading 3</h3>
    <p>This is a paragraph of text under a lower-level subheading.</p>

    <!-- This is an unordered list (ul) for bullet points. Each item is an li tag. -->

    <h4>My Favorite Foods</h4>
    <ul>
      <li>Pizza</li>
      <li>Tacos</li>
      <li>Sushi</li>
    </ul>

    <!-- This is an ordered list (ol) for a numbered list. -->

    <h4>Step-by-Step Guide</h4>

    <ol>
      <li>First, do this step.</li>
      <li>Next, do this step.</li>
      <li>Finally, finish the process.</li>
    </ol>

    <h4>This is a Heading 4</h4>
    <h5>This is a Heading 5</h5>
    <h6>This is a Heading 6</h6>

</body>
</html>
Sample output:

Semantic elements
Earlier, we discussed planning your layout with a header, navigation, and footer. HTML provides specific semantic tags to define these sections, which gives them meaning. Use <header>, <nav>, and <footer> to wrap your content and makes your code easier to read and understand. This practice also helps search engines and screen readers better interpret your page’s structure.
Example:
<!DOCTYPE html>
<html lang="en">
<head>
<meta charset="UTF-8">
<meta name="viewport" content="width=device-width, initial-scale=1.0">
<title>My First Website</title>
</head>
<body>
<!-- The <header> is a semantic element that contains introductory content, like a site's title or logo. -->
<header>
<h1>My Awesome Website</h1>
</header>
<!-- The <nav> element is for navigation links. -->
<nav>
<p>Visit <a href="https://www.google.com" target="_blank">Google</a> for more information!</p>
</nav>
<!-- The <main> element contains the main, unique content of the page. -->
<main>
<!-- This is a placeholder image. The 'src' attribute points to the image URL, and the 'alt' attribute provides a text description. -->
<img src="https://placehold.co/600x400/grey/white?text=Placeholder" alt="A gray box with the text Placeholder.">
<h2>My Story</h2>
<p>This is a paragraph of text. I'm excited to build my first website from scratch using HTML!</p>
<h3>My Hobbies</h3>
<!-- This is an unordered list (ul) for bullet points. Each item is an li tag. -->
<ul>
<li>Reading</li>
<li>Hiking</li>
<li>Coding</li>
</ul>
<h3>A Step-by-Step Guide</h3>
<!-- This is an ordered list (ol) for a numbered list. -->
<ol>
<li>Plan your layout.</li>
<li>Set up your project.</li>
<li>Add your content.</li>
</ol>
<h4>Learning to Code</h4>
<p>This is another paragraph demonstrating text content.</p>
</main>
<!-- The <footer> contains information like a copyright notice or contact details. -->
<footer>
<p>© 2024 My Website</p>
</footer>
</body>
</html> Sample output:
Step 4. Structure with containers
While <header>, <nav>, and <footer> are semantic elements, their primary purpose in the previous step is to act as containers. These semantic tags group related content together and create a clear and logical hierarchy for your webpage. While the <div> tag can also be used for grouping, semantic tags are preferred because they provide meaning to both web browsers and other developers who read your code.
Organizing your code with these containers is a crucial part of learning how to build a website with HTML that can be easily expanded later. When your code is logically structured, it’s easier to read, update, and manage. If you need to add a new section, you know exactly where to put it without creating a messy file. This practice makes your code more maintainable and sets a strong foundation for adding styling and functionality later on.
Example:
<!DOCTYPE html>
<html lang="en">
<head>
<meta charset="UTF-8">
<meta name="viewport" content="width=device-width, initial-scale=1.0">
<title>My First Website</title>
</head>
<body>
<!-- The <header> is a semantic element that contains introductory content, like a site's title or logo. -->
<header>
<h1>My Awesome Website</h1>
</header>
<!-- The <nav> element is for navigation links. -->
<nav>
<p>Visit <a href="https://www.google.com" target="_blank">Google</a> for more information!</p>
</nav>
<!-- The <main> element contains the main, unique content of the page. -->
<main>
<!-- This is a placeholder image. The 'src' attribute points to the image URL, and the 'alt' attribute provides a text description. -->
<img src="https://placehold.co/600x400/grey/white?text=Placeholder" alt="A gray box with the text Placeholder.">
<h2>My Story</h2>
<p>This is a paragraph of text. I'm excited to build my first website from scratch using HTML!</p>
<h3>My Hobbies</h3>
<!-- This is an unordered list (ul) for bullet points. Each item is an li tag. -->
<ul>
<li>Reading</li>
<li>Hiking</li>
<li>Coding</li>
</ul>
<h3>A Step-by-Step Guide</h3>
<!-- This is an ordered list (ol) for a numbered list. -->
<ol>
<li>Plan your layout.</li>
<li>Set up your project.</li>
<li>Add your content.</li>
</ol>
<h4>Learning to Code</h4>
<p>This is another paragraph demonstrating text content.</p>
<!-- A good use case for a <div> is to wrap elements for styling purposes when there isn't a more specific tag. -->
<div>
<!-- We will style this div later using CSS to create a container for a message box. -->
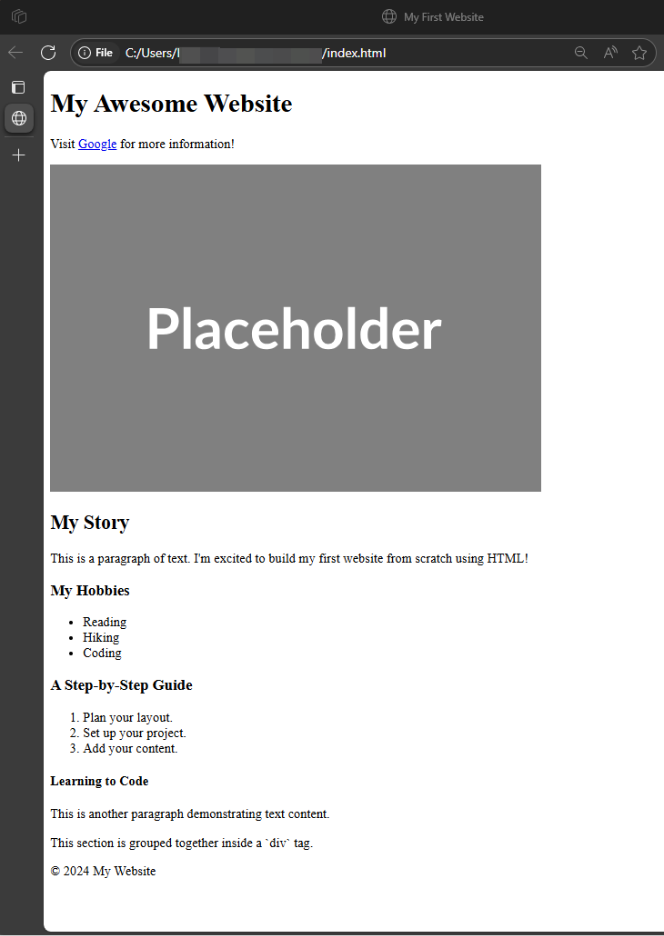
<p>This section is grouped together inside a `div` tag.</p>
</div>
</main>
<!-- The <footer> contains information like a copyright notice or contact details. -->
<footer>
<p>© 2024 My Website</p>
</footer>
</body>
</html> Sample output:
Step 5. Style your site with CSS
Now that your website has a solid structure with HTML, it’s time to give it some style. This is where Cascading Style Sheets (CSS) comes in. Think of HTML as the skeleton of your website and CSS as the clothing, makeup, and design that make it look good.
By using CSS, you can control the visual appearance of all your HTML elements, including:
- Colors and backgrounds. Change the color of your text or the background of the entire page or a specific section.
- Fonts. Choose fonts and change their size, weight, and style.
- Layout and spacing. Adjust the space around your elements and create layouts that are visually appealing and easy to read.
- Navigation. Turn a simple list of links into a professional-looking navigation bar.
In the past, people learning how to build a website with HTML would often use HTML attributes to style their page. For example, to center a paragraph, you would use a tag like <center> or an attribute like <p style=”text-align:center;”>. However, these methods are now outdated and no longer supported in modern HTML.
The reason for this change is a core principle of web development called Separation of Concerns. This simply means keeping your code organized by function:
- HTML’s concern is structure. Its job is to define the content—”this is a paragraph,” “this is a heading,” “this is a list.”
- CSS’s concern is presentation. Its job is to define how that content looks—”this paragraph should be centered,” “this heading should be red,” “this list should have a blue background.”
Separating these two functions makes your code much cleaner, easier to manage, and more flexible. If you want to change the color of all your headings, you only need to change one line of code in your CSS file, rather than having to edit every single heading tag in your HTML.
For this example, we’ll add our CSS directly into the HTML file using the <style> tag inside the <head> section. This is a great way to start because it keeps all your code in one place. You’ll see how we use simple CSS rules to change the font, add a background color, and style our navigation bar to make it stand out, all without using any old, deprecated HTML styling tags.
Example:
<!DOCTYPE html>
<html lang="en">
<head>
<meta charset="UTF-8">
<meta name="viewport" content="width=device-width, initial-scale=1.0">
<title>My First Website</title>
<!-- The <style> tag is where we'll add all our CSS rules to style the HTML elements on the page. -->
<style>
/* CSS reset to ensure consistent styling across browsers. */ * { box-sizing: border-box; margin: 0; padding: 0; }
/* Styling for the body, which affects the entire page. */
body {
font-family: Arial, sans-serif; /* Changes the font for the whole page. */
background-color: #f4f4f4; /* Sets a light gray background color. */
color: #333; /* Sets the default text color to a dark gray. */
line-height: 1.6;
}
/* Styling for the header section. */
header {
background: #333;
color: #fff;
padding: 1rem 0;
text-align: center;
}
/* Styling for the navigation bar. */
nav {
background: #555;
color: #fff;
padding: 0.5rem 0;
text-align: center;
}
/* Styling for links inside the nav bar. */
nav a {
color: #fff;
text-decoration: none; /* Removes the underline from links. */
padding: 0 1rem;
}
/* Styling for links when the user hovers over them. */
nav a:hover {
color: #ddd; /* Changes the link color to a lighter gray on hover. */
}
/* Styling for the main content area. */
main {
padding: 2rem;
max-width: 960px;
margin: auto;
}
/* Styling for the footer section. */
footer {
text-align: center;
padding: 1rem 0;
background: #333;
color: #fff;
position: fixed;
bottom: 0;
width: 100%;
}
/* A good use case for a <div> is to wrap elements for styling purposes when there isn't a more specific tag. */
.message-box {
border: 2px solid #555;
padding: 1rem;
margin: 1rem 0;
background-color: #fff;
border-radius: 8px; /* Adds rounded corners to the box. */
}
</style>
</head>
<body>
<!-- The <header> is a semantic element that contains introductory content, like a site's title or logo. -->
<header>
<h1>My Awesome Website</h1>
</header>
<!-- The <nav> element is for navigation links. -->
<nav>
<a href="#about">About</a>
<a href="#contact">Contact</a>
</nav>
<!-- The <main> element contains the main, unique content of the page. -->
<main>
<!-- This is a placeholder image. The 'src' attribute points to the image URL, and the 'alt' attribute provides a text description. -->
<img src="https://placehold.co/600x400/grey/white?text=Placeholder" alt="A gray box with the text Placeholder.">
<h2>My Story</h2>
<p>This is a paragraph of text. I'm excited to build my first website from scratch using HTML!</p>
<h3>My Hobbies</h3>
<!-- This is an unordered list (ul) for bullet points. Each item is an li tag. -->
<ul>
<li>Reading</li>
<li>Hiking</li>
<li>Coding</li>
</ul>
<h3>A Step-by-Step Guide</h3>
<!-- This is an ordered list (ol) for a numbered list. -->
<ol>
<li>Plan your layout.</li>
<li>Set up your project.</li>
<li>Add your content.</li>
</ol>
<h4>Learning to Code</h4>
<p>This is another paragraph demonstrating text content.</p>
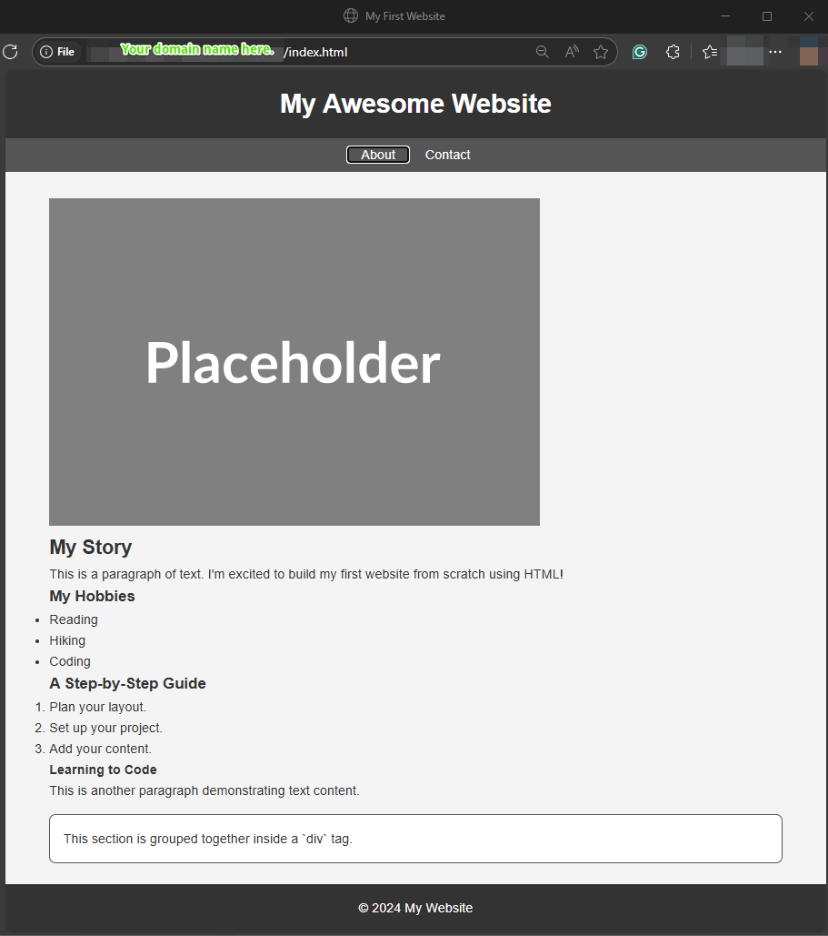
<!-- The div below has a class name "message-box" which allows us to target it with CSS for styling. -->
<div class="message-box">
<p>This section is grouped together inside a `div` tag.</p>
</div>
</main>
<!-- The <footer> contains information like a copyright notice or contact details. -->
<footer>
<p>© 2024 My Website</p>
</footer>
</body>
</html> Sample output:
Step 6. Add interactivity (optional)
If you’re wondering: can I code my own website with HTML alone? Yes, you can. But adding CSS and JavaScript is what adds to the style and makes your site dynamic and responsive to user actions. While CSS provides style, JavaScript powers features like:
- Interactive buttons. A button that changes the text on the page or shows a hidden section.
- Forms. Validating user input and sending it to a server.
- Animations. Making elements move or fade in and out.
- Dynamic content. Loading new content onto the page without a full refresh.
For this step, we’ll add a simple button that changes the text of a paragraph when you click it. This is a perfect way to see JavaScript in action and understand how it connects to your HTML. Let’s place our JavaScript code inside a <script> tag at the very end of the <body>, which is a best practice to ensure all your HTML is loaded before the script tries to interact with it.
Example:
<!DOCTYPE html>
<html lang="en">
<head>
<meta charset="UTF-8">
<meta name="viewport" content="width=device-width, initial-scale=1.0">
<title>My First Website</title>
<!-- The <style> tag is where we'll add all our CSS rules to style the HTML elements on the page. -->
<style>
/* CSS reset to ensure consistent styling across browsers. */
* {
box-sizing: border-box;
margin: 0;
padding: 0;
}
/* Styling for the body, which affects the entire page. */
body {
font-family: Arial, sans-serif; /* Changes the font for the whole page. */
background-color: #f4f4f4; /* Sets a light gray background color. */
color: #333; /* Sets the default text color to a dark gray. */
line-height: 1.6;
}
/* Styling for the header section. */
header {
background: #333;
color: #fff;
padding: 1rem 0;
text-align: center;
}
/* Styling for the navigation bar. */
nav {
background: #555;
color: #fff;
padding: 0.5rem 0;
text-align: center;
}
/* Styling for links inside the nav bar. */
nav a {
color: #fff;
text-decoration: none; /* Removes the underline from links. */
padding: 0 1rem;
}
/* Styling for links when the user hovers over them. */
nav a:hover {
color: #ddd; /* Changes the link color to a lighter gray on hover. */
}
/* Styling for the main content area. */
main {
padding: 2rem;
max-width: 960px;
margin: auto;
}
/* Styling for the footer section. */
footer {
text-align: center;
padding: 1rem 0;
background: #333;
color: #fff;
position: fixed;
bottom: 0;
width: 100%;
}
/* A good use case for a <div> is to wrap elements for styling purposes when there isn't a more specific tag. */
.message-box {
border: 2px solid #555;
padding: 1rem;
margin: 1rem 0;
background-color: #fff;
border-radius: 8px; /* Adds rounded corners to the box. */
}
/* Styling for the button. */
#myButton {
background-color: #5cb85c;
color: white;
padding: 10px 20px;
border: none;
border-radius: 5px;
cursor: pointer;
margin-top: 1rem;
}
#myButton:hover {
background-color: #4cae4c;
}
</style>
</head>
<body>
<!-- The <header> is a semantic element that contains introductory content, like a site's title or logo. -->
<header>
<h1>My Awesome Website</h1>
</header>
<!-- The <nav> element is for navigation links. -->
<nav>
<a href="#about">About</a>
<a href="#contact">Contact</a>
</nav>
<!-- The <main> element contains the main, unique content of the page. -->
<main>
<!-- This is a placeholder image. The 'src' attribute points to the image URL, and the 'alt' attribute provides a text description. -->
<img src="https://placehold.co/600x400/grey/white?text=Placeholder" alt="A gray box with the text Placeholder.">
<h2>My Story</h2>
<p>This is a paragraph of text. I'm excited to build my first website from scratch using HTML!</p>
<h3>My Hobbies</h3>
<!-- This is an unordered list (ul) for bullet points. Each item is an li tag. -->
<ul>
<li>Reading</li>
<li>Hiking</li>
<li>Coding</li>
</ul>
<h3>A Step-by-Step Guide</h3>
<!-- This is an ordered list (ol) for a numbered list. -->
<ol>
<li>Plan your layout.</li>
<li>Set up your project.</li>
<li>Add your content.</li>
</ol>
<h4>Learning to Code</h4>
<p>This is another paragraph demonstrating text content.</p>
<!-- The div below has a class name "message-box" which allows us to target it with CSS for styling. -->
<div class="message-box">
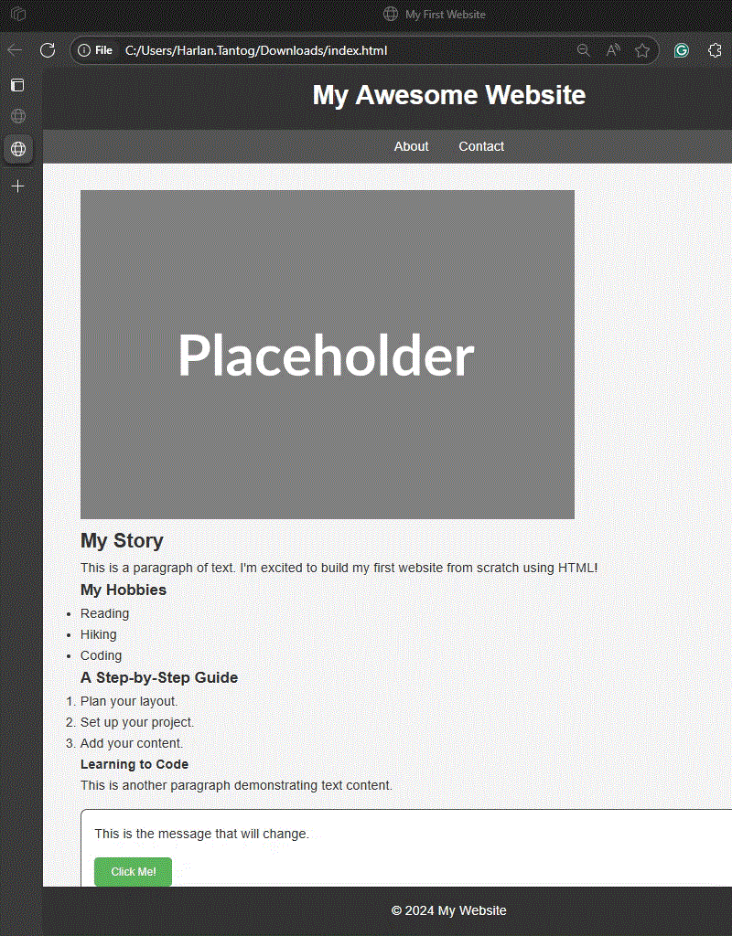
<p id="dynamic-message">This is the message that will change.</p>
<button id="myButton">Click Me!</button>
</div>
</main>
<!-- The <footer> contains information like a copyright notice or contact details. -->
<footer>
<p>© 2024 My Website</p>
</footer>
<!-- The <script> tag is where we will write our JavaScript code for interactivity. -->
<script>
// Get the button and the message element from the HTML using their IDs.
const button = document.getElementById('myButton');
const message = document.getElementById('dynamic-message');
// Add a 'click' event listener to the button.
button.addEventListener('click', () => {
// When the button is clicked, change the text of the message element.
message.textContent = "You clicked the button! JavaScript is working!";
});
</script>
</body>
</html> Sample output:

Step 7. Customize and expand
Now that you have a single, well-structured page, you can easily build upon it to create a full website. The key is to organize your content across multiple pages and to create consistent navigation that allows users to move between them easily.
Adding new sections
You can add a new section directly to your existing index.html file, which is great for a simple, single-page site. For example, we’ll add a new “About Me” section to our homepage. The best practice is to give this section a unique id so you can link to it directly from the navigation bar.
Creating multiple pages
For a larger website, it’s better to create separate HTML files for each major section, like about.html or contact.html. This keeps your files organized and makes the site easier to manage as it grows.
To link to a new page, you’ll simply use the <a> tag with the filename in the href attribute. The new page should have the same header, navigation, and footer as your homepage to ensure a consistent look and feel across the entire site.
Example:
<!DOCTYPE html>
<html lang="en">
<head>
<meta charset="UTF-8">
<meta name="viewport" content="width=device-width, initial-scale=1.0">
<title>My First Website</title>
<!-- The <style> tag is where we'll add all our CSS rules to style the HTML elements on the page. -->
<style>
/* CSS reset to ensure consistent styling across browsers. */
* {
box-sizing: border-box;
margin: 0;
padding: 0;
}
/* Styling for the body, which affects the entire page. */
body {
font-family: Arial, sans-serif; /* Changes the font for the whole page. */
background-color: #f4f4f4; /* Sets a light gray background color. */
color: #333; /* Sets the default text color to a dark gray. */
line-height: 1.6;
}
/* Styling for the header section. */
header {
background: #333;
color: #fff;
padding: 1rem 0;
text-align: center;
}
/* Styling for the navigation bar. */
nav {
background: #555;
color: #fff;
padding: 0.5rem 0;
text-align: center;
}
/* Styling for links inside the nav bar. */
nav a {
color: #fff;
text-decoration: none; /* Removes the underline from links. */
padding: 0 1rem;
}
/* Styling for links when the user hovers over them. */
nav a:hover {
color: #ddd; /* Changes the link color to a lighter gray on hover. */
}
/* Styling for the main content area. */
main {
padding: 2rem;
max-width: 960px;
margin: auto;
}
/* Styling for the footer section. */
footer {
text-align: center;
padding: 1rem 0;
background: #333;
color: #fff;
position: fixed;
bottom: 0;
width: 100%;
}
/* A good use case for a <div> is to wrap elements for styling purposes when there isn't a more specific tag. */
.message-box {
border: 2px solid #555;
padding: 1rem;
margin: 1rem 0;
background-color: #fff;
border-radius: 8px; /* Adds rounded corners to the box. */
}
/* Styling for the button. */
#myButton {
background-color: #5cb85c;
color: white;
padding: 10px 20px;
border: none;
border-radius: 5px;
cursor: pointer;
margin-top: 1rem;
}
#myButton:hover {
background-color: #4cae4c;
}
</style>
</head>
<body>
<!-- The <header> is a semantic element that contains introductory content, like a site's title or logo. -->
<header>
<h1>My Awesome Website</h1>
</header>
<!-- The <nav> element is for navigation links. We now have links to a new page and a section on this page. -->
<nav>
<a href="index.html">Home</a>
<a href="about.html">About Me</a>
</nav>
<!-- The <main> element contains the main, unique content of the page. -->
<main>
<!-- This is a placeholder image. The 'src' attribute points to the image URL, and the 'alt' attribute provides a text description. -->
<img src="https://placehold.co/600x400/grey/white?text=Placeholder" alt="A gray box with the text Placeholder.">
<h2>My Story</h2>
<p>This is a paragraph of text. I'm excited to build my first website from scratch using HTML!</p>
<h3>My Hobbies</h3>
<!-- This is an unordered list (ul) for bullet points. Each item is an li tag. -->
<ul>
<li>Reading</li>
<li>Hiking</li>
<li>Coding</li>
</ul>
<h3>A Step-by-Step Guide</h3>
<!-- This is an ordered list (ol) for a numbered list. -->
<ol>
<li>Plan your layout.</li>
<li>Set up your project.</li>
<li>Add your content.</li>
</ol>
<h4>Learning to Code</h4>
<p>This is another paragraph demonstrating text content.</p>
<!-- The div below has a class name "message-box" which allows us to target it with CSS for styling. -->
<div class="message-box">
<p id="dynamic-message">This is the message that will change.</p>
<button id="myButton">Click Me!</button>
</div>
</main>
<!-- The <footer> contains information like a copyright notice or contact details. -->
<footer>
<p>© 2024 My Website</p>
</footer>
<!-- The <script> tag is where we will write our JavaScript code for interactivity. -->
<script>
// Get the button and the message element from the HTML using their IDs.
const button = document.getElementById('myButton');
const message = document.getElementById('dynamic-message');
// Add a 'click' event listener to the button.
button.addEventListener('click', () => {
// When the button is clicked, change the text of the message element.
message.textContent = "You clicked the button! JavaScript is working!";
});
</script>
</body>
</html>Sample output:
Step 8. Publish your website
With your website built, the final step is to make it accessible to everyone. The process of getting your files online is called web hosting, and there are a few options depending on your needs. Think of it as finding a home for your website on the internet so people can visit it.
Free options for beginners
If you’re learning how to build a website from scratch and want to get your first project online for free, these are excellent places to start:
- GitHub pages. A popular choice for developers, this option lets you turn your website’s code on GitHub into a live website. It’s a fantastic, free way to showcase your skills and your project to the world.
- Netlify. Netlify makes hosting incredibly simple. You connect your GitHub project, and Netlify automatically publishes your site and updates it every time you make changes to your code.
Paid options for professionals
For a professional website for a business or personal brand, you’ll want to invest in paid hosting and a custom domain.
- Paid hosting. Providers like Network Solutions offer more powerful features than free options, including more storage, better performance, and dedicated support. These are perfect for sites that expect a lot of visitors or need advanced features like databases or online stores.
- Custom domains. A custom domain is a unique web address like yourname.com. It makes your site look professional and is easy for people to remember. You can buy these from a domain registrar and then link it to your hosting provider.

You’ve successfully learned how to build a website with HTML from the ground up! You started with a blank page and now have a complete, multi-page website ready to be published. This process shows that you don’t need a lot of complex tools to get started; all you need is a solid understanding of the fundamentals.
Tips for optimizing your HTML site
Now that you have the knowledge and the code, you have everything you need to start building anything you can imagine on the web. But to make sure your site is truly great, you should also consider these tips to make a website with HTML that performs well and reaches a wider audience.
1. Accessibility: Make it usable for everyone
Accessibility means making your website usable for people with disabilities. A key part of this is using alt text for images.
- Why it matters. People with visual impairments use screen readers, which rely on alt text to describe images since they can’t “see” them.
- How to do it. Always include a descriptive alt attribute on your <img> tags.
- Bad Example: <img src=”sunset.jpg” alt=””>
- Good Example: <img src=”sunset.jpg” alt=”A beautiful sunset over a calm ocean.”>
2. SEO: Get found on Google
SEO, or Search Engine Optimization, is the process of making your site easier for search engines like Google to find and rank. Think of it as putting up a clear sign for your website on the internet.
- Meta Tags. The <title> tag in your <head> is one of the most important SEO factors, as it’s what shows up as the title in search results. You can also use other <meta> tags to provide a description and keywords for your site.
- Example: <meta name=”description” content=”A guide to building your first website from scratch with HTML.”>
- Headings. Use headings (<h1>, <h2>, etc.) in a logical order to structure your content. Search engines use them to understand the main topics on your page. The <h1> should always be the most important heading on the page, like the main title.
3. Responsive design: Look good on any device
Responsive design ensures your website looks good and works well on all devices, from a large desktop screen to a small smartphone.
- The Viewport Tag. The most important step for this is adding a single meta tag in your <head> section. This tag tells the browser to scale the page to the device’s screen size.
- Code: <meta name=”viewport” content=”width=device-width, initial-scale=1.0″>
- Flexible Layouts. Use flexible units in your CSS, like percentages (%) and relative units (rem, em), instead of fixed pixels. This allows your layout to stretch and shrink gracefully, so it doesn’t break on smaller screens.
By learning these tips, you’re building a thoughtful, optimized, and professional website that’s ready for the real world.
Do I need HTML to build a website?
This is a question many people ask when they start out, and it’s a great one. The simple answer is: yes, every website on the internet is built on HTML. Even if you use a drag-and-drop website builder, that tool is simply writing the HTML code for you behind the scenes.
So, while you might not have to write HTML yourself with a builder, you can absolutely code your own website directly with HTML, CSS, and JavaScript.
HTML vs. website builders: A quick comparison
- Creating a website is similar to building a house. You can either build it from the ground up or use a ready-made kit.Coding with HTML is like building a house from scratch. You buy the raw materials—the wood, the bricks, the windows—and you put every single piece together yourself. This gives you complete control over every detail of the final design, from the foundation to the roof.
- Using a website builder is like using a pre-packaged kit. You choose a model—a template—and then you can customize it by moving around pre-made rooms and features. It’s much faster, and you don’t need to know how to use a hammer, but you’re limited to what the kit provides.
When to use each
Knowing when to use HTML and when to use a builder is key to your success.
- When to create a website with HTML (Coding):
- If you want to learn the fundamentals. Coding your own site gives you a deep understanding of how the web works.
- If you need a completely unique design. There are no limitations when you start from scratch.
- If you plan to have a career in web development. Learning to code is the foundation of the industry.
- When to use a website builder:
- If you need a site up and quickly. Builders let you create a site in a matter of hours.
- If you don’t want to learn to code. The drag-and-drop interface is perfect for non-technical users.
- If you’re creating a simple portfolio or blog and a pre-made template fits your needs.
You’re ready to start your HTML project!
You did it! You’ve successfully learned how to build a website with HTML from the ground up. We walked you through the entire process: planning, coding, styling, and publishing.
You now have the knowledge and the code to take on your first project. Don’t be afraid to experiment and make errors—they help you learn.
If you’d like to keep coding and want the flexibility to fully customize your site, WordPress hosting is a great option that gives you more control over design and functionality. But if that feels like too much, our drag-and-drop website builder makes it easy to create a professional website without touching any code. And if you’d rather not handle the building at all, our team of web design professionals can build and launch your site for you.
Once your project is ready, power it with a reliable hosting that’s built to scale along with you!
Frequently asked questions
You can definitely learn the basics of HTML in a week. It’s like learning the alphabet; you’ll be able to read and write simple words. You’ll understand the main tags, how to structure a page, and how to add content.
However, to truly master HTML and combine it with CSS and JavaScript to build complex, professional-looking sites, you’ll need more time and practice.
Absolutely! Every website you visit, from a simple blog to a massive online store, uses HTML as its foundation. While other languages and tools have been built on top of it to make the process faster and more dynamic, HTML remains the essential building block of the web.
Yes, you can! You don’t need to spend any money to get started. You can use a free code editor like VS Code and a free hosting service like GitHub Pages to get your site online at no cost. This makes learning to code accessible to everyone.
Yes, HTML is widely considered one of the easiest coding languages to learn. This is because it’s a “markup language,” not a “programming language.” You’re not writing complex logic or instructions; you’re simply using tags to mark up your content. The syntax is straightforward and easy to understand, making it a perfect starting point for anyone interested in web development.