Key takeaways:
- HTTPS encrypts data between your site and visitors, protecting passwords, payments, and personal information.
- Secure sites display a padlock in browsers, which builds trust and improves customer confidence.
- You can enable HTTPS by installing an SSL certificate, and it also helps improve SEO rankings and site performance.
If your website still runs on HTTP, you’re putting visitors at risk. Browsers like Google mark non-HTTPS sites as “Not Secure”, which discourages users from staying on your site.
Search engines also use HTTPS as a ranking signal, meaning unsecured sites are less likely to rank high.
When a site is secured with HTTPS, many browsers display a padlock icon in the address bar. Some even show a green padlock to indicate a secure connection, which helps build user trust.
Here, we’ll walk you through the step-by-step process of getting HTTPS on your website, from obtaining an SSL certificate to resolving common errors after installation.
What is HTTPS?
Hypertext Transfer Protocol Secure (HTTPS) is a secure version of HTTP, the protocol that moves data between your website and a visitor’s browser. The difference is that HTTPS uses Secure Socket Layer (SSL)/TLS encryption.
Secure Socket Layer (SSL) and Transport Layer Security (TLS) are security protocols that encrypt the connection between a web server and a browser. These protocols use private and public keys to establish secure communication. Meaning your information like passwords or payment details travels across the internet in a safe way.
When you install an SSL certificate, your site gains the ability to use HTTPS. TLS is the newer, more secure version of SSL, but most people still use the term SSL certificate to describe it.
Think of HTTP and HTTPS like sending a postcard versus sending a sealed envelope:
- With HTTP, anyone handling the postcard can read the message.
- With HTTPS, the message is inside a sealed envelope, so only the receiver can open and read it.
How does HTTPS work to provide a secure connection?
Encryption scrambles the data so it can only be read by the intended recipient. During the SSL/TLS handshake, a key exchange process takes place to securely establish encryption parameters between the client and the server.
Here’s what happens behind the scenes:
- A visitor enters your website URL.
- The browser sends a “ClientHello” message to request a secure connection from the server.
- The server sends back a “ServerHello” message along with its SSL/TLS certificate, which serves as proof of authenticity.
- The browser checks the certificate chain up to the root Certificate Authority (CA) to ensure the certificate is trusted and hasn’t expired.
- Once verified, the browser and server generate a unique session key. All subsequent communication between the browser and server is then encrypted with this key.
For example:
- If someone logs in to their online banking website, HTTPS ensures their username and password are unreadable to outsiders, preventing them from being stolen by eavesdroppers.
- If a shopper enters credit card details on an eCommerce site, HTTPS keeps that data secure until it reaches the payment processor. This prevents malicious actors from performing a man-in-the-middle attack.
Without HTTPS, the risk is high. Hackers can intercept unencrypted data and misuse it. That’s why HTTPS is now a requirement for every website, not just for businesses handling sensitive information.
Read our guide about SSL vs HTTPS for more added value.
Types of SSL certificates
SSL certificates come in several types, each designed to meet different security needs and validation requirements:
- Domain validated (DV) certificates
- Organization validated (OV) certificates
- Extended validation (EV) certificates
- Wildcard certificates
- Multi-domain certificates
Let’s delve into details.
Domain validated (DV) certificates
These are the most basic SSL certificates. It provides encryption and verifies only that you own the domain. DV certificates are ideal for personal blogs, portfolios, or small websites that don’t handle sensitive data.
Organization validated (OV) certificates
OV certificates provide a higher level of security by verifying both domain ownership and the organization’s identity. This type of SSL certificate is recommended for business websites, as it reassures visitors that your company is legitimate.
Extended validation (EV) certificates
EV certificates provide the highest level of trust and security. The certificate authority conducts a thorough vetting process to confirm your organization’s legal, physical, and operational existence. EV certificates are ideal for eCommerce, financial, and healthcare websites where user trust is vital.
Wildcard certificates
If you need to secure a main domain and all its subdomains, a wildcard certificate is the best choice. With a single certificate, you can secure an unlimited number of subdomains, making management simple and cost-effective.
Multi-domain certificates
Also known as Server Name Indication (SAN)or Unified Communications Certificate (UCC) certificates, these allow you to secure multiple domains and subdomains with a single certificate. This is ideal for organizations managing several websites or brands.
Each type of SSL certificate serves a specific purpose, so consider your website’s structure and the level of validation your visitors expect when choosing between different types of SSL. Securing your site with the right SSL certificate is the first step toward establishing a safer and more trustworthy online presence.
How to get HTTPS on your website (easy steps)
Now that you already know what HTTPS is and how it works, let’s walk through the steps on how to add it to your website.
- Get an SSL certificate
- Install the SSL certificate
- Update website configuration
- Fix mixed content issues
- Test and verify https setup
- Update Google and SEO settings
Note: The process of installing and configuring HTTPS may vary depending on your hosting provider.
Read on for more details.
1. Get an SSL certificate
The first step to enabling HTTPS into your website is getting an SSL certificate. This verifies your website’s identity and allows browsers to establish a secure, encrypted connection with your server. Without it, visitors will see “Not Secure” warnings.
Always make sure to use a certificate from a trusted provider so that browsers recognize your website as secure.
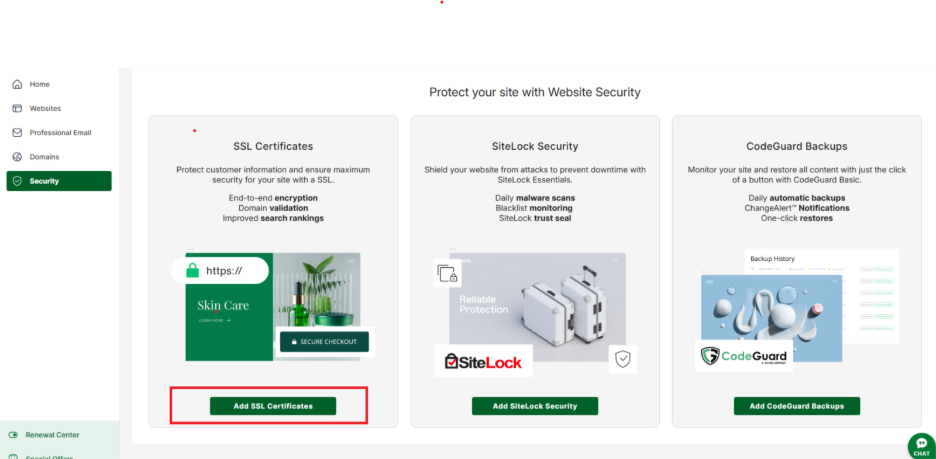
You can obtain SSL certificates through Network Solutions. We provide options suited for different website sizes and security requirements.

2. Install the SSL certificate
Once you have an SSL certificate, the next step is installing it on your server. The process depends on where your website is hosted. Here’s how:
If you’re using shared hosting (like with Network Solutions), the process is simple:
- Log in to your control panel.
- Go to the Security tab.
- Upload or activate your certificate.
- Most providers offer a one-click installation if you purchased the certificate through them.
If you’re using managed platforms such as WordPress hosting or site builders:
These often include built-in SSL options. You can enable HTTPS directly from the dashboard with a toggle or activation button.
After installation, confirm that your website loads with https:// in the address bar. If you see the padlock icon, the certificate is active.
3. Update website configuration
Installing the SSL certificate isn’t enough. You need to make sure all visitors are directed to the HTTPS version of your site. This prevents duplicate content issues and ensures users don’t land on unsecured pages.
To force HTTPS, go to your WordPress or CMS admin and update your site URL in the settings to use https://. Many plugins are available to handle redirects automatically.
After setting up redirects, check your site by entering the HTTP version of your domain. It should automatically redirect to HTTPS.
Tip: Use a 301 redirect instead of a 302. This tells search engines the change is permanent and helps preserve your SEO rankings.
4. Fix mixed content issues
After enabling HTTPS, some pages may still load resources such as images, scripts, or stylesheets over HTTP. This creates mixed content errors, which prevent the padlock icon from showing in browsers.
To fix this:
- Update internal links. Replace http:// with https:// in your code, database, or CMS settings.
- Check external resources. Make sure third-party scripts, fonts, and plugins are loaded over HTTPS.
- Use tools and plugins:
- WordPress users can install plugins like Better Search Replace to update database links.
- Browser developer tools will show which files are still loading via HTTP.
Example: If an image is linked as http://example.com/image.jpg, change it to https://example.com/image.jpg.
Once all resources use HTTPS, your site will show the secure padlock without warnings.
5. Test and verify HTTPS setup
After installing your SSL certificate and fixing mixed content, you need to confirm everything is working correctly. A proper test ensures visitors and search engines see your site as secure.
Here’s what to do:
- Check in the browser.
- Visit your site with https://.
- Look for the padlock icon in the address bar.
- Make sure no warnings appear.
- Use SSL testing tools:
- SSL Server Test – gives a detailed grade of your SSL configuration.
- Why No Padlock – checks for mixed content and insecure elements.
- Verify redirects. Enter the http:// version of your site. It should redirect automatically to the secure https:// version.
- Test on multiple devices. Open your site on desktop and mobile to confirm it works everywhere.
If you see any errors, review your SSL installation, redirect rules, and mixed content settings to ensure all resources are loading securely.
6. Update Google and SEO settings
Switching to HTTPS affects how search engines index your site. To protect your rankings and make sure traffic flows to the secure version, update your SEO settings.
Key actions to take:
- Add your HTTPS version to Google Search Console: Add the HTTPS version of your site as a new property. Then, you can submit an updated sitemap that includes only HTTPS URLs.
- Google Analytics. Update your property settings to reflect the HTTPS domain.
- Update robots.txt and canonical tags. Ensure they reference HTTPS, not HTTP.
- Backlinks and internal links. Update links in menus, footers, and blog posts so they point to the secure version.
- Check plugins and integrations. Update payment processors, email services, and third-party apps to use HTTPS URLs.
Doing this helps search engines recognize HTTPS as the official version of your site and prevents duplicate indexing issues.
Why you need HTTPS for your website
Switching from HTTP to HTTPS is not optional. It’s a requirement for security, trust, and visibility online. Here’s why:
- It protects user data. Every form submission, login, or transaction is encrypted. This prevents hackers from intercepting sensitive information, such as emails, passwords, and credit card numbers.
- It builds trust with visitors. Modern browsers show a padlock icon on HTTPS sites. Without it, users see a “Not Secure” warning. This drives visitors away and lowers conversions.
- It improves SEO rankings. Google has used HTTPS as a ranking signal since 2014. Sites with HTTPS are more likely to appear higher in search results compared to unsecured sites.
- It supports modern web features. Technologies such as HTTP/2, Progressive Web Apps, and geolocation APIs often require a secure connection to function properly.
Get your site secured with SSL
Adding HTTPS protects user data, builds trust, and helps your site rank better in search engines. Following the process discussed would allow you to have HTTPS that increases your site’s overall credibility.
You can get your SSL certificate through Network Solutions. We offer options tailored to various website needs, making it easy to secure your site and maintain its trustworthiness with browsers.
Start today and ensure every visitor connects to your site through a secure, encrypted connection.
Frequently asked questions
For most blogs, portfolios, and small business websites, a free SSL certificate is sufficient. If you run an eCommerce site or handle sensitive data, a paid SSL certificate offers stronger validation and extra features.
Yes, in many cases. HTTPS enables modern protocols like HTTP/2, which can improve loading speed compared to HTTP.
Google uses HTTPS as a ranking signal. While it won’t guarantee top rankings, it helps build trust and can give your site a slight edge over competitors that lack security.
If your SSL expires, browsers will show a “Not Secure” warning, and visitors may leave your site. To prevent this, set up reminders or use automated SSL renewal services.
No. Every website benefit from HTTPS. Even informational sites need it to build trust, protect user privacy, and avoid browser warnings.