Key takeaways:
- An HTTPS proxy helps you browse privately by hiding your IP and encrypting your web traffic.
- You can set up a basic HTTPS proxy using a subdomain, SSL certificate, and a PHP-based script, such as miniProxy or Glype.
- For more advanced control, tools like Squid let you run a system-level proxy with user authentication, caching, and access rules.
If you’re feeling like your online activity isn’t truly private, an HTTPS proxy server may put you back in control.
In this guide, we’ll show you the process of how-to set up an HTTPS proxy server. We’ll also explain what these servers do, why they matter for privacy and performance, and how they differ from other proxies.
We’ll cover both browser-based setups (using simple PHP scripts like Glype) and more advanced, system-level options like Squid for those who need greater control. Whether you’re a beginner looking for a quick solution or a more advanced user wanting full traffic management, this guide is designed to meet you where you are.
What is an HTTPS proxy server?
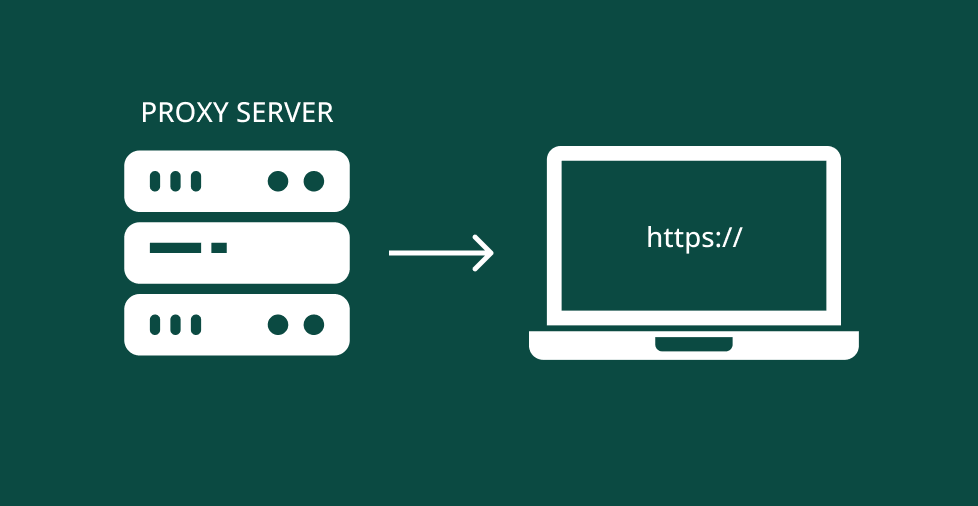
An HTTPS proxy server is an intermediary server that acts as a gateway between your device and the websites you visit. It sends and receives internet traffic on your behalf. When you connect via Hypertext Transfer Protocol Secure (HTTPS), the communication between your device and the proxy is encrypted. This adds a layer of security to keep your data and privacy safe.
To give you a better idea, here’s how it works:
- Normally, when you visit a page, your requests are sent directly to the website. Then, the website responds by showing you the page.
- But with a proxy server, it’s the first one to receive your request. The proxy server then communicates with the website on your behalf. And when the website sends back the information, the proxy retrieves it and displays the page.
Think of it like asking a friend to buy something for you at a store. Your friend (the proxy server) goes to the store, buys what you want and brings it back to you. The store (the web server) only sees your friend, not you.
Why should you use an HTTPS proxy server?
Using an HTTPS proxy server is a good way to enhance your online privacy and security. While it acts as a middleman between you and the website, it offers added benefits that’s especially useful for your needs.
Here are a few good reasons why you need an HTTPS proxy server:
- Protect your privacy. It hides your IP address so websites and trackers can’t easily identify you. However, please note that while HTTPS proxies can mask your IP address, other tracking methods, such as browser fingerprinting, may still identify you unless additional privacy tools are used.
- Secure your browser traffic. When properly configured with HTTPS, a proxy can protect browser traffic on public Wi-Fi by encrypting the connection between your browser and the proxy server. That said, it’s not a substitute for a VPN, which secures all network traffic, not just your web browser.
- Control content access. Companies, schools, or parents can use proxies to block certain websites or apply filtering rules. It’s a practical way to limit access to inappropriate or distracting content.
- Bypass restrictions. It can help you access websites that are blocked on your network or in your region by routing traffic through a different IP address or location.
- Monitor activity. Proxies can be configured to log web activity, making them useful for network admins who need to analyze traffic or monitor for security issues.
- Improve speed with caching. If a website has been visited recently, a proxy (especially one with caching capabilities, such as Squid) can serve a saved version of the page. This can reduce load times and save bandwidth.
- Add user authentication. You can add basic authentication to your proxy setup, requiring a username and password to access it. This adds a layer of control, especially if the proxy is self-hosted.
The primary difference from other internet tools is that HTTPS proxies are specifically designed to handle web browsing. They don’t affect other apps on your computer, such as games or video calls.
It functions as a middleman for browsing, fetching pages on your behalf while masking your IP and encrypting the connection.
What do you need to set up an HTTPS proxy server?
To set up a web-based HTTPS proxy server (which is the most common type), you need components that work together to secure and route traffic. While some of the tools, like SSL certificates, are common in web hosting, the setup requires specific elements to function correctly as a proxy.
Here are the components you need:
- A web hosting plan that supports PHP
- A subdomain secured with SSL
- A trusted proxy script
- A file transfer protocol
- Basic security and networking knowledge (optional)
1. A web hosting plan that supports PHP
Your proxy needs a hosting environment that supports dynamic scripts like PHP. In most cases, a shared hosting or a virtual private server (VPS) will be more than enough, as long as it supports:
- A web server (typically Apache or Nginx)
- PHP 7 or 8
- cURL support enabled
- Write access to the web root folder (e.g., public_html)
Note: Not all HTTPS proxies use PHP scripts. Some are system-level proxies (like Squid) that don’t require a web host or PHP.
2. A subdomain secured with SSL
Once your hosting is in place, you’ll want to create a subdomain (such as proxy.yourdomain.com) where the proxy will reside. Subdomains help isolate the proxy from your main site and make it easier to manage.
For privacy and browser compatibility, your proxy must run over HTTPS. That means you’ll need to secure your subdomain with an SSL certificate.
There are different types of SSL certificates available, depending on your needs:
- Single-domain SSL. Secures one domain or subdomain.
- Wildcard SSL. Secures a domain and all its subdomains (e.g., *.yourdomain.com).
- Extended Validation (EV) SSL. Offers strong of identity verification and trust indicators, such as the organization name in the browser bar.
With Network Solutions, you get an all-in-one solution that lets you:
- Register your domain name
- Add a subdomain via your DNS dashboard.
- Select from a range of SSL certificates tailored to your level of coverage and trust.
This lets you manage your domain, hosting, and security all from one place, no jumping between services or configurations.
3. A trusted proxy script
With your environment secured, you’ll need the actual proxy software. Most HTTPS proxies rely on a lightweight PHP script that handles incoming URL requests, fetches the content, and passes it back through your server.
There are two general types to consider:
Web-based proxy scripts (ideal for browser access)
These are written in PHP and run directly on your web host. They’re simple to install and access via a web browser.
Popular examples:
- MiniProxy. Lightweight, single-file PHP proxy that’s easy to deploy
- Glype. Offers an admin interface, filtering tools, and cookie control
- PHProxy. A legacy option, still functional for basic tasks
Advanced proxy software (for server-side control)
If you’re hosting on a VPS or dedicated server, you may consider:
- Squid. A powerful, open-source caching and forwarding HTTP proxy. It’s not web-based, but great for performance optimization, content control, and managing network traffic. Squid is ideal for use cases beyond simple browser-based proxies, such as enterprise-level caching, traffic filtering, and improving network efficiency.
Choose the solution that best fits your needs:
- For simple browsing, web-based scripts are fast and easy to set up.
- For more advanced control and speed optimization, Squid is a good choice; however, please note that it requires command-line setup and server management experience.
Whichever option you choose, ensure that you download from a trusted source to avoid vulnerabilities or malicious code.
4. A file transfer tool
If you’ve installed a proxy script, you also need to upload it to your hosting account. The most common method is via file transfer protocol (FTP).
A tool like FileZilla works well here:
- Connect to your server using your FTP credentials
- Navigate to your subdomain’s directory (e.g., public_html/proxy)
- Upload the script files directly to that folder
5. Basic networking and security knowledge (optional)
While not strictly required for basic setups, understanding some networking fundamentals is helpful if you plan to customize or secure your proxy further. For example:
- Setting up password protection for your proxy admin panel
- Monitoring bandwidth usage to prevent abuse
- Applying rate limiting or IP restrictions for added privacy and control
Step-by-step guide on how to setup an HTTPS proxy server
With your tools in place, you’re ready to set up your HTTPS proxy. Here’s how to do it, step by step:
- Step 1: Set up a subdomain and SSL certificate
- Step 2: Download a proxy script
- Step 3: Upload the proxy files to your server
- Step 4: Configure your proxy settings
- Step 5: Test your proxy
Note: The process below focuses on setting up a web-based HTTPS proxy server. Alternative methods are also shared briefly for reference. Process may vary slightly per device, domain registrar and other factors.
Step 1: Set up a subdomain and SSL certificate
Create a subdomain in your hosting dashboard. You can name it something like “proxy.yourdomain.com”.
Ensure that an SSL certificate is installed on the subdomain to enable secure HTTPS connections. After setup, visit https://proxy.yourdomain.com in your browser to confirm it’s active and encrypted (look for the padlock icon).
Step 2: Download a proxy script
Select your preferred proxy script, download it (typically a .zip or .php file), and extract it to your computer.
Step 3: Upload the proxy files to your server
Upload the extracted script to your web host.
- Use an FTP client like FileZilla to connect to your hosting account.
- Navigate to the folder for your subdomain (usually inside public_html/proxy or a similar directory).
- Upload all the script files into that folder.
Once uploaded, your proxy script is ready to use.
Step 4: Configure your proxy settings
Open your subdomain in a browser (https://proxy.yourdomain.com) and you should see a working proxy homepage with a URL bar. You can now test it by entering a website like https://example.com.
Some scripts (like Glype) include an admin.php file where you can configure settings like:
- Whether to allow cookies
- Whether to enable or disable JavaScript
- Which websites to block or allow
- Logging preferences
Make sure to password-protect this admin page if it exists, to prevent unauthorized access.
Step 5: Test your proxy
Try loading a few secure websites through your proxy. You should see them load inside your browser window with your proxy subdomain still in the address bar.
Look for:
- A padlock icon in your browser, confirming SSL encryption
- Pages loading without errors
- Blocked content (if you’ve added filters)
If everything works, congrats your HTTPS proxy server is live.
Alternative method: Set up a system-level HTTPS proxy server using Squid
Best for:
- Developers
- Privacy-focused users
- Anyone wanting full control over proxy traffic
If you’re looking for a more powerful and secure solution, consider setting up a system-level HTTPS proxy using a tool such as Squid on a Linux server.
Unlike web-based proxies, Squid runs as a background service on a server and can route HTTPS traffic using tunneling. By default, it doesn’t decrypt encrypted content, but advanced configurations like SSL Bump can enable deeper inspection if needed.
You can configure it to route browser traffic, block sites, cache frequently accessed content, and even require user authentication.
Here’s a quick summary of how the system-level method works:
- Rent a VPS (Ubuntu is ideal).
- Install Squid using a few terminal commands.
- Edit the Squid configuration to allow HTTPS traffic.
- Secure it by allowing only your IP or requiring a login.
- Set your browser or operating system to use the proxy.
This method is more flexible and powerful but requires some command-line experience.
When to use system-level instead of web-based
| Use case | Recommended method |
| You want to proxy all internet traffic | System-level (Squid) |
| You need user authentication and logs | System-level |
| You’re writing a script or app to use proxy | System-level |
| You just want to browse through a page | Web-based (Glype or similar) |
| You’re new and want something quick | Web-based |
What’s the difference between HTTPS proxy vs. SOCKS proxy?
An HTTPS proxy operates at the application layer, specifically designed to handle web traffic (HTTP and HTTPS). It can cache content and filter data but primarily encrypts the connection between your device and the proxy server.
A SOCKS proxy (often SOCKS5) operates at a lower network level (session layer), meaning it can handle any type of traffic, like web browsing, email, peer-to-peer, or gaming. On its own, SOCKS5 doesn’t encrypt your connection, but it can be paired with tools like SSH to create a secure tunnel if needed.
Start building your own HTTPS proxy
Setting up an HTTPS proxy server is a practical step toward better privacy, control, and flexibility online. Whether you’re testing filters, bypassing restrictions, or just want to manage your own browsing experience, having your proxy gives you that freedom.
Now that you know how it works and what you need, you’re in a great spot to try it yourself. Make sure to use SSL certificates and explore our hosting options to launch your HTTPS web-based proxy with confidence.
Frequently asked questions
You can, but you shouldn’t if you care about security. Without SSL (it would just be an HTTP proxy):
– No encryption. Your data (passwords, Browse) is sent in plain text, visible to anyone snooping.
– Vulnerable to attacks. You’re exposed to “man-in-the-middle” attacks.
– Limited access. Many modern websites won’t work securely.
Always use SSL for a secure connection.
Here are a few beginner-friendly options:
– MiniProxy. Simple, web-based PHP proxy that runs on shared hosting
– Glype. Offers a user-friendly interface with basic admin settings
– TinyProxy. Lightweight and good for minimal setups
– Squid. More advanced, but great for learning how proxies work
For SOCKS5 encryption, Shadowsocks is a good option. Developers can also explore Node.js proxy scripts for more control.
An HTTPS proxy only routes browser traffic and hides your IP for web activity. A virtual private network (VPN) encrypts all internet traffic across your device, including apps, email, and background services.