Key takeaways:
- Reels now support up to 3 minutes and offer new AI tools, but short clips under 90 seconds often win attention and reach.
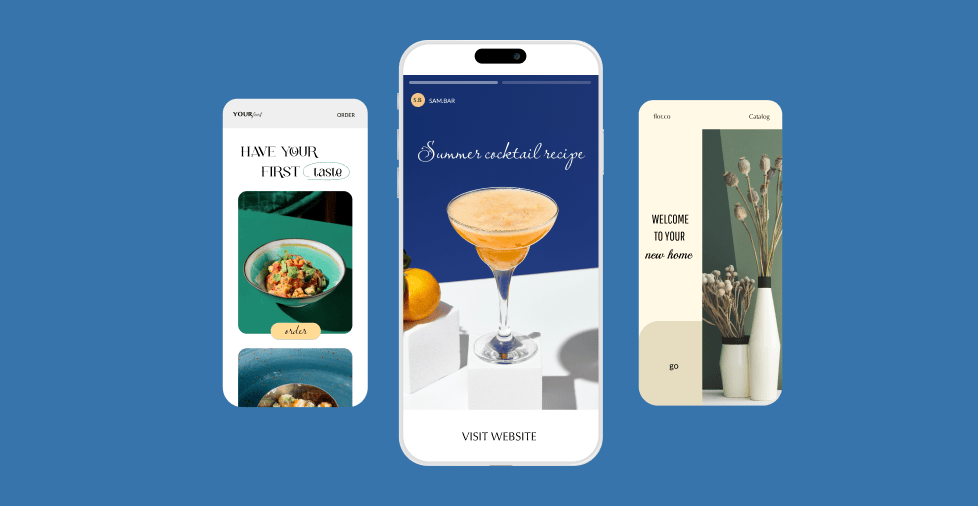
- Plan by funnel: Strong hook, clean edits, captions, product tags, and a steady posting rhythm to move viewers from discovery to purchase.
- Measure with Insights, stay compliant, fix issues fast, and give viewers a clear next step with a domain that matches your IG handle.
We scroll and double-tap, then move on in Instagram posts, but Reels make us pause.
For small businesses in 2025, those 30-second reels are fuel for reach. This guide shows how to turn quick clips into sales, from idea to upload, helping your brand shine in a feed. Discover tactics that convert fleeting views into lasting growth.
At-a-glance: What are Instagram Reels for business
Instagram Reels are short vertical, short-form videos that are up to 3 minutes (180 seconds). This is an increase from the previous 90-second cap. Shorter reels (under 90 seconds) usually drive higher engagement but longer clips can still succeed when they maintain the viewers’ attention, according to Descript.
Unlike Instagram Stories, Reels aren’t automatically deleted after 24 hours. This gives your content longer-term visibility and higher views.
Benefits of Reels
- Reaches people beyond your current followers
- Appears in ‘Explore’ tab and the ‘Reels’ feed for extra visibility
- Allows you to show products in action to spark buying ideas
- Allows you to ride trending audio without the extra spend
- Humanizes your brand through casual clips
- Repurposes the same video on Facebook and ads to save time
- Encourages more comments and shares than static images
Quick tips for Instagram Reels
- Grab attention in the first three seconds with movement or a question
- Turn on captions so silent viewers follow along
- Pair each clip with trending audio that matches your brand
- Keep videos under 30 seconds to hold viewers to the end
- Tag products so buying takes one tap
- Post when your audience is online and reply to comments quickly
- Share user-generated clips to build trust
What’s new with Instagram Reels in 2025?
Instagram packed Reels with upgrades. Clips are now up to three minutes and built-in AI handles translations, captions, and beat matching, so you stay on the story. The next section walks you through the updated specs and the smartest tools to make every post count.
Key specs and limits
- Length. Reels can now run up to 3 minutes / 180 seconds, instead of the old 90-second cap.
- Engagement sweet spot. Clips between 15 and 30 seconds still attract the most likes and replays, according to OneStream Live.
- Dimensions and aspect ratio. Shoot at 1080 × 1920 pixels (9:16) for full-screen viewing; Instagram auto-crops to 4:5 in the feed and 1:1 on your grid.
- File limit and format. Keep uploads under 4 GB in MP4 or MOV to avoid heavy compression.
- Caption room. You get up to 2,200 characters for hashtags, CTAs, and context.
New AI-powered tools
- Voice translation and lip-sync dubbing. Instagram can now auto-translate spoken audio and sync your lips in multiple languages. This widens your global reach without extra editing (FilterGrade).
- Trending-audio shortcut. A new “Trending Audio” button inside the editor surfaces hot tracks to add to your reel. This can give you an edge as a content creator with early access to sounds that can boost reach and visibility (Socioblend).
- Edits app. Meta’s free Edits app rolls out AI animation, auto-captions, green-screen effects, and watermark-free exports. This tool is built to replace CapCut for fast Reels creation (Lifewire).
- Advantage+ generative video. Advertisers can feed still images or logos into Meta’s AI to auto-brand, animate, and resize Reels-ready creative, cutting production time and boosting ROAS (Search Engine Land).
Why Instagram Reels grow small businesses
Reels give small brands a wider reach that sparks engagement, authentic content that earns the audience’s trust, and improvements in clicks and sales. The figures below break down each advantage.
Reach and engagement stats
- Reels see 3–5% average engagement compared to a feed’s under 2% average engagement (Marketing Scoop).
- Reels are 33% more likely to appear on the Explore tab compared to regular photo posts (Zebracat).
- 35% of total Instagram screen time belongs to Reels. This number keeps on rising. (Cropink).
Trust and community building
- 86% of consumers trust brands that share user-generated Reels compared to influencer-only content. This only shows that viewers put more faith in genuine, customer-focused stories than polished influencer promos (AdWeek).
- Accounts that regularly post reels gained followers 33% faster in three months. (Zebracat)
Conversions and sales impact
- Around 61% of viewers say they’re more likely to buy after watching a product demonstration reel. (Zebracat)
- Brands that tag their products in their reels see 45 % more site traffic, and average conversion is at 4.5%. This is higher than static posts which is at 1.8%. (Zebracat)
Strategy first: Match Reels to your sales funnel
With a clear plan, reels can become more than random clips and start leading shoppers toward checkout. Below you’ll see which kind of reel fits each sales stage, how to track results, how stories and feed posts work alongside them, and the best times to post.
| Funnel | Goals | Key Performance Indicators (KPIs) | Why it works | Examples |
| Awareness | Spark discovery Grow reach Pull new followers | Reach rate Reshares Follower lift | Reels are reshared 4.5 billion times every day, planting your clip in feeds far beyond current followers. (Outfy) | Jump on trending audio with a product tease “Day-in-the-life” behind a launch One-question poll that invites comments |
| Consideration | Educate Prove value Earn saves | Average watch time Save rate Profile taps | Tutorial-style reels keep viewers 28% longer than other formats. These types of videos give you more room to teach and build trust. (Zebracat) | 30-second how-to demo Side-by-side before/after A quick frequently asked question (FAQ) answered on-camera |
| Conversion | Drive clicks Boost cart adds Close sales | Product-tag tap-throughs Checkout completions | Brands that tag their products in their reels see 45 % more site traffic | First-person unboxing with shoppable tags Limited-time offer countdown Customer testimonial stitched with a direct call-to-action (CTA) |
Instagram Reels vs. Stories vs. Feed posts: What’s the difference
| Feature | Reels | Stories | Feed posts |
| Discovery reach | Generate 2x more impressions than other post types like carousels and images (Vidico) | Mostly existing followers; boosts intimacy | Depends on follower base and hashtags |
| Lifespan | Permanent on profile and the Explore tab | 24 hours (unless Highlighted on the Instagram page) | Permanent |
| Max length | 3 minutes (180 seconds) | 15 seconds per frame, sequences allowed | Up to 10 min video or carousel |
| Best use | Reach new eyes, trend riding | Real-time Q&A, flash promos | Evergreen authority, detailed visuals |
| Shop/link tools | Product tags, CTA stickers | Link stickers | Link in caption, product tags |
Posting cadence and best times
- Reels: 2–3 per week hits the engagement sweet spot for most brands (Dash Social)
- Stories: Aim for 4 per day to keep the bubble glowing. (Dash Social)
- Feed posts: Keep a consistent 2–3 posts weekly; mix carousels or static images around your Reels. (Dash Social)
Best-time trends (global averages):
- Midnight uploads average over 1 million per post. (ContentGrip)
- Tuesday slots at noon or 3 a.m. secure the highest view counts. (ContentGrip)
How to create reels on the Instagram app
Follow our step-by-step guide on how to make a reel on Instagram:
- Open Instagram. Launch the Instagram app on your mobile device and log in to your account.
- Access the camera. Tap on the plus icon located in the middle of the home screen. This will open the camera interface within the Instagram app.
- Select reels. At the bottom of the screen, you’ll see various post options. Click “Reel.”
- Start creating your reel. You can use an existing video in your camera roll as a reel. Upload it to get started. You can also start with Templates. This allows you to start a reel with pre-set background music, caption, frame, and filter. On the other hand, If you want to record, click the tile below and tap and hold the capture button. You’ll see a progress indicator around the capture button. This indicates how much time you have left of your recording. Feel free to explore options on the right expandable and collapsible menu to add effects to your reel while filming.
- To record multiple clips for your reel, lift your finger off the capture button to pause the recording and then tap it again to resume.
- Enhance your reel. After recording your video clips, click Next. You can enhance your reel by trimming it, adjusting its speed, or playing with effects, background music, voice-overs and text, closed captions, and more.
- Finalize and post. When you’re ready to share your reel, click Next. Add a caption, hashtag, poll, or prompt. You can also tag people, add location, and toggle the ‘add an AI Label’ (a disclaimer if AI had a hand in creating your reel). Set other options, if necessary. Once everything’s set, click Share.
Note: The process described above is current at the time of writing. It may vary per device and following succeeding updates.
Proven Reels ideas for businesses with shooting tips
Bring your phone, good lighting, and a clear and compelling story. The ideas below suit product sellers, service providers, and hometown shops, each paired with a quick tip so you can film fast and hit publish with confidence.
Ideas for product brands
- One-minute unboxing. Record the box opening in a single take. Place the camera at eye level and use natural light to ensure colors are as accurate as can be.
- Before-and-after reveal. Show the item unused, then cut to the final look. Lock your tripod to keep framing identical for both shots.
- Stop-motion assembly. Snap quick photos as you build or style the product, then stitch them into a reel. Use a remote shutter to avoid camera shake.
- Customer reaction mash-up. Compile three short clips of customers praising the product. Add captions for each quote so viewers catch every word, even on mute.
Ideas for service brands
- Time-lapse project flow. Speed-run a full service from start to finish. Shoot at one frame every two seconds to squeeze an hour into under 30 seconds.
- Quick myth buster. Address a common question, then show proof. Start with a bold text overlay in a big font to grab attention in the first second.
- Day-in-the-life. Create behind-the-scenes content to Walk viewers through your schedule. Use jump cuts and on-screen timestamps to keep the pace lively.
- Client testimonial split-screen. Show the client talking on one side and your work on the other. Frame both clips vertically to fill the screen.
Ideas for local businesses
- Store tour in 30 seconds. Guide viewers from door to checkout. Hold the phone at chest height and move slowly to avoid motion blur.
- Meet the team clip. Let staff share quick facts about themselves. Film in front of a branded wall to keep backgrounds consistent.
- Local collab shout-out. Feature a neighboring business and tag them. End with a joint call-to-action to boost cross-traffic.
- Event countdown tease. Post daily snippets leading to a sale or pop-up. Use the same background music across clips to build anticipation.
Make a reel that performs: The workflow
Want a reel that’s scroll-stopping and drives action? Use the simple workflow below.
- Plan your hook and script.
- Film and trim clips.
- Edit with templates and captions.
- Optimize cover, caption, and hashtags.
- Schedule and publish.
1. Plan your hook and script
- Pick one goal for the reel. Examples: follows, saves, product taps, bookings.
- Define the takeaway in one line. Example: “How to style a white tee in 3 ways.”
- Choose a hook for the first three seconds. Choose from a bold result, quick question, visual reveal, or fast movement.
- Map simple beats. 0 to 3 seconds hook, 3 to 15 setup, 15 to 45 value, final CTA.
- List shots, props, and location. Organize these and keep it simple.
- Write the closing CTA. Examples: “Save for later,” “Tap to shop,” “Book a slot.”
2. Film and trim clips
- Shoot vertically at 1080 x 1920, 30 fps. Clean the lens of your camera or mobile phone first. Lock focus and exposure.
- Face a window or a soft light. Avoid harsh overhead light.
- Keep the camera steady. Use a tripod or rest your phone on a stack of books.
- Record two or three takes per shot. Aim for one to three seconds per clip.
- Trim dead air and pauses. This is to ensure that every beat moves the story forward.
3. Edit with templates and captions
- Choose a template. Start with an appropriate template to match your video.
- Add on-screen text that lands with the visuals. It should have one idea per line.
- Turn on auto captions. Fix names and key terms.
- Balance audio so your voice is clear. Keep music under your voice.
- Use simple cuts. Save heavy effects for a single accent moment.
4. Optimize cover, caption, hashtags
- Upload a clean cover that states the benefit. Center the subject so it crops well.
- Write a sharp first line. Add two to three short lines of context and a clear CTA.
- Use three to five specific hashtags plus one or two broad ones. Add a location if relevant.
- Tag products, collaborators, and the location. Enable Remix if you want more reach.
5. Schedule and publish
- Batch the work. Brainstorm ten hooks, script five, film in one session, edit in blocks.
- Schedule in Meta’s planner when your audience is online. This ensures that you don’t forget to post your reel at the scheduled time.
- Run a pre-publish checklist. This includes the cover, captions, tags, products, and accessibility checks.
- Publish your reel. After publishing, share to Stories, pin a helpful comment, and reply fast in the first hour.
- Track results in a simple sheet. Track the reach, average watch time, replays, saves, follows, and product taps. Use what works to plan the next batch.
Best practices to maximize reach
Reach grows when people watch, share, and comment. Use this quick checklist to give your reel a better shot in the Explore tab and your audience.
- Hook viewers in the first two seconds with motion or a clear benefit.
- Keep it tight. Aim for 30–45 seconds when the message allows.
- Add on-screen text and auto captions for silent viewers.
- Use trending audio that fits your brand.
- Choose a clean cover that states the payoff.
- Add 3–5 specific hashtags plus one or two broad tags.
- Tag the location and relevant partners or creators.
- Use Collab posts to publish to both profiles at once.
- Enable Remix and invite duets in your caption.
- Ask a question to spark comments and saves.
- Pin a helpful comment and reply fast in the first hour.
- Share to Stories with a clear CTA sticker.
- Cross-post to Facebook Reels for extra distribution.
- Post when your audience is online and stay consistent.
- Avoid watermarks from other apps.
- Keep the subject centered in 9:16 aspect ratio safe zones.
- Tag products or add a link sticker when relevant.
- Test two covers and first lines. Keep the winner.
- Track reach rate, watch time, and replays. Double down on what works.
How to measure the success of your reels
Skip the guesswork. Use Instagram Insights to track your success. Compare those numbers to your funnel goals to see what to repeat, refine, or cut.
- Reach and plays. Reach shows you unique viewers. Plays can be higher than reach, which hints at replays.
- Average watch time. A quick read on how long viewers stick around. Aim to lift this week over week.
- Completion rate. Percentage of viewers who reach the end. Great for judging hook strength and pacing.
- Engagement. Likes, comments, shares, saves.
- Saves and shares. Saves suggest future intent. Shares expand discovery.
- Follows and profile visits. Signal growing interest and brand lift.
- Taps that matter. Product tag taps, website taps, link sticker taps, DM starts. Use these as proxy steps toward revenue.
Legal and compliance checklist
Stay out of trouble and keep posts live. Use this quick guide as you plan each reel. This is not legal advice, so check local laws and your company policy when in doubt.
Music licensing
- Use Instagram’s Commercial Music Library or tracks you’ve licensed.
- Avoid creator-only or personal-use tracks on business posts.
- When in doubt, pick royalty-free audio or record original sound.
Branded-content tags
- If a brand pays or gives value for a feature, add the Paid partnership label.
- Make sure the partner is approved in your settings before you publish.
Federal Trade Commission (FTC) disclosures for paid partnerships
- Use clear words like Ad, Sponsored, or Paid partnership at the start of the caption and on screen.
- Don’t hide disclosures in a hashtag pack or after a “see more.”
Captioning and accessibility
- Turn on auto captions and fix names, prices, and jargon.
- Keep on-screen text large, high-contrast, and inside safe zones.
Filming in public and location consent
- Get permission on private property.
- In public spaces, avoid filming people who expect privacy, and blur faces if asked.
- If people are featured in ads, get a signed release.
Regulated industries (finance, healthcare, etc.)
- Finance: Add required disclaimers, avoid performance promises, cite risks.
- Healthcare: Never share patient info, get written consent, avoid unapproved claims.
- Keep records of approvals and disclosures.
Quick fixes: Common Reel problems solved
Glitches happen. Use this cheat sheet to diagnose fast and get your post back on track:
| Symptom | Quick fix |
| Audio is muted after upload | Replace the track with one from Instagram’s music library or a licensed file, then re-upload. Check volume sliders in the editor. |
| Video looks blurry | Export at 1080×1920, 30–60 fps, high bitrate. Turn on “Upload at highest quality” in app settings and upload on strong Wi-Fi. |
| Music is blocked in some regions | Pick a track available in your target country from the Commercial Music Library or swap to royalty-free audio. |
| Reach suddenly drops (shadow-ban rumors) | Check your Account Status for violations. Compare reach, watch time, and shares in Insights. If clean, test a new hook, topic, or post time for three clips. |
| Captions are missing or wrong | Enable auto captions, set the correct language, then edit the transcript. Add key terms as on-screen text. |
| Wrong aspect ratio or awkward crop | Use 9:16 (1080×1920). Keep text within safe zones, then update the cover to frame the subject. |
| Content was removed | Read the policy notice, trim the violating section, add proper tags or disclosures, and submit Request Review. If denied, edit and re-post. |
Secure a domain that matches your IG handle
Reels are great for grabbing attention, but real growth happens when your audience knows exactly where to go next. One simple way to guide them is by keeping your name consistent—from Instagram to your website. Match your handle with a domain name and link it to the page you want people to visit. Then, make sure it’s easy to spot: add it to your Instagram bio, captions, and even on-screen text.
When you’re ready, you can register your matching domain with Network Solutions. It’s a small step that makes a big difference—turning views into visits.
Frequently asked questions
They put your brand in front of people who don’t follow you yet, tell quick stories that feel human, and make it easy to show products in action. That combination creates awareness, trust, and clicks without a big budget.
Start with 2–3 reels a week and keep a steady rhythm. Batch ideas and shoots, then adjust using your Instagram Insights.
Yes. Reels reward clear ideas and personality. Lean into customer stories, simple demos, and local moments.
They can, if you connect them to a next step. Use product tags, a clear CTA, and a link to a focused landing page so viewers can act right away.
Instagram allows up to 3 minutes. Most topics work best in 15–30 seconds. Go longer only if every second keeps viewers engaged.