Key takeaways:
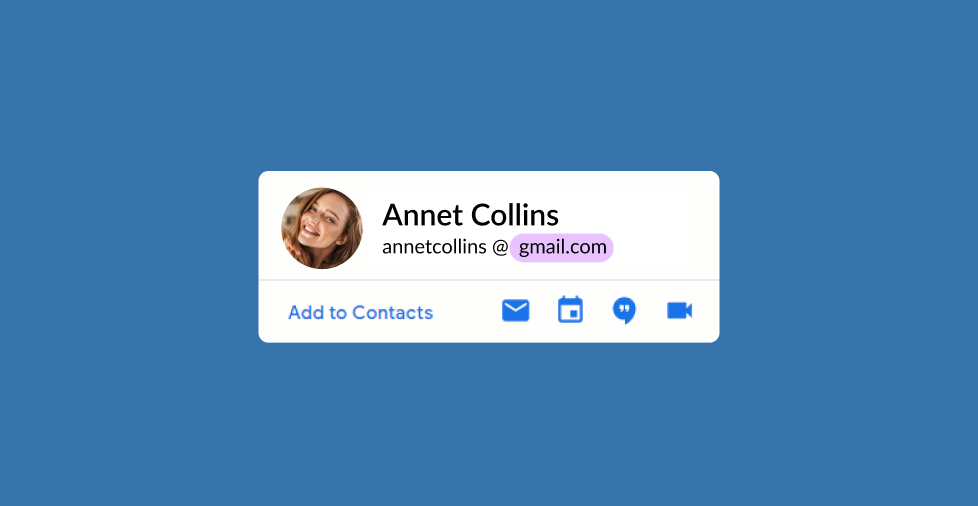
- Gmail domain name is the portion of an email address that follows the “@” symbol, typically “@gmail.com,” and signifies that the email is hosted by Google’s Gmail service.
- Setting up a Gmail custom domain creates a professional email address that builds trust and credibility for any business.
- Google Workspace offers a comprehensive suite of tools, including email, storage, calendars, and collaboration apps, that streamline team productivity and communication.
Establishing credibility in email communications is important for businesses of all sizes. Generic email addresses are no longer sufficient. Would you feel comfortable doing business with someone using a basic Gmail account? Unless you have a personal connection, you’d likely have reservations.
That’s where Gmail custom domains come in. These professional email addresses replace the generic “@gmail.com” suffix with your company’s domain name. This simple change instantly projects a more professional and trustworthy image to clients and partners.
But how do you create these unique email addresses and unlock the powerful features of Google Workspace? We’re here to guide you!
This article will guide you through the steps of setting up a professional email address with a Gmail custom domain, enabling you to fully leverage the capabilities of Google Workspace and enhance your business communication.
Let’s get started!
6 steps to set up a Gmail custom domain for your business
Here’s an overview of the steps required to create a professional Gmail address using your own domain:
- Register your domain
- Sign up for Google Workspace
- Verify your domain ownership
- Set up custom email addresses
- Migrate existing email and data (optional)
- Configure MX records
Step 1: Register your domain
The first step in setting up an email is registering a domain name. Through the Domain Name System (DNS), computers can send and receive emails through the domain name settings called MX record.
A domain registrar, such as Network Solutions, is necessary to register a domain name. Domain registrars are internet companies that manage your domain name. Think of them as real estate agents for internet addresses. Just like a real estate agent helps you buy or sell a house, a domain registrar helps you buy or sell a domain name.
When you buy a domain name, you’re renting it from the domain registrar. They keep track of who owns domain names and make sure that only one person can use a particular domain name at a time.
Domain registrars are afforded this privilege because:
- They have received accreditation through ICANN.
- They have built up years of experience in the domain world.
- It helps centralize and track the ownership and availability of names.
Purchasing a domain name
Checking a domain name’s availability at Network Solutions is simple. On the Network Solutions website, type the name you’d like to register for and click search.
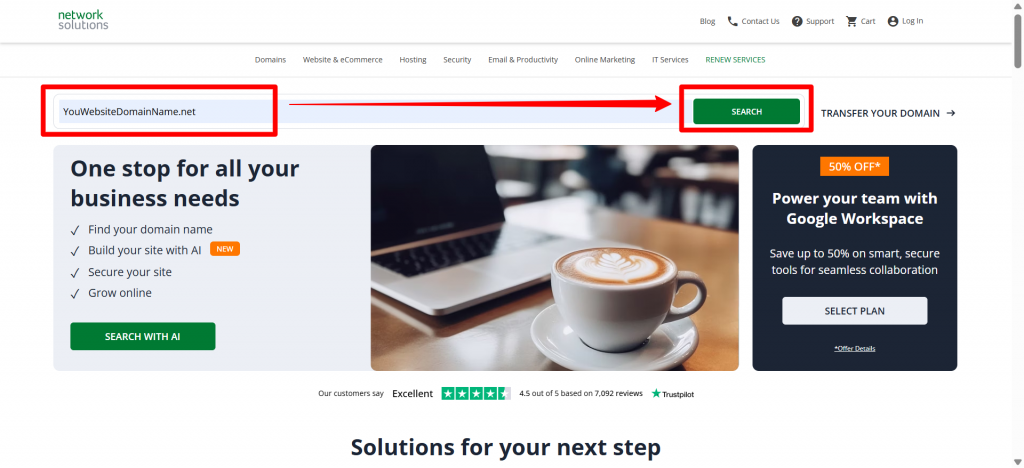
If it’s available, buy your domain name. Otherwise, a list of the domain variations will appear for your consideration.
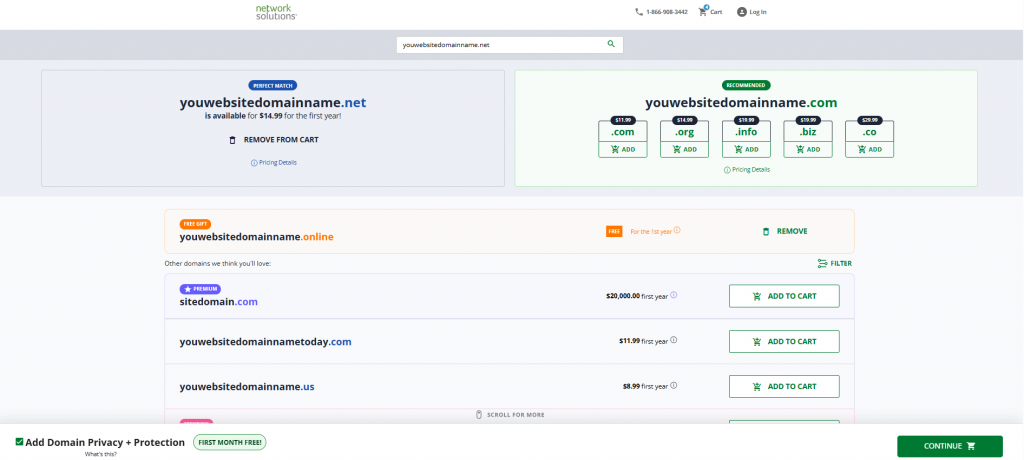
To register the available domain name, you must provide the following information:
- Registrant’s first and last name
- Registrant’s email address
- Phone number
- Physical address
- Billing information
- Administrative and technical contact information
After providing these details, Network Solutions initiates the registration process by sending a request to ICANN, which then performs a WHOIS query to verify your identity.
Note that domain registration doesn’t last forever. It’s like renting an apartment for a few years, with the option to renew according to the terms available for the domain extension.
With Network Solutions, you can register a domain name for up to five years.
Google Workspace: A quick overview
Google Workspace, formerly known as Gmail for Business, is an email service. Additionally, it’s powered and enhanced by proprietary tools, which are applications that set Gmail apart from other mail services.
These tools have contributed to what has propelled Google’s email services into one of the most popular email services on the market. Utilizing the power of cloud computing, it became a revolutionary way to collaborate online.
This comprehensive suite offers everything you need to collaborate effectively, from professional email and online storage to shared calendars and video meetings.
- Calendar. Cloud-based scheduling software that lets users view a teammate’s calendar, share their schedule, set meetings, or plan for the upcoming week or month.
- Cloud. Google Cloud is a powerful cloud computing platform that lets businesses run their applications and store data on Google’s advanced infrastructure. It simplifies information technology (IT) by removing the need for physical servers and enhances data security, using the same technology that supports Google Search and Gmail.
- Docs. Google’s cloud-based answer to Microsoft Word allows documents to be worked on, edited, shared, or viewed by anyone with permission. This provides easy visibility and workability, all while preventing loss due to automatic updates and allowing for the tracking of changes.
- Drive. Google’s cloud-based data storage center for all your files, including music, video, text, documents, pictures, or any other vital data.
- Forms. Google’s cloud-based tool allows you to start a poll, create a survey, and get answers quickly. Forms gather, tabulate, and organize responses to simplify your analysis.
- Gmail. Google’s mailing service is intuitive, powerful, and easy to organize. Users can have storage options of 30GB, 1TB, or Unlimited, depending on their package and the total number of users.
- Meet. Google’s high-resolution, high-end version of Zoom that can support anywhere from 50 to 100 users on a single video conference at any time.
- Sheets. Google’s cloud-based answer to Microsoft Excell. Sheets can be worked on, edited, shared, or viewed by anyone on your team.
- Slides. Google’s cloud-based answer to Microsoft PowerPoint. Slides has all the tools and templates you need to put together a high-end pitch or demonstration.
Step 2: Sign up for Google Workspace
To sign up, check the available Google Workspace plans that best suit your business needs. Network Solutions provides three offer tiers as listed below:
- Business Starter. Ideal for small businesses with basic requirements, offering essential features like custom email, online storage, and collaboration tools.
- Business Standard. Ideal for growing businesses that require enhanced features, including increased storage, advanced email capabilities, and larger meeting capacities.
- Business Plus. Designed for large enterprises demanding top-notch security and advanced collaboration tools, such as live streaming and watermarks.
Each plan is tailored to meet specific business needs.
Why choose Google Workspace
While it’s true that you can get and use a free Gmail account and Google Apps, that means you can’t link your domain name to Gmail. Also, you miss out on all the powerful tools that come with subscribing to it.
Your subscription includes:
- Seamless collaboration. Work together effortlessly on documents, spreadsheets, and presentations, regardless of location.
- Enhanced productivity. Access your work from anywhere, anytime, on any device.
- Robust security. Protect your sensitive data with industry-leading security measures.
- Integration with Google apps. Enjoy a seamless workflow with other popular Google tools like Gmail, Calendar, and Drive.
Step 3: Verify your domain ownership
After signing up, you’ll need to verify your domain ownership to use its services. Follow the steps below to verify your domain ownership:
- Access the Google Admin console. Log in to your Google Workspace admin account and navigate to the Admin console.
- Start the setup process. On the home page, click Start Setup.
- Verify your domain. In the Verify Domain section, click Next.
- Choose a verification method. Google will provide you with a few options to verify your domain. The most common methods are:
- HTML File Upload. Download an HTML file from Google and upload it to your website’s root directory.
- CNAME Record. Create a CNAME record in your domain’s DNS settings, pointing to a specific Google domain.
- TXT Record. Create a TXT record in your domain’s DNS settings, containing a specific text string provided by Google.
- Follow the instructions. Carefully follow the instructions provided by Google for your chosen verification method.
- Confirm verification. Once you’ve completed the verification process, Google will check your domain to confirm ownership. This may take a few minutes.
- Complete setup. After successful verification, you can proceed with the rest of the setup process, such as creating user accounts and configuring settings.
Now that the account creation is complete, you can begin to set up your Google Workspace account with your domain.
Step 4: Set up custom email address
Now that your domain is verified, you can proceed to setting up user accounts to maximize the suite. To make it easier for you, we’ve prepared the steps below:
- Access the Google Admin console. Log in to your admin account and navigate to the Admin console.
- Go to Users. In the Admin console, select Users from the left-hand menu.
- Add new users. Click on the Add user button.
- Enter user information. Fill in the required information for the new user, including:
- First name
- Last name
- Username (Email account name)
- Password
- Organization unit (if applicable)
- Choose a role. Select the appropriate role for the user based on their permissions and responsibilities. Common roles include:
- Super administrator. Has full control over the Google Workspace account.
- Administrator. Has limited administrative privileges.
- End-user. Can use Google Workspace tools but cannot manage the account.
- Set other options (Optional). You can also configure additional settings for the user, such as:
- Default apps. Specify the default apps that the user will see when they log in.
- Device management. Enable device management features to control the user’s access to Google Workspace on their devices.
- Two-step verification. Requires the user to verify their identity with a second factor (e.g., a code sent to their phone) when they log in.
- Save the changes. Click Save to create the new user account.
- Repeat for additional users. Repeat steps 3-7 to create additional user accounts as needed.
User and group management features
- Bulk User Creation. Use the bulk user import feature when you need to create many user accounts.
- User Management. Once you’ve created user accounts, you can manage them by editing their information, changing their passwords, or suspending their accounts.
- Organizational Units. Use organizational units to group users and manage their permissions effectively.
Benefits of Google Workspace
Google Workspace provides numerous benefits that facilitate seamless collaboration and organization among teams. Here’s a quick overview of the key perks that Google Workspace offers you and your team:
- Domain-branded emails. Having a professional Google email that matches your domain name can boost your brand’s credibility. When your email address aligns with your website, it helps build trust with your customers because they see your business as more legitimate and established.
- Storage. In the Business Starter plan, the 30 GB of storage gives enough space to store and secure a large amount of data. That means you may never have to worry about storage again with the Business and Enterprise models.
- Email marketing. It allows users to create and manage high-level email marketing campaigns and grants you the ability to create up to 30 email aliases per user.
- Collaborate. Its cloud-based document creation utilizes cutting-edge technology that enables teams to work together, make alterations, and share their work from anywhere in the world. A team member in Dallas can meet with a team member in Los Angeles using a mobile device, while another worker in New York meets on their laptop. These three people can also access the same document, spreadsheet, or presentation to make changes and strategize in real-time efficiently.
- Document ownership. Tracking changes in Google Drive is straightforward thanks to its archiving features. You can easily see who made changes, when they were made, and what changes were made. Access to earlier document versions is available, and you can add notes to the current version. This transparency ensures that team members remain accountable and can clearly see and take ownership of their contributions.
- Outlook sync. Google Workspace offers a simple integration with Outlook, allowing your company or employees to use Microsoft Outlook’s email service.
- Two-step domain verification. Google Workspace provides additional security by allowing admins to require two-factor authentication. This means a user must enter their password and then confirm their identity using their mobile device to access their account. This extra layer of security is crucial if you’re using Google Drive for cloud storage because it helps protect sensitive information.
Step 5: Migrate existing email and data (optional)
Use the Google Workspace Migration Center, third-party migration tools, or manual migration to migrate your existing email and data to Google Workspace. Each method has its advantages and considerations. Choose the approach that best suits your needs and preferences below:
Google Workspace Migration Center
- This is a web-based tool that guides you through the migration process.
- You can migrate email, contacts, calendars, and files from various providers like Microsoft 365, Office 365, and IMAP/POP3 servers.
Third-party migration tools
- Many third-party vendors offer migration tools specifically designed for Google Workspace.
- These tools often offer advanced features such as data filtering, scheduling, and reporting.
Manual migration
- In some cases, you may need to manually migrate your data. This typically involves exporting your data from your current provider and importing it into Google Workspace.
Steps involved in migration
- Prepare for migration:
- Back up your existing data to ensure you have a copy should issues arise.
- Review your migration plan and ensure you have the necessary permissions and access to your current email provider.
- Choose a migration method:
- Decide whether to use the Google Workspace Migration Center, a third-party tool, or manual migration.
- Configure migration settings:
- Set up the migration tool according to your specific requirements, including source and destination accounts, data to be migrated, and migration schedule.
- Start the migration:
- Initiate the migration process and monitor its progress.
- Verify migration:
- After the migration is complete, verify that all your data has been successfully transferred to Google Workspace.
To ensure a smooth migration, it’s important to plan and start the process early. This will give you ample time to prepare and address any potential issues. Additionally, consider testing the migration on a small portion of your data. This will help verify that everything is working correctly before migrating your entire dataset.
If you encounter any difficulties during the migration, don’t hesitate to consult Google’s documentation or reach out to their support team for assistance.
Step 6: Configure MX records
X (Mail Exchanger) records are DNS (Domain Name System) records that specify which mail server is responsible for handling incoming email for a particular domain. When you send an email to a domain, your email server looks up the domain’s MX records to determine where to deliver the message.
Why configure MX records for Google Workspace?
To ensure that emails sent to your domain address are routed to your Google Workspace account, you need to update your domain’s MX records to point to Google’s mail servers. This will allow Google to handle incoming email to your domain.
Steps to configure MX records
- Access your domain registrar. Log in to your domain registrar’s control panel. Then, locate the DNS management section.
- Find the MX records. Look for the section where you can manage MX records.
- Remove existing MX records. If there are any existing MX records for your domain, remove them.
- Add Google’s MX records. Refer to the MX records found here, and add them to your domain’s DNS settings.
- Save the changes. Save the changes to your DNS settings.
Note: The exact steps may vary slightly depending on your domain registrar’s interface.
How long does it take?
It typically takes 48 hours for DNS changes to propagate across the Internet. However, in some cases, it may take longer.
Verifying MX record configuration
To verify if your MX records have been configured correctly, you can use a tool like MX Toolbox or MX Lookup. Simply enter your domain name into the tool and check the MX records. The results should match the Google MX records.
Get ready to start using Google Workspace
Google Workspace is more than just a productivity suite; it’s a game-changer for businesses seeking to create a branded mail account, streamline operations, and enhance collaboration.
With its comprehensive suite of tools, from email and calendar to document editing and video conferencing, it empowers teams to work smarter, faster, and more efficiently. By harnessing the power of Google Workspace, you can unlock new levels of productivity, strengthen team cohesion, and drive your business forward.
Check out Network Solutions’ Google Workspace plans today.
Frequently asked questions
No, using Gmail with a custom domain requires a Google Workspace subscription. Free Gmail accounts only support @gmail.com addresses and doesn’t allow you to connect your domain for professional use.
Gmail is a personal email service with limited features for businesses. Google Workspace offers custom domain email, admin controls, expanded storage, advanced security, and access to collaborative tools such as Meet, Drive, and Docs.
To connect your domain, sign up for Google Workspace, verify domain ownership in the Admin console, and update your domain’s MX records to point to Google’s mail servers. This ensures your email is routed through Gmail.
In the Google Admin console, you can add new users, each with their own @yourdomain.com email address. You can also create email aliases for each user, allowing them to send and receive emails from multiple addresses linked to their main account.
A professional email address that matches your business domain helps build trust and reinforces your brand identity. It shows customers and partners that you’re a legitimate and established business, as opposed to using a free personal email account.