Key takeaways:
- A 401 Unauthorized error means the site is blocking access because your login details are missing or invalid.
- The error often occurs due to a mistyped URL, outdated browser data, or an expired login session.
- Clearing your cache and cookies, checking the URL, or signing in again usually fixes the issue quickly.
Encountering a 401 Unauthorized error page while using the internet can be frustrating, especially when the website contains important information you need. For website owners, this may leave a negative impression on your potential visitors.
So, what’s causing this issue to recur, and what can you do to fix it? Let’s get an overview of the 401 error code its common causes, and basic tips on how to fix it.
What is the 401 Error code?
HTTP error 401 means a user doesn’t have permission to access a target resource, usually a password-protected website. The response includes a WWW-Authenticate header, which tells the browser what authentication method is required. The website denies entry if the user lacks valid authentication credentials.
In short, you get a 401 error if you don’t have the appropriate login details or if your credentials have expired.
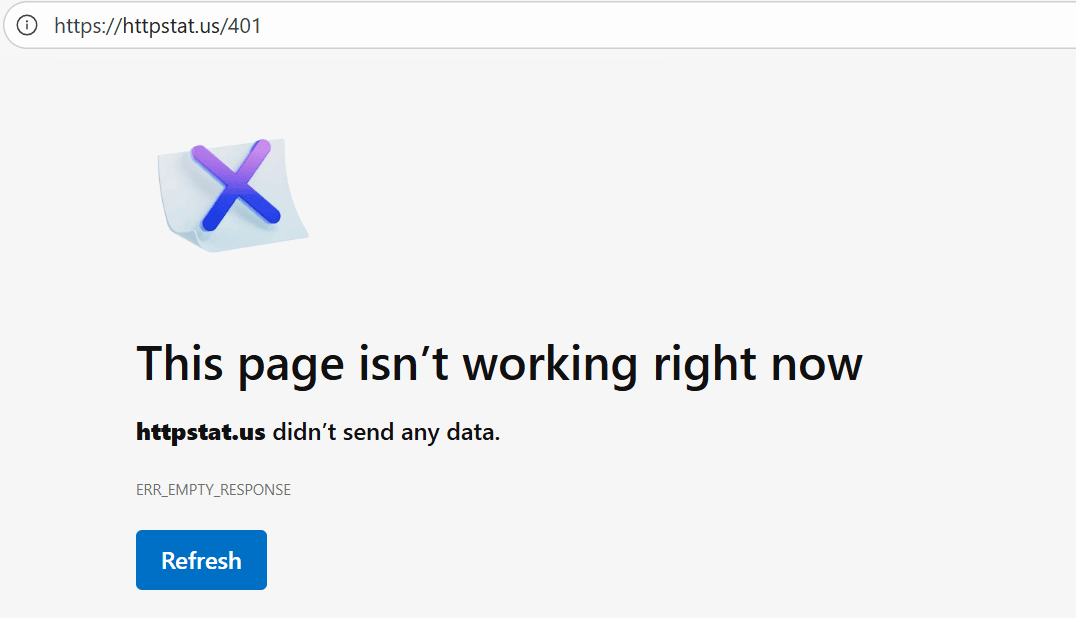
As a result, a variation of 401 error messages may appear on screen depending on the visitor’s browser. Google Chrome and Microsoft Edge users will likely see the “HTTP Error 401” error message below the phrase “If the problem continues, contact the site owner.”
401 error variations
Users may see a 401 error appear in different ways depending on their browser or how the site handles authentication. Some common variations include:
- HTTP Error 401 Unauthorized
- 401 Unauthorized Error
- Error 401 Unauthorized
- Access Denied
- 401 Authorization Required
These messages may appear with different wording, but they’re all simple indicators that something interrupted the authentication process. Each variation gives a small clue about why the requested resource didn’t load.
Types of 401 Error
Now that you’ve seen the different 401 error messages, here’s a quick look at the specific types and what usually causes them. These codes help pinpoint what went wrong during the authentication process, allowing you to narrow down the next steps.
- 401.1 – Failed login attempt
- 401.2 – The server configuration caused the failed login attempt
- 401.3 – The Access Control List (ACL) blocked access to the requested resource
- 401.501 – The client sent too many requests and reached the maximum request limit
- 401.502 – A client from the same IP address triggered the dynamic IP restriction rule
- 401.503 – The client’s IP is on the server’s deny list
- 401.504 – The client’s hostname is in the server’s deny list
To give you a fuller picture, there are also a few less common variations that relate to deeper authentication and authorization rules:
- 401.5 – ISAPI or CGI authorization failed
- 401.6 – The request came from an invalid trusted domain
- 401.7 – The URL hit a blocked path because of URL authorization rules
No matter the variation, each one circles back to the same idea: the server can’t confirm the user’s identity, so it stops the request until valid authentication credentials are provided.
What causes a 401 error?
Error 401 is a common issue that typically occurs when an interruption occurs during the authentication process. While incorrect login information is the most common cause, several other issues can also trigger this error, such as:
- Incorrect URL: An incorrect URL is a common cause for a 401 unauthorized error to appear on your screen, especially if the page is restricted.
- Outdated browser cache or cookies: Saved login data expires and prevents your browser’s request from going through successfully.
- Plugin misconfiguration: Plugin errors or incompatibility cause your firewall to mistakenly identify your login attempt as malicious activity.
- Server-protected URLs: Many hosting providers intentionally set password protection on their servers to prevent general access to their website’s restricted resources. This results in a 401 error page popping up on your end.
- Restricted .htaccess file: When a website owner forgets to remove their previously set password protection, the Apache directives from their site’s .htaccess file will automatically be added and cause the 401 error code to display on the screen.
- DNS problems: An outdated DNS cache may prevent your browser from reaching the site. Refreshing your DNS settings helps your device connect to the correct server.
- IP-based restrictions: Some servers automatically block certain IP addresses. This often happens when a site detects unusual activity or strict security settings.
Many of these issues can be resolved in just a few minutes. When you understand what caused the error, it’s easier to know what to do next.
How to fix the 401 error code
With the causes in mind, here are a few simple ways to fix it. These steps help resolve issues with your browser, your device, or your login information.
- Correct any URL errors.
- Clear your browser cache and cookies.
- Flush the DNS cache from your device.
- Contact the site owner.
- Double-check your login details.
- Disable browser extensions.
Here are the steps in detail:
1. Correct any URL errors
Manually typing long URLs increases the chances of making errors because website owners may update, move, or delete their web pages at any time. If you encounter the HTTP 401 server error or get redirected to another website, double-check for any wrong URLs in your browser’s address bar and correct them.
2. Clear your browser cache and cookies
Your browser stores site data and cookies to improve your online experience by shortening page loading time. However, they can cause interruptions to your authentication process when they’re outdated. Cleaning invalid data from your device’s internal storage helps your device run optimally and prevents the 401 error message from displaying on your screen.
To clean your browsing data, follow these steps.
For Google Chrome
1. At the top right-hand corner, click the Kebab Menu or three vertical dots.
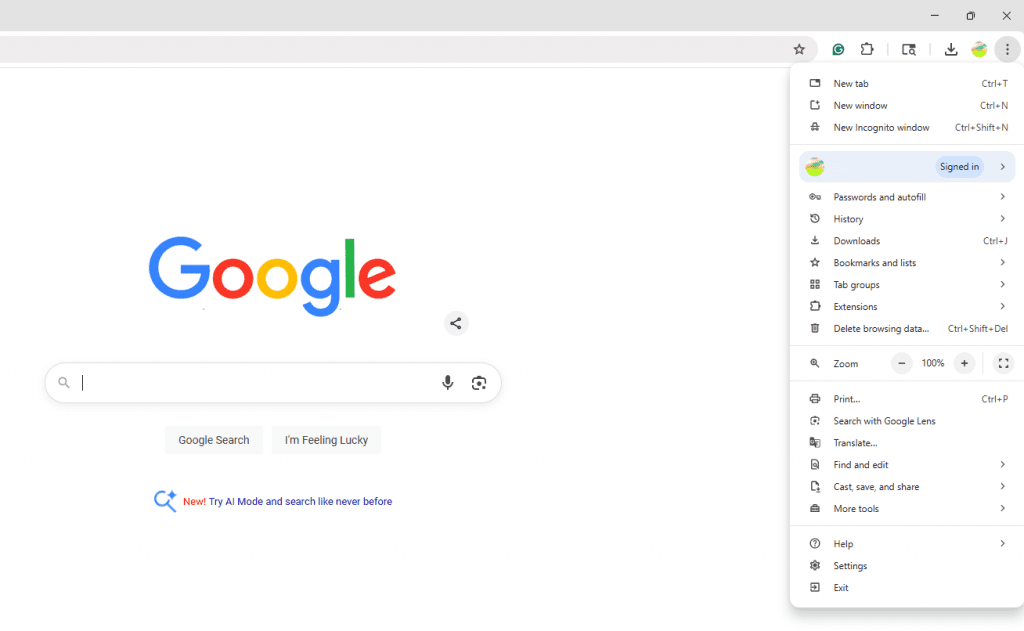
2. Scroll down and click Settings.
3. On the left-hand side, click Privacy and Settings.

4. On the Privacy and Security tab, click Delete Browsing Data.

5. Uncheck Browsing History to keep track of the previous websites you’ve visited.
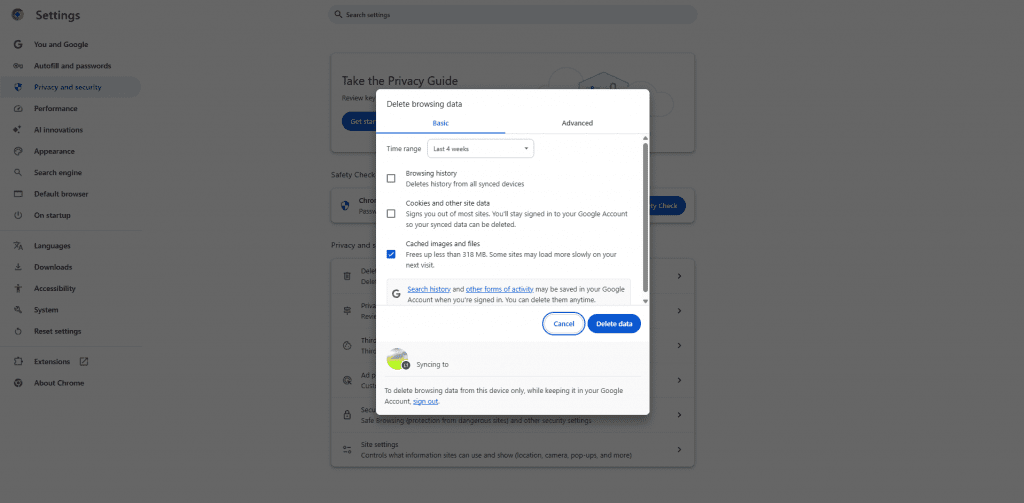
6. At the bottom right-hand corner of the pop-up, click Delete Data.
For Microsoft Edge
1. At the top right-hand corner, click on the Meatballs Menu or the three horizontal dots.

2. Far down, click Settings.
3. On the left-hand side, click Privacy, Search, and Services.
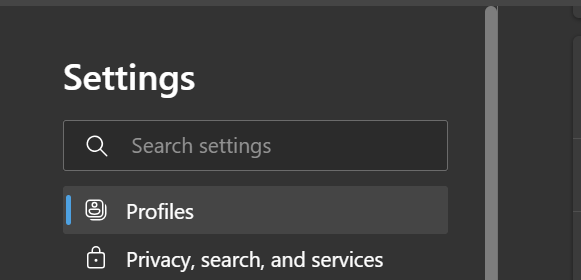
4. Scroll down and look for the Delete Browsing Data tab.
5. On the Delete browsing data tab, Click Choose What to Clear.

6. Uncheck Browsing History and Download History.
7. Click Clear Now.
For Mozilla Firefox users, clearing browsing data may look slightly different compared to Chrome and Edge. It’s done by clicking the library icon at the top-right corner of your browser. Click Clear Recent History, then choose a time range. If you choose the Everything option, all your browsing and downloading history, active logins, search history, cookies, and cache will be removed from your device’s internal storage.
3. Flush the DNS cache from your device
If the same error occurs after clearing your browsing data, the next thing to do is clear your DNS resolver cache. Although this step is not as common, you can do this by opening your command prompt (Windows) or Terminal app (Mac).
For Windows users
- On your Windows Search Bar, type cmd.
- Click Command Prompt.
- On the command prompt window, type ipconfig/flushdns.
- Press Enter.
For Mac users
On the Spotlight search, Type Terminal and press Enter to open the Terminal app.
- If you’re using a macOS Big Sur or later versions of macOS, type the following command in the Terminal window: sudo killall -HUP mDNSResponder.
- Press Enter.
- Type in your password. Note that you won’t see the characters on your screen.
- Press Enter.
Older macOS requires different commands. Try the following:
MacOS version | Command |
|---|---|
Catalina | sudo killall -HUP mDNSResponder |
Mojave | sudo killall -HUP mDNSResponder |
High Sierra | sudo killall -HUP mDNSResponder |
Sierra | sudo killall -HUP mDNSResponder |
El Capitan | sudo killall -HUP mDNSResponder |
Mavericks | sudo killall -HUP mDNSResponder |
Mountain Lion | sudo killall -HUP mDNSResponder |
Lion | sudo killall -HUP mDNSResponder |
Yosemite | sudo discoveryutil udnsflushcaches |
4. Contact the site owner
If none of the solutions work, try contacting the website owner. Tell them about the 401 error and the steps you’ve taken to resolve it. This way, they can provide additional solutions specific to their website, such as resetting your account credentials or granting the necessary permissions.
5. Double-check your login details
Make sure you’re entering the correct username, password, or access token. If your session expired or didn’t load properly, try signing out and back in. This refreshes your authentication and helps the site confirm your identity before giving access to the page.
6. Disable browser extensions
Some browser add-ons can block parts of the www-authenticate header or interfere with the login request. Turning them off temporarily can help you see if one of them is stopping your access to the target resource. If the issue persists, you can also try clearing your browser cache again or checking if any extensions are enforcing insufficient permissions.
How can a website owner fix the 401 error?
While the 401 error code is usually on the client’s side, sometimes errors can stem from a server error. How can you fix it? Here’s how:
- Deactivate your WordPress plugins
- Review the security settings of your website
- Check your site’s .htaccess file
- Contact your hosting provider
- Check your server configuration
Important: Please proceed with caution, especially when it comes to settings that affect your website security and up-time.
Here are each method in detail:
1. Deactivate your WordPress plugins
From a developer’s perspective, if your visitors are still having trouble accessing your website, try deactivating your site’s security plugins.
To do this, follow these steps:
- Open your WordPress dashboard.
- On the right-hand side, click the Plugins option.
- Click Installed Plugins.
- From the dropdown menu, look for the security plugin you wish to deactivate.
- Click Deactivate.
See if the 401 is still there. Once fixed, your visitors may now have server access to explore your website.
You can also try temporarily deactivating your theme if you want to rule out conflicts that cause the authentication process to fail or affect user permissions.
2. Review the security settings of your website
Another way to resolve your site’s 401 error issue and approve a client request to access your web page is to disable password protection. You can do this by following these steps:
- Through Site Tools, open your hosting panel.
- Open the Security section.
- Select the Protected URLs option.
- Click Manage Protected URLs.
- Delete any unnecessary protection settings under the Actions column.
Double-check that no outdated redirects, rules, or required authentication methods are blocking access for an authenticated user.
3. Check your site’s .htaccess file
You can also disable any password protection from there. Here’s how:
- Go to your File Manager (FTP).
- Locate the .htaccess file and open it.
- At the bottom, delete the code where it says password protected area.
Note: Modifying the .htaccess file can cause serious problems if not done correctly. If a user is not comfortable with server-side file editing, please refer to the next option.
Also, if your site uses other server types, try to check equivalent configuration files or authentication headers such as the WWW-Authenticate header to confirm the correct method is being used.
4. Contact your hosting provider
If you’ve tried everything and the 401 error persists, contact your hosting provider. Tell them about the issue and the necessary steps you’ve already taken. This way, they can check for further server-side authentication issues, misconfigurations, and security rules that you might have overlooked.
Additional note: Before making major changes, be sure to back up your site, especially if you’ve recently updated plugins, edited configuration files, or cleared an expired browser cache.
5. Check your server configuration
Sometimes the issue lies in the underlying configuration of your hosting environment. Reviewing key settings helps confirm that the server knows how to process the request correctly.
You can check the following:
- File and folder permissions in your file manager
- Whether the correct authentication method is being used
- If the server is sending the right authentication headers
- Whether specific rules or modules are blocking the request
- If the site requires an API key or token for the authentication server
If you’re unsure where to look, your hosting provider can point you to the right configuration files or logs.
What are common mistakes when fixing 401 errors?
Website owners often make mistakes that prolong the resolution process. These missteps frequently involve overlooking fundamental causes, implementing changes without proper precautions, or not using diagnostic tools and resources.
Let’s discuss further below:
- Ignoring client-side issues: A common mistake is immediately looking for server problems without first ruling out simple client-side fixes like instructing users to clear their browser cache, check their login credentials, or try a different browser.
- Overlooking CDN or firewall rules: Most website owners forget that the Content Delivery Network (CDN) or external firewall rules can sometimes interfere with authentication processes and lead to 401 errors.
- Assuming a single cause: Each 401 error has a unique underlying reason. It’s wrong to assume that it always stems from the same cause instead of systematically investigating all potential sources based on the error’s context.
- Not backing up: Without a backup, it will be more difficult to recover from an incorrect change or modification.
- Quickly modifying security settings: Editing important files or modifying security features without considering other factors.
- Using an incorrect or outdated URL: Even a small typo or old link can trigger a 401 unauthorized error or the wrong status code, especially if the web page is restricted or behind password protection.
- Relying on expired browser data: Saved or expired browser cache, old cache data, or outdated browser’s cookies can cause the authentication server to reject the request even if nothing changed on the website.
- Assuming credentials are correct: Typing the wrong username, password, or API key can lead to incorrect credentials being sent in the request. This stops the server from completing proper authentication or matching the required authentication method.
- Ignoring session timeout or restricted access: When a user’s session expires, the server may block the request to protect restricted resources. Logging in again refreshes the session and restores user permissions needed to access the page.
- Overlooking request headers: Sometimes the issue comes from misconfigured authentication headers or settings under the response header section, which tell the server how to verify the request.
Best practices to avoid 401 errors
Overall, the best way to prevent the 401 Unauthorized error from recurring is to ensure that you’re inputting valid credentials, which include the correct username, user ID, and URL.
At the same time, regularly clearing your browsing site data, cache data, and cookies beforehand is also helpful in improving your browsing experience. It reduces problems such as slow page loading speed and formatting issues.
What’s the difference between error 401, 403, and 404?
Before we wrap this up, it’s important to address common misconceptions about HTTP status codes, especially those in the 400s. 401, 403, and 404 errors are often confused because they relate to access issues.
But they have distinct meanings:
- The 401 error means that the WWW-authenticate header detects invalid or missing credentials, which indicates an unauthorized or expired session from your end.
- The 403 error, also known as the “403 Forbidden” error code, is a response status code indicating the server understands the request but still denies the client access. This type of error is the same as the 401 error. However, any re-authentication credentials won’t change the web page access due to the website owner’s restrictions.
- The 404 error or “Not Found” error indicates a broken or dead link. This means that the website is either temporarily or permanently unavailable.
This error may be caused by moved or deleted pages, a mistyped URL, caching issues, DNS settings problems, or missing assets from the website.
Error code | Meaning | Cause |
|---|---|---|
401 | Unauthorized | No valid credentials |
403 | Forbidden | Access is denied despite authentication |
404 | Not Found | Page doesn’t exist |
Frequently asked questions
A 401 error is an HTTP status code that shows up when someone tries to open a web page that requires login or special permissions, but the server can’t verify their authentication credentials. This usually happens when the username or password is incorrect, missing, or expired, so the server blocks access to the requested resource until valid credentials are provided.
401 errors are usually caused by:
1. Incorrect login credentials
2. Missing authentication headers
3. The browser did not send the required authentication information with the request
4. The authentication token used for access is no longer valid or has expired
5. Security settings on the server or client-side are blocking the authentication process
6. Your browser or proxy server uses an outdated and unauthenticated version of the page stored in your cache
If you’re a user, you should:
1. Double-check that you’re on the right URL.
2. Clear your browser cache and cookies to remove old or expired browser data.
3. Clear or flush your DNS resolver cache using the Command Prompt (Windows) or Terminal app (Mac).
You can also try a few quick checks that often fix a 401 Unauthorized error:
1. Re-enter your login credentials to make sure nothing was typed incorrectly.
2. Log out of the website, then log back in to refresh your session.
3. Try opening the page in a different browser to rule out a browser-specific issue.
4. Disable any active VPN or proxy, since these can interfere with the authentication process.
A 401 Unauthorized error happens when the server can’t verify who you are because the request lacks valid authentication credentials (like a username, password, or API key).
A 403 Forbidden error means the server recognizes you, but your account doesn’t have the permissions to access the requested resource.
Yes, it is possible. It can happen due to:
1. Expired authentication tokens
2. Browser or server issues with handling sessions
3. Firewall blocks
4. Misconfigured security settings
Either. Both your website (server-side) and the user’s browser (client-side) can cause issues:
1. Website issues include incorrect authentication configurations or problems with the authentication mechanism
2. Browsers involve incorrect credentials, cached data, or browser settings
It varies. In some cases, it can be a temporary issue that only needs a page refresh or clearing your cache. But it can also be a reoccurring and persistent problem until you fix the underlying cause.
Yes, a 401 error can affect your website’s SEO and performance. These errors can deter search engine bots from crawling your website and impact your search rankings. 401 errors also cause poor user experience and potentially increase bounce rates.
Outdated browsers can contribute because they might not support the latest authentication protocols or correctly handle security tokens. They are also prone to bugs that interfere with the authentication process.
The best ways to prevent 401 errors include inputting valid credentials (e.g., username, URL, passwords, and user ID) and regularly clearing browsing data, cache, and cookies.
Understanding error messages improves user experience
Errors 401, 403, and 404 are temporary and fixable. When they happen too often, they can frustrate users and may cause lower traffic. Knowing what these errors mean and how to troubleshoot them leads to a smoother browsing experience for both visitors and site owners.
Make your website perform at its best with SiteLock. It keeps your site safe and reduces common security problems. You can also check our trusted web hosting and SSL certificates to improve your website’s protection and performance.