Key takeaways:
- You can back up a website manually through FTP or your hosting panel, or set automatic backups through your web hosting provider or plugin.
- A website backup keeps your files, database, and settings recoverable if your site gets hacked, breaks or goes offline.
- The 3-2-1 backup rule means keeping three copies of your data across two storage types, with one backup stored offsite.
A website backup is like an insurance policy for your website or online store. Your domain name brings visitors to your site, and a backup keeps your website’s files safe if something goes wrong. It creates a copy of your site’s content, images, and code so you can restore your website if there’s a problem.
This guide explains how to back up a website using simple, practical methods, even if you’re new to managing a site. But first, it helps to understand why backups matter in the first place.
Find the perfect domain
Ready to register a domain name? Check domain availability and get started with Network Solutions today.
Why you need to back up your website
Things can go wrong with any website. A hacked account, a data breach, a broken update, or even a simple mistake can cause files or data to disappear. When you back up your website, you keep a copy of your files and database so you can restore your site quickly instead of rebuilding everything from scratch.
Here are some common situations where a website backup can save you a lot of trouble:
• Website hacking
• Website breaks after an update
• Accidental file deletions
• Website updates
Website hacking
It’s a scary thought, but cybercriminals are getting better. Hackers might try to steal data, deface your site, or use it to spread malware. Protecting your site is always best but if all else fails, a backup is your best way to recover quickly if you fall victim to an attack. Without one, you could be looking at rebuilding your entire website from scratch – a costly and time-consuming nightmare.
Website breaks after an update
Website updates are necessary to maintain a secure and smooth website, but plugin conflicts, theme problems, and coding updates can cause errors that can break your site. Instead of panicking, you can use a recent backup to restore your website to its pre-update state and get back online quickly.
Accidental file deletions
Even with the best intentions, it’s possible to accidentally delete the wrong file—maybe just with a click of the wrong button, or you might think you have deleted the test file. Whatever the reason, losing critical website files can cause so much trouble. A backup lets you quickly recover those lost files, saving you from a potential crisis.
Website updates
A backup lets you quickly revert to your previous website version in case you don’t like the new design. It allows you to experiment with changes without the risk of permanently losing your old site—it’s like having an “undo” button for your website.
Two ways to back up your site
There are two main ways to back up your site. You can back up a website manually by copying files and databases yourself, or use a service or plugin that handles the backup process automatically. Both options create a website backup so you can restore your site if something goes wrong.
Here are the two most common approaches:
- Manual backups: A hands-on approach
- Third-party backup services: Automating security
Manual backups: A hands-on approach
Manual website backups mean you’re personally copying all your website’s elements, like your images, code, and content, and saving them somewhere safe. It’s a direct, no-middleman way to protect your data from unexpected issues or loss, and it gives you full control over what gets backed up, when, and where it’s stored.
And that’s the real advantage here. With manual backups, your important data is always within reach whenever you need it, without having to rely on a third-party service to do it for you.
Third-party backup services: Automating security
Technology makes a lot of things easier, and website backups are no different. Third-party backup services take the backup process off your plate entirely by handling it automatically. Here’s what they typically do:
- Automation: They continuously monitor your website for changes and automatically backup new content and modifications. This hands-free approach keeps your backups current without manual work.
- Scheduled backups: They set up regular backup schedules according to your website’s update frequency. This stores a current backup of your website so you can restore it if needed.
- Efficient storage: They store your backups on secure remote servers, minimizing the risk of data loss due to local hardware failures.
- Easy restoration: Should the need arise, you can easily restore your website to its previous state with just a few clicks, saving you time and stress.
That’s exactly what CodeGuard and SiteLock are designed to do. They work in the background to back up your site and monitor for threats, so you always have a safe copy of your website when you need it.
How to manually back up your website
Manual backups are one way to protect your site when you want full control over the process. If you’re learning how to back up a website, you can copy files and databases from your hosting server and store them in a safe backup destination. The process can take a few minutes for smaller sites, and it helps you keep a copy of your site on a regular basis.
Here are the common ways to create a manual website backup:
- Back up manually using hosting panel (cPanel, Plesk, etc.)
- Manually set up backup plugins (for WordPress)
- Manually back up using FTP clients
Backup manually using hosting panel (cPanel, Plesk, etc.)
Backing up your site with cPanel is easy. You can set it up to back up automatically, but it doesn’t keep your data for long, and you might lose important files when you need them most. To make sure you have what you need, it’s best to back up your site manually.
Here’s how you can do that:
- Access your hosting control panel: Log in to your hosting account. This is usually done through a web browser using a URL provided by your hosting company (e.g., cpanel.yourdomain.com or a similar address). You’ll need your username and password.
- Locate the backup manager/files section: Once logged in, look for a section related to backups, files, or file management. This might be called “Backups,” “File Manager,” “Files,” or something similar. The name and location can vary.
- Choose your backup method (full or partial): A full backup backs up everything—all your website files, databases, emails, settings, etc. It’s the most comprehensive option. A partial backup lets you choose specific files of your website to back up (e.g., only the website files or only the database). This is useful if you don’t need to back up everything or if you have limited storage space.
- Initiate the backup process. Once you’ve chosen your backup method, there will usually be a button or link to start the backup process. Click it.
- Choose a backup destination. You can choose a local download. This means you download the backup files directly to your computer. This is generally recommended for smaller websites. Or you can use remote storage.
Note: Some hosting providers allow you to store backups on a separate server or cloud storage service (like Dropbox, Google Drive, or Amazon S3). This provides an extra layer of security and is often preferred for more significant sites. Or you can use your hosting server. The backup might be stored on your hosting server itself. While convenient, this is less ideal because if your entire server crashes, your backup goes down.
- Wait for the backup to complete. Depending on the size of your website and the speed of your hosting server, the backup process can take some time. Be patient, and don’t interrupt it.
- Download the backup (if applicable). Once the backup is complete, download it to your computer. Store it safely, preferably on an external drive or in cloud storage.
Note: It’s always a good idea to verify your backup. This might involve restoring it to a test environment or checking the file sizes to confirm the files downloaded correctly. Typically, you can find the backup options under Files or Backup in cPanel. Within that section, you can find either Full Backup, Partial Backup, or Backup Wizard as the available options. The wizard usually walks you through the steps.
If you’re unsure about any of these steps, it’s always best to consult your web hosting provider’s documentation or contact their support team. They can provide specific instructions for your hosting environment.
Manually set up backup plugins (for WordPress)
WordPress websites are typically backed up using a plugin. While these plugins work similarly to third-party backup services, they need to be manually set up to back up your site. Here’s how to set yours up:
- Choose and install a WordPress backup plugin: In your WordPress dashboard, go to Plugins, then Add New. Use the search bar for a reputable backup plugin (read reviews and compare features) and see if there is a free version available. Click Install Now and then Activate.
- Access the plugin settings: After activating the plugin, you’ll usually find its settings page under Settings or a new menu item in your WordPress dashboard.
- Configure the backup plugin: This is where you’ll customize how your backups are performed. Common settings include:
- Schedule backup: How often do you want to back up your WordPress site (e.g., daily, weekly, monthly)?
- Backup destination: Where you want to store your backups (e.g., your hosting server, cloud storage like Dropbox, Google Drive, Amazon S3, or FTP). Cloud storage is highly recommended.
- What to back up: Choose whether to back up everything (files and database) or specific parts (e.g., only the database or certain files).
- File exclusion (optional): Specify any files or folders you want to exclude from the backup (e.g., large media files that don’t change often).
- Database backup options: Some plugins offer options for optimizing the database before backup.
- Run a backup: Most plugins have a button or option to run a backup immediately. This is useful for creating an initial backup after configuring the settings.
- Configure automated backups (optional): If you want your backups to run automatically, make sure you’ve set up the backup schedule in the plugin’s settings.
- Monitor backups: Monitor your backups to confirm they are running successfully. Many plugins provide logs or notifications that show the status of your backups.
- Test restores (optional): It’s a good idea to test restoring your backups in a staging or test environment to make sure they work correctly. This gives you confidence that you can restore your website if needed.
Manually back up using FTP clients
FTP is one of the most hands-on ways to back up your website. It’s especially useful if you want to save a copy before making any major changes to your site. You can export your files and store them wherever you want, with no added costs, but it does require manual effort.
Here’s how to back up your site using FTP:
- Connect to your server via FTP: Use an FTP client (like FileZilla, Cyberduck, or Transmit) and enter your hosting account’s FTP credentials (hostname, username, password, and port).
- Back up your website files: Once connected, navigate to your website’s root directory (usually public_html or similar) in the remote server view within your FTP client. Download all the files and folders within this directory to your computer. This process might take a while, depending on the size of your website.
- Export your WordPress database (via phpMyAdmin): You’ll still export the database through phpMyAdmin, which is usually accessible through your hosting control panel (cPanel, Plesk, etc.). Find the phpMyAdmin icon or link. Select your WordPress database. Go to the “Export” tab. Choose the “Quick” or “Custom” export method (Custom lets you choose specific tables if needed). Select “SQL” format. Click “Go” to download the database export file (usually a .sql file). You do not use FTP to download the database; you use phpMyAdmin’s export function.
- Back up your .htaccess file viat FTP (optional): If the .htaccess file is visible in your FTP client (you might need to enable “show hidden files” in your FTP client’s settings), download it to your computer.
- Store your backups securely: Keep your downloaded files (from FTP) and the .sql database export file (from phpMyAdmin) safe, ideally on an external drive or cloud storage.
- Verify your backups (optional): Verifying your backups is highly recommended. Set up a test WordPress installation and restore your backup to see if everything works as expected.
Creating a website backup using FTP downloads all the files using the FTP client. The database export is still handled through phpMyAdmin, not directly through FTP. The .htaccess file, if present, is also handled via FTP.
How to back up your website using Network Solutions’ CodeGuard
You can back up your website using CodeGuard to create automatic copies of your site’s files and database files. This backup software runs the process for you and stores copies in secure cloud storage, so you always have a proper backup if something breaks. It also helps answer a common question for site owners: how many backups you need to keep your site protected.
Step 1: Sign in to your Network Solution account.
Step 2: From the Website Backup section, select the website that you want to back up.
Step 3: In the upper right corner of the Files tab, look for the backup counter.
Step 4: Click Run Backup Now.
Why choose CodeGuard?
CodeGuard helps you back up your site automatically and restore it quickly if something goes wrong. This managed service creates secure site backups, including your site’s content and code files, and stores them safely in the cloud instead of on the same web server. With features like daily backups and one-click restore, you always have one copy of your site ready if you need to recover it.
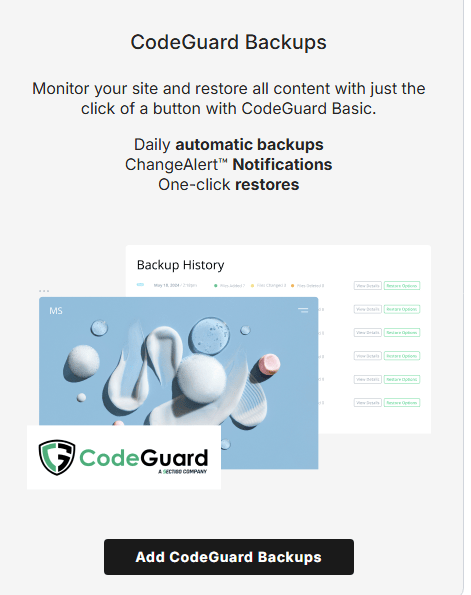
Here are some of the key features that make CodeGuard a reliable way to back up your site:
- Automated backups
- One-click restoration
- Enhanced security measures
- Daily site-change monitoring and alerts
- User-friendly interface
- Professional support
Automated backups
CodeGuard monitors your website for changes and updates. It automatically saves a new backup when your site content changes, so you always have a recent copy of your site.
When you run your first backup, CodeGuard stores your website’s files and data in secure storage. After that, it tracks changes on your site and saves updated copies to keep your backups current.
One-click restoration
If something breaks on your site, you can restore a previous version with a single click. CodeGuard lets you roll back to an earlier backup so your site can return to a working version.
The system compares your current site with earlier backups and restores only the files that were changed. This helps you recover your site faster and avoid unnecessary downtime.
Enhanced security measures
CodeGuard encrypts your data while it moves across the internet and while it stays in storage. This helps protect your website’s information and backups from unauthorized access.
Each backup and password uses secure encryption and regular vulnerability testing. CodeGuard also uses secure connections like Secure File Transfer Protocol (SFTP), Secure Shell (SSH), and Secure Sockets Layer (SSL). Backups are stored on Amazon Web Services Simple Storage Service (S3), a widely used cloud storage platform.
Daily site-change monitoring and alerts
CodeGuard checks your website each day for updates or file changes. If something changes on your site, it sends you a Change Alert so you know what happened.
It also notifies you if someone modifies your website files without permission. You receive an email alert so you can review the change and fix the issue quickly.
User-friendly interface
CodeGuard is accessible to everyone, whether you’re a tech whiz or just starting with websites. Its intuitive design and simple layout mean anyone can do backups and restore their site without any hassle or confusion.
Professional support
With CodeGuard, you have access to a customer support team that’s dedicated to providing the assistance you need to keep your digital presence secure and thriving.
How often should you back up your website?
You should back up your website as often as your site changes. For most sites on web hosting, daily backups work best, while smaller or rarely updated sites may only need weekly or monthly backups. If you run a busy WordPress site or add new content often, more frequent backups help protect your work and keep your data safe.
Think of a backup as your website’s latest picture if anything happens; you can go back to that picture instead of losing all the new things you’ve added.
Here’s a general guideline:
- Daily backups: If your website is dynamic and frequently updated, such as an e-commerce site with new products added daily or a news site with constant articles, consider daily backups. If you’re unsure whether your site updates often, understanding the difference between a static vs dynamic website can help you decide how frequently you should back up your content.
- Weekly backups: For websites that have regular updates but not daily, like a blog or portfolio site, a weekly backup might be sufficient. This strikes a balance between backup protection and not overwhelming your backup process.
- Monthly backups: If your website’s content changes infrequently, such as a small business website with static information, a monthly backup should suffice. However, it’s a must to back up your website to avoid data loss.
- Before significant updates: Before making major updates or changes to your website, it’s good practice to perform a backup. This provides a restore point in case something goes wrong during the update.
What are the best practices for website backups?
The best practices for website backups focus on protecting your site’s content, keeping multiple copies of your data, and testing your backups regularly. Many site owners follow the 3-2-1 rule, which stores backups in different locations such as cloud storage and an external hard drive.
Here are some best practices that help keep your website backups reliable:
- Implement a 3-2-1 backup strategy.
- Schedule regular backups.
- Regularly test your backup restorations.
- Secure backup files and access credentials.
- Stay updated with evolving backup technologies.
Implement a 3-2-1 backup strategy
A time-tested strategy, the 3-2-1 backup principle provides a robust foundation for data protection:
- 3 copies: Keep three copies of your website data: the original and two backups. This gives you redundancy and lowers the risk of losing your website data.
- 2 different media: Store your backups on two different types of storage media, such as external hard drives and cloud servers. This guards against data loss due to a single technology failure.
- 1 offsite backup: Secure one copy of your backup offsite–away from your physical location. This shields your data from local disasters like fires, floods, or theft.
Schedule regular backups
Maintain a regular backup schedule so you always have a recent version of your website ready if something goes wrong. Automate the process if possible. The backup plugin or service handles the work for you. This reduces human error and keeps your backups consistent.
Regularly test your backup restorations
Backing up your website is only half the battle. Regularly testing the restoration process is equally important. Run practice restores to confirm your backup files work and can bring your website back online if needed.
This proactive approach helps you catch any issues before they become critical, giving you the confidence that your backups are reliable and effective.
Secure backup files and access credentials
While backups protect against data loss, they can also become vulnerable if not properly secured. Encrypt your backup files to prevent unauthorized access and only allow those with the appropriate decryption keys.
Be sure to safeguard access credentials to your backup storage locations. Use strong, unique passwords and consider multi-factor authentication for an extra layer of protection.
Stay updated with evolving backup technologies
The digital landscape is ever-changing, and backup technologies evolve to meet new challenges. Keep a watchful eye on emerging backup solutions and methodologies that enhance your data protection. Don’t forget to regularly update your backup software and tools to benefit from the latest security patches and features.
Frequently asked questions
You can back up your entire website through your hosting control panel by creating a full backup, which saves all your files, databases, and settings. If you use a WordPress site, you can also install a backup plugin that automatically creates copies of your site and lets you download them to your computer or cloud storage.
The golden rule of backups is the 3-2-1 rule, which means keeping three copies of your data so you always have a safe version to restore if something goes wrong. In simple terms, it helps protect your website by storing backups in more than one place instead of relying on a single copy.
Most experts recommend keeping three backups of your data, following the 3-2-1 rule. That means three copies of your website stored in different places so you still have a safe version if one backup fails.
Start backing up your website today
Knowing how to back up a website helps protect your files, database, and settings from unexpected problems. Before your next update or design change, create a website backup so you always have a safe copy of your site.
If you want a simpler option, automated tools like our CodeGuard can handle your web backups for you. And when you register a domain with us, you also get FREE tools to help manage and quickly promote your site, including Link in Bio, Coming Soon Page, Customers App, Social App, and Marketing Calendar.
Protect your website before problems happen
Backing up your website starts with owning your domain and having the right tools in place. Secure your domain today and keep your website protected as it grows.